


Canva has 260 million monthly users, and most of them are pulling from the same element library. Custom repeating backgrounds are one of the fastest ways to make your work look different from everyone else’s.
Knowing how to make a pattern in Canva is a practical skill whether you’re building branded social graphics, designing for print, or creating assets for a print-on-demand store.
This guide covers every method, from applying a background tile in under two minutes to building a seamless repeating pattern for fabric or packaging. You’ll also learn how to save and reuse your pattern across projects, and which mistakes to avoid before you export.
What Is a Pattern in Canva

A pattern in Canva is a repeated visual element arranged across a defined area of your design canvas. It is not the same as a background texture or a decorative photo from Canva’s stock library.
Canva does not include a native pattern generator tool. Patterns are built through 3 main methods: element repetition on the canvas, pre-made tile backgrounds from the Elements library, or imported custom PNG graphics with transparent backgrounds.
That distinction matters before you start. The method you pick determines the output quality, how editable the result is, and whether the pattern works for print, social media, or presentation use cases.
What separates a pattern from a background texture in Canva
Background textures in Canva are single photographic or illustrated images stretched across the full canvas. They do not repeat. A linen texture, a watercolor wash, or a grunge overlay are all background textures.
Repeating patterns are built from a base unit, a shape, icon, or graphic, that tiles across the canvas multiple times in a structured arrangement. The repetition is the defining feature.
Searching “texture” in Canva’s Elements tab returns non-repeating images. Searching “seamless” or “tile” returns true repeating pattern graphics.
The 3 pattern types you can build in Canva
| Pattern Type | How It Works | Best For |
|---|---|---|
| Tile background | Pre-made repeating element applied as background fill | Social media, presentations |
| Manually repeated elements | Duplicate a graphic element across canvas using Ctrl+D | Custom branded patterns |
| Imported PNG pattern | Upload a seamless tile made externally, use as background | Print, fabric, packaging |
If you plan to use the pattern for print design, the imported PNG method gives the most control over resolution and tile accuracy.
What Are the Methods for Making a Pattern in Canva
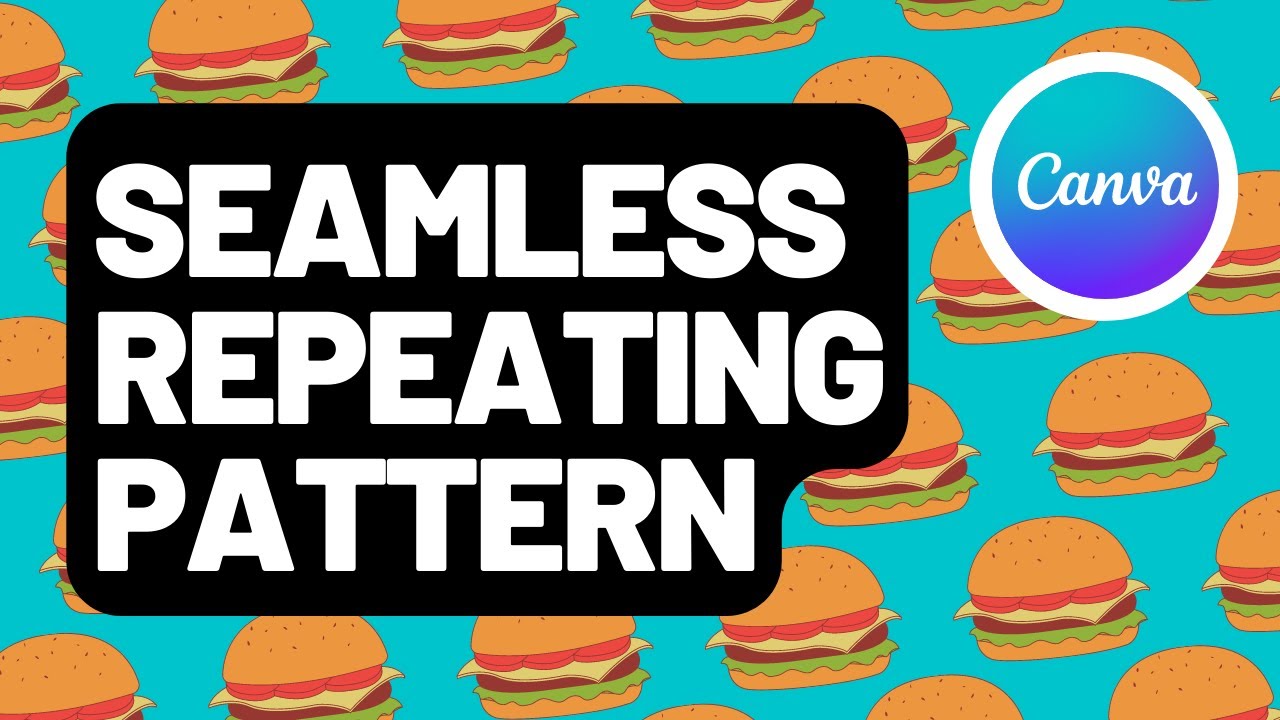
There are 4 distinct methods for creating a repeating pattern in Canva: using the built-in background tile feature, duplicating and arranging elements manually, applying Canva’s grid layout tool, and importing a custom seamless PNG graphic.
Each method suits a different skill level and output goal. Choosing the right one before you open a blank canvas saves a lot of backtracking.
How the 4 methods compare
| Method | Skill Level | Time | Best Use Case |
|---|---|---|---|
| Background tile | Beginner | Under 2 minutes | Quick social media backgrounds |
| Manual element repeat | Beginner to intermediate | 5–15 minutes | Custom branded repeating motifs |
| Grid layout tool | Beginner | 3–5 minutes | Photo-based grid patterns |
| Imported PNG | Intermediate to advanced | 15–30 minutes | Print, fabric, POD products |
The print-on-demand market hit $12.15 billion in 2025 and is projected to reach $37.85 billion by 2030 (Mordor Intelligence). Patterns are a core visual asset in that space, which makes the imported PNG method increasingly relevant for creators selling on Printful or Redbubble.
Which method to pick
Background tiles work for anyone who needs a fast decorative fill and does not need to customize the repeat unit. Manual element repetition works when the pattern needs to match brand colors, specific shapes, or a unique motif.
The grid layout tool is genuinely underused for photo-based patterns. It arranges photos into a repeating grid format that reads as a pattern without any manual duplication. The imported PNG method is the only option that produces a true seamless tile for print-quality output.
How to Make a Pattern in Canva Using Background Tiles

The background tile method is the fastest way to apply a repeating pattern in Canva. The entire process takes under 2 minutes and requires no manual element placement.
Canva’s Elements library contains millions of assets including hundreds of pre-built tile patterns (Canva, 2024). Many are available on the free plan. The Pro plan unlocks the full range.
Step-by-step: applying a tile background pattern
- Open a new or existing Canva design.
- Click the Elements tab in the left sidebar.
- Search for “seamless,” “tile,” “repeat,” “geometric,” or “floral pattern.”
- Click a result to apply it. Canva will place it as an element on the canvas.
- Right-click the element and select Set as background to fill the full canvas area.
Free elements appear without a crown icon. Pro elements show a crown in the corner. Filtering by “Free” in the search results panel saves time if you are on the free plan.
How to recolor a background tile pattern in Canva
Single-color tile patterns are the easiest to recolor. Click the pattern, then click the color dot in the top toolbar to open the color editor.
Multi-color tile patterns allow individual color editing per element in some cases. Click the pattern, then click “Edit graphic” if the option appears. Each color layer becomes selectable.
Canva Pro users can apply Brand Kit colors directly from the color picker panel, which keeps the pattern consistent with the rest of the design system. This is actually one of the more useful Pro features for brand-focused work, and I’ve seen a lot of designers overlook it entirely.
Limitation: background tile patterns applied via “Set as background” cannot be exported as standalone repeating assets. To reuse a pattern across projects, save it as a template or export the full design as a PNG and re-upload it to the media library.
How to Make a Pattern in Canva by Repeating Elements Manually

Manual element repetition gives full creative control over the repeat unit. You choose the base graphic, the spacing, the layout direction, and the color. Nothing is predetermined by Canva’s library.
Canva processes over 38.5 million designs per day (Backlinko, 2024). A significant share of those are social and brand assets where custom repeating backgrounds appear. Most of them are built using this exact method.
Step-by-step: building a pattern from scratch
Start with a base element. Choose a shape, icon, or uploaded SVG from the Elements tab. Simple geometric shapes work best for first attempts. Complex illustrated icons work better once you understand how the spacing behaves.
- Place the base element on the canvas.
- Press Ctrl+D (Windows) or Cmd+D (Mac) to duplicate it.
- Move the duplicate to create the first row of the pattern.
- Repeat duplication and placement until the canvas is covered.
- Select all elements with Ctrl+A, then group them with Ctrl+G.
Grouping is the step most people skip, and then regret. Once grouped, the entire pattern moves and scales as a single unit.
How to space and align repeated elements in Canva
Canva’s smart guides snap elements into even spacing automatically as you drag them. Pink alignment lines appear when an element aligns with another.
For precise control, use Arrange > Align options in the toolbar. Select multiple elements and apply “Distribute horizontally” or “Distribute vertically” to space them evenly without manual measurement.
Canva Pro users have access to the Tidy Up tool, which auto-spaces all selected elements in one click. It is under the “Position” panel in the right sidebar. Genuinely saves time when working with 20+ repeated elements across a canvas.
For the free plan, the ruler and guide lines under View > Rulers and Guides serve as a manual alternative. Set guides at regular intervals and snap elements to them during placement.
Understanding alignment as a design principle helps here. Even spacing and consistent positioning are what make a manually built pattern feel intentional rather than scattered.
How to Make a Seamless Pattern in Canva

A seamless pattern is one that tiles without any visible seam or edge line where 2 tiles meet. It is the standard format for fabric printing, packaging design, and print-on-demand products.
Canva does not generate seamless tiles natively. A workaround using an external tool is required.
Why seamless matters for print and POD use cases
Home decor in the print-on-demand space is growing at a 27.29% CAGR through 2030 (Mordor Intelligence). Fabric patterns, throw pillow designs, and wall art all require seamless tiles to print correctly at scale. A non-seamless pattern produces a visible grid of edges across the finished product.
For digital use, like a social media background or a presentation slide, visible tile edges are less noticeable. But for anything going to a physical product, seamless is non-negotiable.
The workaround: making a seamless tile from a Canva design
Step 1: Design the pattern on a square canvas in Canva. Set custom dimensions to 1000x1000px or 2000x2000px.
Step 2: Export the design as a PNG.
Step 3: Open the PNG in Photopea (free, browser-based), GIMP, or Pattern Cooler. Use the offset/tile tool to shift the design by 50% horizontally and vertically, then fill the gaps. This creates a seamlessly repeating tile.
Step 4: Export the seamless PNG and upload it back to Canva’s media library via the Uploads tab.
Step 5: Apply the uploaded PNG as a background in any Canva design.
How to test if a pattern is seamless in Canva
Duplicate the design onto a 2×2 grid arrangement and check the edges where tiles meet. Zoom into the corners. Any visible line, color shift, or element cutoff at the edge is a seam problem.
A faster test: export the PNG, open it in a browser, and tile it using a simple HTML background-repeat test page. Visible grid lines confirm a seam. If the pattern flows continuously, the tile is clean.
The repetition principle in design theory is exactly what seamless patterns apply. When repeated elements flow without interruption, the eye reads the surface as continuous rather than segmented.
How to Make a Pattern in Canva for Printing

Print patterns have different technical requirements than screen-based designs. Getting these wrong means the printed product looks pixelated, has color shifts, or tiles incorrectly on the final material.
Canva Pro supports CMYK PDF export, which is the correct color mode for professional print output. The free plan exports in RGB only.
Resolution and canvas size for print patterns
Minimum resolution for print: 300 DPI. In Canva, you achieve 300 DPI by working at large pixel dimensions before export. A 3000x3000px canvas exports at 300 DPI for a 10×10 inch print area.
For print-on-demand platforms like Printful or Redbubble, check each product’s template dimensions. A pattern for an all-over print t-shirt requires a much larger canvas than one for a mug.
Understanding DPI is worth the 5 minutes it takes to read up on it before designing for print. I’ve seen designers export beautiful Canva patterns at 72 DPI and then wonder why the physical product looks soft and blurry.
Export settings for print patterns in Canva
For professional printing:
- Export as PDF Print (Canva Pro) for the highest quality output
- Enable the Crop marks and bleed option in export settings (adds 3mm bleed)
- Select CMYK color profile in the PDF export panel
For print-on-demand platforms:
- Export as high-resolution PNG (PNG is the correct format, not JPEG)
- Set canvas dimensions to match the platform’s template exactly
- Check that the tile pattern aligns with the product’s print area boundaries
The distinction between CMYK and RGB color modes directly affects how a pattern looks in print. CMYK colors are mixed from ink. RGB colors are mixed from light. A pattern that looks vibrant on screen can appear muted in print if the color profile is wrong.
Bleed settings and why they matter for pattern printing
Bleed is an extra 3mm of design area that extends beyond the trim line. It prevents white edges from appearing if the cut is slightly off during production.
For repeating pattern designs, bleed means the tile needs to extend visibly beyond the canvas edge. In Canva Pro, enable bleed under File > Print with Canva or during PDF export. The canvas preview will show bleed guides as a faint border.
Print shops and POD fulfillment services like Printful provide downloadable template files with bleed areas marked. Designing inside those templates from the start is more reliable than adding bleed after the fact.
How to Use Canva’s Pattern Elements Library

Canva’s Elements library contains hundreds of pre-built pattern graphics. Most users scroll past them because they do not know the right search terms to surface them.
Canva offers access to over 2.1 million free templates and elements across its platform (Canva, 2024). The pattern subset is a fraction of that, but it covers geometric, floral, abstract, and photographic repeat styles.
Search terms that surface pattern elements in Canva
These 6 search terms consistently return pattern-specific results in the Elements tab:
- “seamless” – returns tileable graphic patterns across multiple styles
- “tile” – returns architectural and geometric tile-style graphics
- “repeat” – surfaces both background fills and floating pattern elements
- “geometric pattern” – returns structured shape-based repeating designs
- “floral pattern” – returns botanical and flower-based repeat motifs
- “background [color]” (e.g., “background blue”) – returns color-matched pattern fills
After searching, filter results by selecting the “Graphics” category tab. This removes photos and videos from results and shows only vector-style pattern elements.
Applying a pattern element as a full background fill vs. a floating layer
As a background fill: click the pattern element once to place it on the canvas, then right-click and select “Set as background.” The pattern scales to fill the entire canvas and sits behind all other elements.
As a floating design layer: leave the pattern element placed on the canvas without setting it as a background. Resize it, rotate it, adjust its opacity, or layer other elements on top of it. This method works well for adding a pattern to one section of a design rather than the full canvas.
The Photos tab in Canva also contains photographic pattern assets. Searching “fabric texture,” “tile pattern,” or “woven” in the Photos tab returns high-resolution photographic patterns useful for realistic material mockups.
Editing pre-built pattern elements in Canva
Most vector pattern elements in Canva’s library are editable. Click the element on the canvas, then select “Edit graphic” from the toolbar if the option appears. This opens a simplified vector editor where individual color areas of the pattern can be recolored.
Recoloring a pre-built pattern to match brand colors is one of the fastest ways to produce a custom-looking repeating background without building anything from scratch. The result looks original, and the process takes under 3 minutes.
Good pattern color choices rely on understanding how colors interact. Color theory principles like contrast ratios and color harmony directly affect whether a pattern reads clearly or becomes visually noisy at scale. A complementary color scheme in a repeating pattern creates strong visual tension. Analogous colors produce a calmer, more cohesive pattern surface.
How to Make a Pattern in Canva Using a Photo or Custom Graphic
Uploading your own artwork into Canva and tiling it as a repeating pattern gives the most brand-specific results. No two designs in the Elements library will produce it.
A 2025 Creative Market survey found that 67% of Canva users report their designs look similar to competitors because they use the same stock elements. Custom uploaded graphics are the direct solution to that problem.
Preparing your graphic before uploading
Transparent background required. The base graphic needs a transparent background so it tiles cleanly without white or colored boxes around each repeated unit.
For graphics created in Procreate or Adobe Illustrator, export as PNG with transparency before uploading to Canva. For photos, use Canva’s Background Remover (Canva Pro) to strip the background after upload.
SVG files also upload cleanly into Canva. Canva accepts SVG format via the Uploads tab, and vector graphics in SVG format scale without any quality loss during tiling, which is a real advantage over raster PNGs at large print sizes.
Step-by-step: tiling a custom uploaded graphic in Canva
- Click the Uploads tab in the left sidebar and select “Upload files.”
- Upload your PNG or SVG with a transparent background.
- Click the uploaded graphic to place it on the canvas.
- Resize it to the correct unit size for the tile.
- Duplicate with Ctrl+D (or Cmd+D) and arrange copies across the canvas.
- Use Arrange > Align to distribute elements evenly.
- Group all elements with Ctrl+G once the arrangement is complete.
Digital Fabrics, a custom fabric printing service, recommends working at a minimum 45x45cm canvas in Canva when designing patterns for physical fabric production. They note that designing small and scaling up later consistently produces lower print quality than starting large.
Using the Background Remover to prep a photo for tiling
Upload the photo to Canva. Select it on the canvas, then go to Edit photo > BG Remover. The tool automatically isolates the subject from the background in one click.
Refine edges using the Erase and Restore brush at a reduced size (10-15 pixels works well for detailed edges). Once the background is removed, download the result as a PNG with transparency, then re-upload it as the base graphic for tiling.
The Background Remover is a Canva Pro feature. Free plan users can remove backgrounds using external tools like remove.bg before uploading the cleaned graphic into Canva.
How to Save and Reuse a Pattern in Canva

Building a pattern once and reusing it across projects is faster than rebuilding it from scratch every time. Canva gives 4 practical ways to do this, depending on whether you are working solo or with a team.
Canva Pro supports up to 100 separate Brand Kits within a single account (Canva, 2024), which means pattern assets can be organized by client, campaign, or product line.
The 4 ways to save and reuse a Canva pattern
Save as a template: Finish the pattern design, click File, and select “Save as Template.” This saves the design to your personal or team template library. Access it later by clicking “Templates” and searching your saved templates folder.
Add to Brand Kit (Pro): Go to Brand, select your Brand Kit, and upload the pattern PNG as a graphic asset. The pattern then appears under Graphics in the Brand Kit panel and is accessible in any Canva design without re-uploading.
Upload to media library: Export the pattern as a PNG and re-upload it via the Uploads tab. It stays in your media library permanently and can be applied as a background in any future design.
Share via Canva for Teams: Publish the pattern as a Brand Template. Set permissions to share with specific team members or the entire organization. Team members access it from the Brand section on the homepage.
Creating a pattern swatch file in Canva
A pattern swatch file is a single Canva design that stores multiple pattern variations side by side. Think of it as a reference document where you keep all color versions and layout variations of a pattern in one place.
Set up a wide canvas (e.g., 4000x1000px) and arrange each pattern variation in its own section. Label each with a text element. When you need a specific version, open the swatch file, find the right variation, and copy the grouped elements into the target design.
This approach also doubles as a visual mood board for client presentations. Showing pattern options in a single design is cleaner than sharing multiple separate files.
What Are Common Mistakes When Making a Pattern in Canva

Most pattern problems in Canva come down to 5 repeatable mistakes. All of them are fixable once you know what to look for.
Canva’s own help documentation notes that low-resolution base images are the most common cause of blurry or pixelated print results (Canva Help Center). That same problem applies directly to pattern design.
Using low-resolution base graphics
This is mistake number one. A graphic that looks sharp at small screen size becomes visibly blurry when tiled across a large canvas or printed on a physical product.
Most images from the internet are 72 DPI, according to Canva’s help documentation. The minimum for print is 300 DPI. Always start with high-resolution source files, particularly when the pattern is destined for fabric, packaging, or POD products.
Skipping the grouping step after duplication
Duplicate without grouping, then accidentally click one element and drag it. Suddenly the whole pattern is misaligned and the grid structure is broken.
Fix: Select all pattern elements with Ctrl+A immediately after completing the arrangement. Group with Ctrl+G before doing anything else. This locks the layout and makes the whole pattern behave as a single movable unit.
Designing at the wrong canvas size
A pattern built for a 1080x1080px Instagram post will not print cleanly on a 12×12 inch cushion cover. The canvas dimensions need to match the intended output from the start.
| Output Type | Recommended Canvas Size | Export Format |
|---|---|---|
| Social media post | 1080 × 1080 px | PNG |
| POD product (apparel) | 3000 × 3000 px minimum | PNG |
| Professional print | Match trim size at 300 DPI | PDF Print (Pro) |
| Fabric / large format | 4500 × 4500 px or larger | High-res PNG or PDF |
Canva notes that 90% of blurry download issues trace back to the design dimensions being too small (Canva Help Center). Setting the correct size before starting eliminates the problem entirely.
Forgetting bleed on print-ready patterns
No bleed means a white edge can appear on the final printed product if the cut is even slightly off. It is a small technical detail that causes disproportionately visible problems.
Add 3mm bleed via File > Print with Canva or during PDF export in Canva Pro. For POD platforms, use the platform’s downloadable product template, which includes pre-marked bleed areas. Designing inside those templates from the start is faster than adding bleed after the fact.
Ignoring color mode for print output
A pattern designed using vivid screen colors can print noticeably duller than expected. Screens display color in RGB (light-based), while print uses CMYK (ink-based). The two color systems do not produce identical results.
Canva Pro’s PDF Print export converts to CMYK automatically. For free plan users, checking the pattern against a printed proof before finalizing a large order is the only reliable way to confirm color accuracy. Saturation levels that look vivid on screen often appear softer in CMYK print, so adjusting brightness and saturation up slightly before exporting for print is a practical workaround.
Pattern colors also interact differently depending on the base material. A design destined for a white fabric ground behaves differently from the same pattern printed on a natural or kraft-toned surface. Testing a physical proof before bulk production is worth the time.
If you want to go deeper into the full range of graphic design terms that apply to pattern work, including rhythm, balance, and unity, those graphic design principles directly shape how a repeating pattern reads at a glance. A pattern with strong visual rhythm feels intentional. One without it feels random, even if the elements themselves are well-designed.
For other Canva-specific tasks that pair naturally with pattern work, see the guides on how to make a logo in Canva, how to make a brand kit in Canva, how to remove a background in Canva, and how to make a mockup in Canva to see the full pattern-to-product workflow.
FAQ on How To Make A Pattern In Canva
Does Canva have a built-in pattern maker?
Canva does not have a dedicated pattern generator tool in its core editor. You can build repeating patterns by duplicating elements manually, using pre-made tile graphics from the Elements library, or using the third-party PatternedAI app available inside Canva.
How do I make a repeating pattern in Canva for free?
Search “seamless” or “tile” in the Elements tab and apply a result as a background. Alternatively, place any free graphic element on the canvas, duplicate it with Ctrl+D, and arrange copies in a grid. Both methods work on the free plan without a Pro subscription.
Can I make a seamless pattern in Canva?
Not natively. Design on a square canvas, export as PNG, then use a free tool like Photopea or Pattern Cooler to offset the tile and close the seams. Re-upload the seamless PNG into Canva and apply it as a background fill.
What file format should I export a Canva pattern in?
Export as PNG for digital use and print-on-demand platforms. Use PDF Print for professional printing, as it is the only Canva export format that preserves 300 DPI quality. Avoid JPEG for patterns with sharp edges or flat colors, since compression creates visible artifacts.
How do I make a pattern in Canva for print-on-demand?
Set a square canvas at 3000x3000px minimum. Build or upload a repeating graphic element with a transparent background, tile it manually, and export as a high-resolution PNG. Check each platform’s template dimensions before designing. Printful and Redbubble both provide downloadable product templates.
Can I upload my own graphics to make a custom pattern in Canva?
Yes. Upload a PNG or SVG file with a transparent background via the Uploads tab. Place and duplicate it across the canvas to build a custom repeating pattern. Use Canva Pro’s Background Remover to strip backgrounds from photos before tiling them.
How do I recolor a pattern in Canva?
Click the pattern element and select the color dot in the top toolbar. Single-color patterns recolor in one click. For multi-color patterns, select “Edit graphic” if available to adjust individual color areas. Canva Pro users can apply Brand Kit colors directly from the color picker panel.
How do I save a pattern to reuse it in Canva?
Export the pattern as a PNG and re-upload it to your media library for easy access. Canva Pro users can add it to a Brand Kit as a graphic asset or save the design as a Brand Template and share it across team projects.
What canvas size should I use for a pattern in Canva?
Use a square canvas for repeating patterns. A 1000x1000px canvas works for digital use. For print and fabric, start at 3000x3000px or larger. Working large then scaling down always produces better quality than designing small and scaling up for print output.
Why does my Canva pattern look pixelated when printed?
The most common cause is a canvas that is too small or a low-resolution base graphic. Canva’s own documentation notes that 90% of blurry download issues trace back to small design dimensions. Always design at 300 DPI equivalent dimensions and export as PDF Print for physical output.
Conclusion
This conclusion is for an article presenting every practical method for creating a repeating pattern design in Canva, from quick background tiles to custom uploaded graphics built for fabric and print-on-demand output.
The method you pick depends on the output. Fast decorative fill for a social post is a different workflow from a seamless tile pattern destined for Printful or a packaging run.
Get the canvas size right from the start. Export at the correct resolution. Group your elements before moving anything.
Beyond the technical steps, strong pattern design comes down to variety, contrast, and proximity between repeated elements. Those three design principles determine whether a tiled background feels intentional or accidental.

Renowned for his expertise in logo design and visual branding, Bogdan has developed a multitude of logos for various clients.
His skills extend to creating posters, vector illustrations, business cards, and brochures. Additionally, Bogdan's UI kits were featured on marketplaces like Visual Hierarchy and UI8.
He also wrote in the past years on sites like Design Your Way, WebDesignerDepot, WPDean, Designmodo, Speckyboy, Slider Revolution, and more.
- The Cursor Logo History, Colors, Font, And Meaning - 24 September 2026
- Top 7 Web Design Subscription Services That Replace Full-Time Hires - 24 September 2026
- Canva vs PowerPoint: Which Is Better for Presentations? - 22 September 2026

Bogdan Sandu is a seasoned designer who has been designing websites since 2008. Renowned for his expertise in logo design and visual branding, Bogdan has developed a multitude of logos for various clients. His skills extend to creating posters, vector illustrations, business cards, and brochures. Additionally, Bogdan's UI kits were featured on marketplaces like Visual Hierarchy and UI8. He also wrote in the past years on sites like Design Your Way, WebDesignerDepot, WPDean, Designmodo, Speckyboy, Slider Revolution, and more.
You Might Also Like


