Your brand colors are scattered across five different folders. Your team keeps using the wrong logo. Sound familiar?
Learning how to make a brand kit in Canva solves this chaos in under 15 minutes.
A brand kit centralizes your logos, colors, and fonts in one accessible hub. Every design stays consistent. Every team member uses the correct assets.
This guide walks you through the complete setup process, from accessing the Brand Kit dashboard to uploading custom fonts and creating usage guidelines.
You’ll need a Canva Pro, Teams, or Enterprise subscription since free accounts have limited brand kit features.
How to Make a Brand Kit in Canva

Making a brand kit in Canva is the process of uploading and organizing your brand assets (logos, colors, fonts) into a centralized hub for quick access during design work.
Business owners, marketers, and teams need this when creating consistent marketing materials across multiple projects.
This guide covers 7 steps requiring 10-15 minutes and a Canva Pro subscription.
Prerequisites
Before you start, gather these items:
- Canva Pro, Teams, or Enterprise account (free accounts limit you to 3 brand colors only, no custom fonts, no logo uploads)
- Logo files in PNG, SVG, or JPG format
- HEX color codes for your color palette
- Font files (TTF or OTF) if using custom typography
Time estimate: 10-15 minutes.
Skill level: Beginner.
Step One: How Do You Access the Brand Kit Section in Canva?
The Brand Kit section is located in the left sidebar of your Canva homepage, under the “Brand” tab where all brand assets are stored and managed.
Action
- Canva Homepage > Left Sidebar: Locate and click the “Brand” tab
- Brand Kit Tab: Select “Brand Kit” from the submenu options
- Result: The Brand Kit dashboard loads, displaying asset categories (Logos, Colors, Fonts, Graphics)
Purpose
Accessing this section is the entry point for all brand asset management in Canva.
Step Two: How Do You Create a New Brand Kit?
Creating a new brand kit generates an empty container where you store logos, define brand colors, and set up brand fonts for consistent design work.
Action
- Brand Kit Dashboard > “+ Add new” button: Click to initiate new kit creation
- Name Field: Enter your brand kit name (e.g., “Company Main Brand” or “Client ABC”)
- Create Button: Click “Create” to confirm
- Result: Empty brand kit template appears with sections for Logos, Brand colours, and Brand fonts
Purpose
Each brand kit acts as a separate container.
Canva Pro allows up to 100 brand kits, making it useful for agencies managing multiple clients or businesses with sub-brands.
Step Three: How Do You Upload Your Logo Files to the Brand Kit?

Uploading logo files stores your visual identity assets directly in the brand kit, making them instantly accessible from the design editor sidebar when creating any project.
Action
- Logos Section > “+ Add new” button: Click to open the upload dialog
- File Selection: Choose logo files from your computer (supported formats: PNG, JPG, SVG)
- Upload Multiple Variations: Add primary logo, secondary logo, icon-only version, and light/dark variants
- Result: Logos appear in the Logos section and become available in the editor under Brand > Logos
Purpose
Centralized logo storage eliminates searching through folders.
Following logo design principles, upload multiple variations: horizontal, stacked, icon-only, and reversed color versions for different use cases.
Recommended Logo Formats
- SVG: Scalable vector graphics, best for quality at any size
- PNG: Supports transparency, good for web use
- JPG: Smaller file size, no transparency support
Step Four: How Do You Add Brand Colors to Your Kit?
Adding brand colors saves your exact RGB or HEX values to the kit, making them one-click accessible in any design project.
Action
- Brand colours Section > “+ Add new” button: Click to open the color picker
- HEX Code Input: Enter your exact color code (format: #XXXXXX) or use the color picker
- Add Multiple Colors: Set up primary color, secondary color, and accent colors
- Result: Colors appear in the Brand colours section and show in the editor’s color menu
Purpose
Consistent color usage builds brand recognition.
Understanding color theory helps when selecting complementary shades for your palette.
Color Organization Tips
- Primary colors: Main brand colors used most frequently
- Secondary colors: Supporting shades for backgrounds and accents
- Neutral colors: Blacks, whites, grays for text and spacing
For print materials, note your CMYK values separately since Canva works in RGB by default.
Step Five: How Do You Set Up Brand Fonts in Canva?
Setting up brand fonts defines your typographic hierarchy for headings, subheadings, and body text across all designs.
Action
- Brand fonts Section > “+ Add new” button: Click to access font options
- Font Selection: Choose from Canva’s library or upload fonts to Canva (TTF or OTF files)
- Assign Font Roles: Set heading font, subheading font, and body text font
- Result: Fonts appear in the editor’s font dropdown under “Brand fonts”
Purpose
Defined font roles speed up design work and maintain visual consistency.
Font Type Recommendations
- Headings: Bold sans-serif fonts or serif fonts for impact
- Body text: Clean, readable fonts at 14-16px minimum
- Accent text: Display fonts or script fonts for special elements
Check font licensing before uploading custom fonts for commercial use.
Step Six: How Do You Add Graphics and Photos to Your Brand Kit?
Adding graphics and photos stores approved visual assets like icons, patterns, and brand photography in your kit for team access.
Action
- Graphics/Photos/Icons Section: Navigate to the relevant asset category
- Upload or Link: Upload files directly or link existing Canva folders
- Organize Assets: Group by type (icons, backgrounds, product photos)
- Result: Assets appear in the editor sidebar under Brand when designing
Purpose
Centralized asset storage prevents team members from using off-brand imagery.
Step Seven: How Do You Create Brand Guidelines in the Kit?
Creating brand guidelines adds written rules for how to use your brand assets correctly.
Action
- Guidelines Tab: Select from the Brand Kit navigation
- “Add guidelines” Button: Click to open the guidelines editor
- Document Editor: Write usage rules, do’s and don’ts, spacing requirements
- “Done” Button: Click to save and publish guidelines
- Result: Guidelines become accessible to all team members with kit access
Purpose
Written guidelines prevent misuse of logos, colors, and fonts by collaborators.
A complete brand style guide typically includes logo clear space rules, color usage contexts, and font pairing examples.
Verification
Confirm your brand kit works correctly before using it in projects.
Testing Steps
- Create a new design: Click “Create a design” from the homepage
- Open Brand tab: Check the left sidebar in the editor
- Verify assets appear: Logos, colors, and fonts should display under their categories
- Apply brand styles: Click any color or font to apply it to selected elements
All uploaded assets should load instantly in the editor.
Troubleshooting
Issue: Brand Kit Options Are Limited
Solution: Verify your subscription level.
Canva Free limits brand kit features to 3 colors only, with no logo uploads or custom fonts.
Issue: Custom Fonts Not Uploading
Solution: Check file format (TTF or OTF required) and ensure file size is under 10MB.
Some fonts have licensing restrictions that prevent upload.
Issue: Brand Kit Not Appearing in Editor
Solution: Refresh your browser, clear cache, or verify you’re logged into the correct team account.
Brand kits are team-specific, so switching accounts may hide certain kits.
Applying Your Brand Kit to Designs
Access brand assets directly from the design editor for fast, consistent design work.
How to Access
- Design Editor > Left Sidebar: Click the “Brand” tab
- Select Asset Type: Choose Logos, Colors, or Fonts
- Click to Apply: Select any element, then click a brand color or font to apply
Switching Between Multiple Brand Kits
Use the dropdown menu at the top of the Brand tab to switch between kits.
Useful for agencies managing multiple clients or businesses with different sub-brands.
One-Click Brand Styles
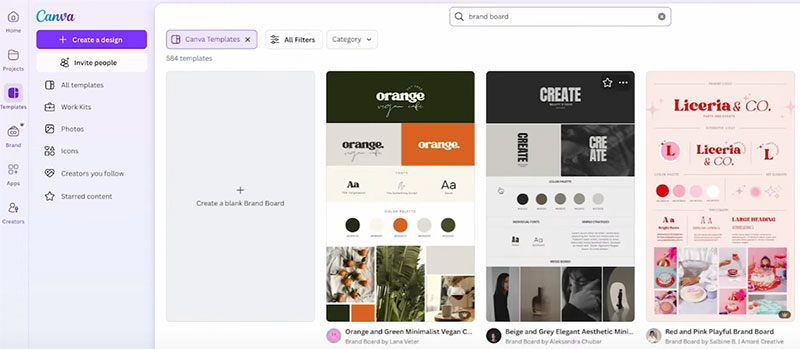
The “Brand styles” feature applies your entire color and font scheme to a template instantly.
Select a template, click “Brand styles” in the editor toolbar, and choose a style variation.
FAQ on How To Make A Brand Kit In Canva
Can I create a brand kit in Canva for free?
Canva Free allows only 3 brand colors. No logo uploads, no custom fonts.
For full brand kit features, you need Canva Pro, Teams, or Enterprise. The free version works for basic color saving only.
How many brand kits can I create in Canva Pro?
Canva Pro supports up to 100 brand kits. Canva Teams and Enterprise allow up to 1,000 kits.
Each kit holds separate logos, colors, fonts, and graphics for different brands or clients.
What file formats can I upload for logos in a brand kit?
Canva accepts PNG, JPG, and SVG files for logo uploads. SVG files maintain quality at any size.
PNG supports transparency. JPG works but has no transparency support.
How do I add custom fonts to my brand kit?
Go to Brand fonts section, click “+ Add new,” then upload your font files.
Canva accepts TTF and OTF formats only. Maximum file size is 10MB per font.
Can I share my brand kit with team members?
Yes. Canva Teams and Enterprise allow brand kit sharing across your organization.
Team admins and brand designers control access permissions. Individual Canva Pro accounts cannot share kits with others.
How do I access my brand kit while designing?
Open any design, click the “Brand” tab in the left sidebar. Your logos, colors, and fonts appear there.
Click any asset to apply it directly to selected elements on your canvas.
Can I create brand guidelines inside the brand kit?
Yes. Click the Guidelines tab, then “Add guidelines” to open a document editor.
Write usage rules, logo spacing requirements, and color application contexts. Save by clicking “Done.”
What happens to my brand kit if I downgrade from Canva Pro?
Your kit reverts to free limitations. Custom fonts and logos become inaccessible.
Only 3 brand colors remain visible. Upgrading again restores all previously saved assets.
How do I organize multiple color palettes in one brand kit?
Add color groups within the Brand colours section. Label each group (Primary, Secondary, Neutral).
Click “+ Add a palette” to create separate groupings. Understanding hue and saturation helps when building palettes.
Can I use my brand kit to create a logo in Canva?
Brand kits store existing logos but don’t create them. Use Canva’s logo maker separately.
Learn how to make a logo in Canva, then upload the finished file to your brand kit.
Conclusion
You now know how to make a brand kit in Canva from start to finish.
The entire setup takes 15 minutes. The time saved on future projects? Countless hours.
Your brand identity stays consistent across every design. Team collaboration becomes smoother when everyone accesses the same brand assets.
Start with your logo uploads and HEX color codes. Add your heading and body fonts next. Build out graphics and photos as your asset library grows.
Don’t skip the brand guidelines section. Written rules prevent costly mistakes when multiple people create marketing materials.
Open Canva, click the Brand tab, and build your first kit today. Your design workflow will thank you.

Renowned for his expertise in logo design and visual branding, Bogdan has developed a multitude of logos for various clients.
His skills extend to creating posters, vector illustrations, business cards, and brochures. Additionally, Bogdan's UI kits were featured on marketplaces like Visual Hierarchy and UI8.
He also wrote in the past years on sites like Design Your Way, WebDesignerDepot, WPDean, Designmodo, Speckyboy, Slider Revolution, and more.
- Canva vs Photoshop: When Does Each Make Sense? - 12 September 2026
- Briefing 3D Game Animation: Rigs, Clip Lists and Engine Handoffs - 11 September 2026
- The Webflow Logo History, Colors, Font, And Meaning - 10 September 2026

Bogdan Sandu is a seasoned designer who has been designing websites since 2008. Renowned for his expertise in logo design and visual branding, Bogdan has developed a multitude of logos for various clients. His skills extend to creating posters, vector illustrations, business cards, and brochures. Additionally, Bogdan's UI kits were featured on marketplaces like Visual Hierarchy and UI8. He also wrote in the past years on sites like Design Your Way, WebDesignerDepot, WPDean, Designmodo, Speckyboy, Slider Revolution, and more.
You Might Also Like