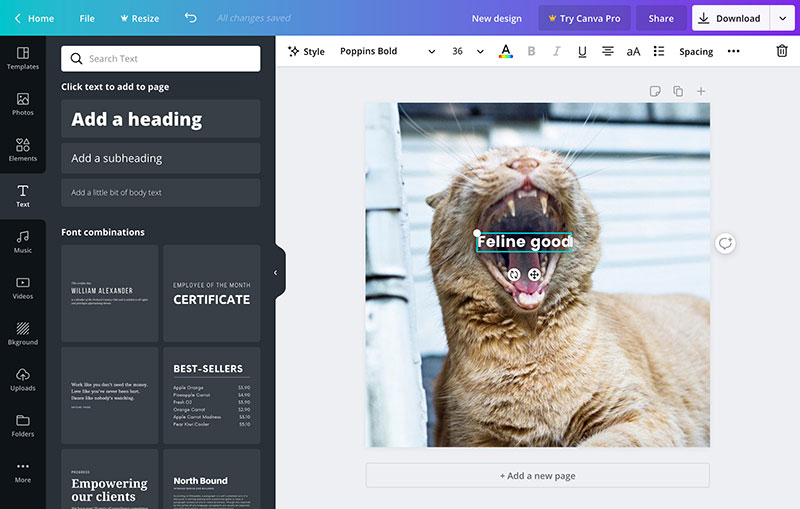
“Canva rejects Adobe Originals fonts outright and requires an embeddable license before any upload reaches the Brand Kit.”
Installing a font on your laptop does nothing for Canva. The file has to land in the Brand Kit, which lives on the account rather than the machine, and that distinction trips up more people than any of the technical stuff further down.
Once a font sits in that Brand Kit, it appears in the font list for every design tied to the account. The gate is who gets to put it there. Canva restricts uploading to paid plans and a short list of account roles, which is tighter than what most design tools ask of you.
Some perspective on how many people that leaves out. Canva reports 265 million monthly active users, and only 31 million of them pay for a subscription, according to co-founder and COO Cliff Obrecht’s count reported by TechCrunch in February 2026. Paying is what unlocks font upload.
What Is a Canva Font Upload
Treat it as a private extension of Canva’s font library. You hand over a file Canva doesn’t stock, and from that point it behaves like every other font in the dropdown.
Local installation works on a different principle. A font installed on a computer is visible to programs on that one machine and nowhere else. The Brand Kit copy follows the account instead, so a teammate opening the same kit on a different laptop sees it without doing anything.
Most people arrive here chasing one specific typeface. A client’s brand mark. A script font licensed for a wedding invitation line. Some custom weight nobody bothered putting on Google Fonts. Whatever the origin, the thing being uploaded is still just a font, one weight and style of a typeface saved in a format a computer can read.
You can kick off the upload from the Brand Kit under Brand Fonts, or from the font dropdown inside the editor, where the option sits below the built-in list. Same destination either way, so pick whichever is closer to hand.
Which Font File Formats Does Canva Support
OTF, TTF, and WOFF get through. That’s the entire list.
Everything else bounces at the upload screen. WOFF2, EOT, SVG, and the ZIP files that come straight out of a download folder all fail. Variable fonts are blocked too, which is the rejection I find hardest to forgive, since the whole point of that format is packing multiple weights and widths into one file instead of a folder full of them.
| Format | Supported | Typical source | Fix if rejected |
|---|---|---|---|
| OTF | Yes | Foundry purchase, Adobe Fonts | None needed |
| TTF | Yes | Google Fonts, most free foundries | None needed |
| WOFF | Yes | Web font kits | None needed |
| WOFF2 | No | Modern web font kits | Convert to OTF or TTF |
| ZIP, EOT, SVG | No | Marketplace downloads | Extract or reformat the actual font file |
Format is the first thing Canva checks. Licensing is the second, and that one is stricter than people expect.
What Are Canva’s Font Upload Limits
The ceiling is 500 fonts in a single Brand Kit. Within one family you get 18 styles, and no individual file can go past 15 MB. All three numbers come from Canva’s own Help Centre documentation. Only three formats make the cut, as covered above.
Hit any limit and the upload screen quietly stops accepting files until you delete something.
Honestly, nobody hits 500. The style cap is where the real friction lives.
Fonts uploaded before July 2023 don’t group their weights automatically, and Canva’s documentation says those older uploads have to be re-uploaded with the extra styles attached before the bold and italic buttons will do anything. Condensed cuts count as a separate upload regardless, even when they came from the same family as the regular weight.
What Font Licensing Do You Need Before Uploading
Every uploaded font needs a license that permits embedding. A license permitting everyday design use is not the same thing, and plenty of fonts, free and paid alike, only cover the second.
Canva points at section 4b of its own Terms of Use, which parks the responsibility for checking that license on whoever uploads the file. Not on Canva.
The details of font licensing swing wildly by foundry, covering how many devices, how many seats, and how many output files one purchase actually buys you.
Two named foundries show the range. Adobe Originals fonts are blocked from upload outright, whatever license you hold. Font Diner sits at the other end, explicitly permitted per Canva’s own documentation.
Uploading a font without embedding rights risks more than a rejected file. It puts the finished design at risk too, especially once that design goes to print or lands in front of a client who bothers to check.
Which Canva Plan Do You Need to Upload Fonts
Font upload needs a paid plan. Free accounts never see the option, no matter how clean the file or how airtight the license.
Pro, Business, Education, and Nonprofit accounts all include it, per Canva’s Help Centre documentation.
| Plan | Font upload | Brand Kits included | Price |
|---|---|---|---|
| Free | No | 1 | $0 |
| Pro | Yes | 5 | $180/year for one person |
| Business | Yes | 100 | $250/year per person |
| Education, Nonprofit | Yes | Varies by organization | Free for eligible organizations |
| Enterprise | Yes, with Brand Controls | 1,000 | Custom, by contract |
Enterprise runs on contract pricing rather than a published rate. It’s also the only tier that can stack extra restrictions on top of the base permission, which sounds like a downgrade until you’ve watched an intern upload a knockoff of the company typeface.
Note: Canva retired its old flat-rate “Teams” plan; that tier is now sold as Canva Business at the per-person pricing above.
Who Can Upload Fonts on a Team Account
On a paid team plan, the permission belongs to team owners, administrators, and brand designers. Nobody else.
Everyone else on the account can use whatever already sits in the Brand Kit. They just can’t add to it.
Enterprise admins can go further with Brand Controls and pull upload rights away from people who would otherwise qualify.
What Can You Do Without Canva Pro
The free tier ships with thousands of fonts and no upload step at all. Google Fonts accounts for a big share of that built-in list, and the source library keeps expanding. Google Fonts lists more than 1,900 font families in its directory as of mid-2026, and a wide share of that catalog already sits inside Canva’s free plan.
Staying free costs nothing, waits on nothing, and works fine for personal projects or any brand that hasn’t settled its typography yet. Most of Google Fonts is already sitting there.
Pro becomes necessary at one specific moment: when a brand owns a purchased or custom-built typeface. The Brand Kit keeps that font consistent across every design, and bold and italic finally light up once both style files are in.
When a client’s brand font hasn’t been bought yet, grabbing two solid options from a list of the best free Google Fonts is usually the fastest way out. Pairing them well matters as much as picking them, and a dedicated Google Font pairing guide covers combinations that survive contact with an actual page layout.
How Do You Upload a Font to Canva
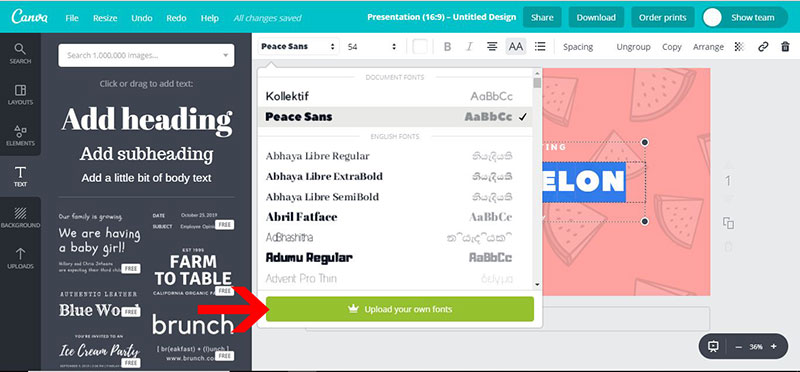
The Brand Kit, the in-editor font dropdown, and the mobile app all reach the same endpoint. Each one saves the font to whichever Brand Kit is active at the time, so this is a convenience choice, not a consequential one.
Uploading Through the Brand Kit
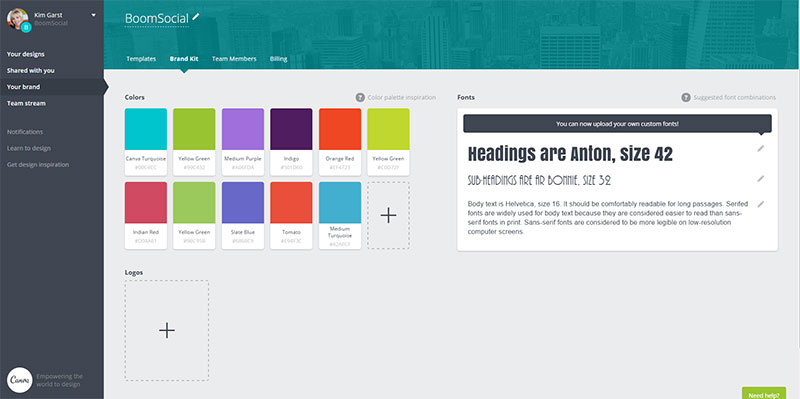
Canva documents this as the main path. It starts from the homepage, not from inside a design.
- From the homepage side panel, select Brand
- Pick a Brand Kit from the dropdown, if more than one exists
- Go to Fonts and select Add to category
- Select Upload a font
- Drag and drop the file, or choose it from the computer
- Confirm the license and wait for the upload to finish
Step six is the licensing check from earlier. Canva doesn’t skip it for small files.
Uploading From Inside the Editor
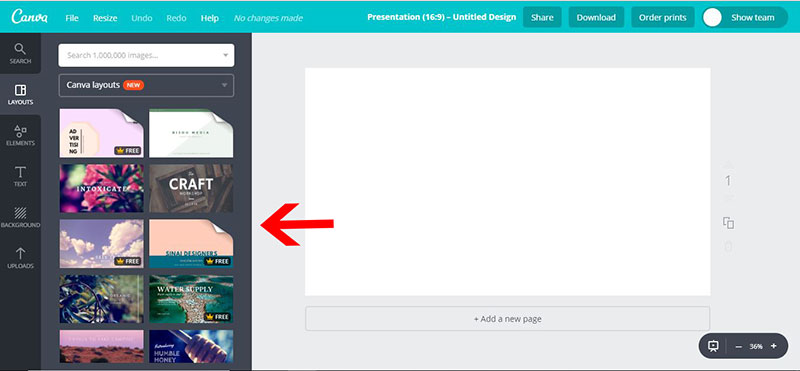
Select any text box, open the font dropdown, and scroll to the very bottom of the alphabetical list. The upload option lives underneath every built-in font, and it’s easy to miss the first time you go looking.
Nothing changes about the rules. The file still has to be OTF, TTF, or WOFF, and it still saves to whatever Brand Kit is active.
Uploading From the Mobile App
The mobile flow tracks the desktop one closely, so switching devices mid-task won’t cost you anything.
- Tap the menu icon, then Brand, then Brand Kit
- Scroll to Fonts, tap the plus icon, then Upload a Font
- Choose the file, which has to already be saved on the phone or tablet
That last requirement bites more often than you’d think. Fonts emailed to yourself as attachments need saving to the device first.
How Do You Apply an Uploaded Font to Your Design
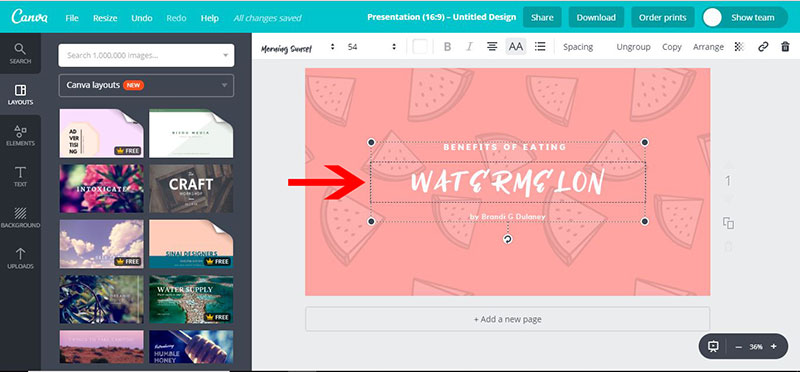
Assigning a font to a role happens in the same Brand Kit that stores the file. Canva lets you set one default for each of five heading levels, H1 through H5, plus a separate one for body text, per its Help Centre documentation.
Those heading levels carry real semantic tags, not just visual styling. Exported PDFs stay readable to screen readers because of it, which is a nice side effect of doing the boring setup properly.
Line and letter spacing sit outside Brand Kit control for now, so fine-tuning font spacing still happens design by design rather than once at the source. Mildly irritating, and I doubt it changes soon.
There’s a commercial argument for keeping all this consistent, if you need one for a client conversation. Lucidpress’s 2019 State of Brand Consistency Report, based on a survey of more than 200 organizations, found respondents associated consistent brand presentation with revenue gains of up to 33 percent.
Northwestern University’s McCormick School of Engineering runs its Canva Enterprise account as a hub for promotional materials, with school fonts, colors, and logos preloaded so every heading and body assignment defaults to the same identity across departments.
Getting the heading and body assignment right comes down to pairing fonts deliberately, matched for contrast and readability rather than picked off the top of the list.
Unlocking Bold and Italic Styles
The bold and italic buttons don’t switch on by themselves.
Canva treats every weight as its own file, so the B and I controls stay grayed out until the matching bold or italic version joins the regular upload. Upload those cuts as separate files under the same family name and the buttons come alive once Canva groups them.
How Do You Manage or Delete an Uploaded Font
Deletion works identically regardless of why the font has to go. If it isn’t showing under Fonts, Manage uploaded fonts is the fallback view that catches anything hidden or mis-filed.
- Go to Brand, then the Brand Kit holding the font
- Find it under Fonts, or under Manage uploaded fonts if it’s missing
- Select the delete icon next to it
- Confirm the deletion when prompted
Text that already used the deleted font doesn’t vanish. It just needs a replacement the next time that design opens, because Canva won’t render a file that isn’t there anymore.
Multiple Brand Kits don’t share uploads. A font added to one kit stays invisible in the others until you upload it again or switch the active kit from the dropdown.
New South Wales public schools deal with this at the account level. Staff request brand designer access through the department’s Technology 4 Learning program specifically so they can manage their school’s font uploads and branding toolkit, rather than leaving that open to every teacher.
How Do You Fix a Canva Font Upload Error
Most rejected uploads trace back to a handful of causes, and each leaves a different fingerprint.
| Cause | What it looks like | Fix |
|---|---|---|
| Corrupted file | Upload fails immediately | Re-download from the original source |
| Wrong metadata | Styles won’t group under one family | Correct the internal family name, then re-upload |
| Missing embedding license | Rejected at the confirmation step | Request an embeddable version from the foundry |
| Partial compatibility | Uploads fine, glyphs missing on export | Swap in a fully supported font instead |
Metadata is the miserable one. You can’t diagnose it from inside Canva, because the upload screen never shows the file’s actual internal family name.
Font Book, built into every Mac, previews that family structure before the file ever reaches Canva. Installing the font locally first, the same process covered in any guide on how to install fonts on Mac, is often the quickest route to the real family name Canva is going to read. FontBase does the same job on Windows.
Uploads that stall rather than fail outright are usually a browser problem. Refresh the page, switch to Chrome, Firefox, Edge, or Safari, clear the cache. One of those clears it, and none of them require touching the font file.
Missing glyphs after a download point to a font Canva accepted but never fully supported. The same gap shows up in exported PDFs generally, which comes down to whether the file manages to embed fonts in PDF form or gets swapped for a placeholder.
One more, since it catches people mid-project: a font already in the Brand Kit can’t be uploaded twice under the same name. New weights need their own separate upload rather than overwriting the original.
When Does Font Upload Not Work in Canva
A few conditions kill font upload with no workaround inside Canva at all.
- The account sits on the Free plan, which never includes font upload regardless of the file itself.
- The person isn’t a team owner, administrator, or brand designer, or an Enterprise admin has switched on Brand Controls.
- The file is an outright unsupported type, such as WOFF2, EOT, SVG, or a variable font.
- The font belongs to a blocked foundry, Adobe Originals being the named example.
- No version of the font carries an embeddable license, no matter where it gets sourced from.
Downgrading from a paid plan won’t strip fonts already used in finished designs, but it does close the door on uploading anything new. Edit an old text block after that point and it can snap back toward the free library instead of the custom font that used to sit there.
FAQ on How To Upload Fonts To Canva
Do uploaded fonts also appear in Canva Docs or Brand Templates?
They do. Canva Docs and Brand Templates both pull from the same Brand Kit as standard designs.
There’s one exception worth knowing. The Edit panel that bulk-applies Brand Kit text styles across a design isn’t supported on responsive doc types like Docs, so that particular shortcut won’t work there even though the fonts themselves are available.
Is Adobe Fonts a good alternative source for a font to upload?
Usually not. Adobe Fonts fonts sync to a system through an active Creative Cloud subscription instead of downloading as a standalone file, so most aren’t upload-ready for Canva’s Brand Kit in the first place.
Check embedding rights with Adobe before you assume an Adobe Fonts license travels.
Is there a cost to upload fonts beyond the subscription?
Canva charges nothing extra once your plan includes the feature.
The money goes to the font. Foundries frequently price a desktop license separately from one cleared for embedding in a tool like Canva, and the second is the one you need.
Can uploaded fonts be shared automatically with teammates?
Yes, provided teammates share the same Brand Kit. Canva’s documentation frames font upload as a way to keep designs on-brand throughout a team, so anyone with Brand Kit access sees the uploaded font without doing a separate upload.
What Does a Canva Font Upload Cost to Maintain Over Time?
The confirmation screen isn’t the end of it. Somebody on the account has to keep the underlying license current, recheck embedding rights whenever a foundry rewrites its terms, and re-upload if Canva ever changes its accepted format list.
Check license status first. Format compatibility after that. Account role last, since it’s the least urgent of the lot.
License status leads because a foundry can revoke embedding rights without warning, and that reaches backward into work you’ve already published. A lost account role only costs you the next upload, not the fonts already in use.
Picking a typeface worth running through all of that matters as much as the mechanics. Font psychology covers how a single typeface decides whether a brand reads as trustworthy or playful, well before anyone reads a word of the copy.

Renowned for his expertise in logo design and visual branding, Bogdan has developed a multitude of logos for various clients.
His skills extend to creating posters, vector illustrations, business cards, and brochures. Additionally, Bogdan's UI kits were featured on marketplaces like Visual Hierarchy and UI8.
He also wrote in the past years on sites like Design Your Way, WebDesignerDepot, WPDean, Designmodo, Speckyboy, Slider Revolution, and more.
- Beautiful Fonts Similar to Poppins You Should Try - 22 October 2026
- Website Redesign: How to Improve Your Website without Losing SEO Rankings - 22 October 2026
- The Coda Logo History, Colors, Font, And Meaning - 20 October 2026

Bogdan Sandu is a seasoned designer who has been designing websites since 2008. Renowned for his expertise in logo design and visual branding, Bogdan has developed a multitude of logos for various clients. His skills extend to creating posters, vector illustrations, business cards, and brochures. Additionally, Bogdan's UI kits were featured on marketplaces like Visual Hierarchy and UI8. He also wrote in the past years on sites like Design Your Way, WebDesignerDepot, WPDean, Designmodo, Speckyboy, Slider Revolution, and more.
You Might Also Like