The quickest way to replace an image in Canva is to drag a new one onto the old one. The new image takes the old one’s size and position, so nothing else on the page moves. Selecting the image and clicking Replace in the toolbar gets you the same result.
Canva’s Help Center (2026) documents something most drag-and-drop tutorials skip. A lock doesn’t always block the swap. An image or frame set to Lock position only still accepts Replace, while a full lock doesn’t.
How to replace an image in Canva
Drag the new image onto the old one, or select the old image and click Replace. Either way the layout stays put.
Dragging is faster when the new image is already sitting in the side panel. In a crowded layout it’s easy to drop onto the wrong element, and the menu route is less fiddly there. Delete and re-insert works too. It just costs the most effort.
Drag and drop over the old image
- Open the side panel and choose Uploads, Photos, or Elements. If you do not see them, select Apps first.
- Find the new image, using the search bar if needed.
- Drag it over the old image until the target highlights.
- Release the mouse button.
- Double-click the new image to adjust it, then select Done.
Canva’s Help Center documents the drop-and-snap action for frames. Third-party walkthroughs show the same drop working on loose images.

Replace image from the right-click menu or toolbar
Right-click the image, choose Replace image, then pick the new file from the side panel. The menu reads Replace when a frame is empty and Replace image when it already holds a picture.
The toolbar route is nearly identical. Select the image, click Replace in the editor toolbar, and choose from Uploads, Photos, or Videos.
Canva’s Help Center (October 2026) describes the right-click route for frames and the toolbar route for frames and grids.
I’d reach for either one whenever drag and drop keeps landing on the wrong element.
Delete and re-insert
This is the slowest method, and the only one that loses the old position.
Select the old image, press Delete, add the new one, then resize the new picture by hand and move it into place. It only makes sense when the layout has changed enough that the old size and position no longer fit the new image.
How replacing works in frames, grids, and page backgrounds
The container around an image decides which command does the swap. Frames and grids take a drop or the Replace button, while page backgrounds have their own command.
| Container | Command | Adjust afterwards |
|---|---|---|
| Frame | Drag media over it, or right-click Replace image | Double-click to reposition inside the frame |
| Grid | Select the image in the cell, click Replace in the toolbar | Double-click to resize or reposition in the cell |
| Page background | Add the image, right-click, choose Replace background | Double-click the background to reposition or resize it |
Frames
Canva describes frames as placeholders for your own media or library media. Only images and videos can be added to them.

Canva’s template guidance recommends a frame whenever one image has to fill a fixed space, which is why template designers rely on them so heavily.
One conflict is worth knowing about. Some tutorials tell you to detach the image from its frame before swapping. Canva’s documentation lists Detach image only for shapes that were converted with Change to frame, where it separates the picture from the shape again.
For a closer look at frames beyond swapping, see this walkthrough on working with frames in Canva.
Grids
A grid works like several frames side by side. Select the image in the cell you want to change, then click Replace in the toolbar.
Afterwards you can resize with the white corner handles and reposition by dragging inside the cell. Select Done when it looks right.
Page backgrounds
A background image has its own command.
Add the new photo to the page, right-click it, and choose Replace background. Set image as background appears instead when the page has no background image yet, and Canva documents the same pair of commands for video backgrounds.
Canva’s lock guidance lists background images among the elements designers lock in a Brand Template. A template background can therefore refuse the swap until it is unlocked.
What carries over to the new image?
Size and position carry over. Everything else depends on how the original image was built.
- Size and position are kept, according to Canva’s Brand Templates guide (2026), which says frames and grids keep images sized and positioned correctly.
- Crop is a mixed case. Canva says teammates can replace an image in a frame without adjusting the crop, but for loose images that claim rests on third-party walkthroughs only.
- Effects and filters are disputed, see below.
- Transparency is best applied to an overlay rather than the photo itself, per Canva’s advice, with the photo kept above the overlay.
Several third-party tutorials say effects and filters survive a swap. Canva’s own guidance makes no such promise.
It warns that complex effects and overlays make replacement harder, and it tells designers to keep them simple. It also notes that photos under translucent shapes are hard to replace, so the image should sit above the shape.
So check every effect after the swap instead of assuming it came along.
A different aspect ratio is the most common surprise, because part of the new image ends up outside the frame. Double-click the image, drag it into position, resize with the corner handles, and select Done.
Canva’s Help Center says Smart Crop crops a photo to show its most interesting part, and it also works on photos inside frames, grids, and page backgrounds. Canva advises against using it on images with transparency or on non-photos such as screenshots and graphics. If the framing is still off, cropping the image by hand gives finer control than dragging alone.
Where can the replacement image come from?
Almost anywhere in the side panel. Uploads, the Photos library, Elements, Brand Kit, Magic Media, and connected apps can all feed the swap, and the right one depends on whether you already have the file and what your plan includes.
Uploads, stock photos, and brand images
Uploads holds your own files and lives in the editor side panel. Photos is Canva’s stock library, searchable from the same place, and Elements mixes graphics and photos into one search.

Brand Kit is the one to use when the swap has to follow brand rules, since it stores approved logos and brand photos.
For a person or product shot, removing the background from the new photo before the swap leaves a clean cutout. That tool is paid-only, covered below.
Generated images and connected apps
Magic Media creates an image from a text prompt, and Magic Edit replaces part of an existing image (Canva Design School). Canva’s AI Product Terms cover both tools and ask that you let viewers know when content in your designs is AI-generated.
Connected apps cover files you keep elsewhere. Open Apps, choose the app, connect your account, select the file, and click Upload.
Canva lists Google Drive, Dropbox, OneDrive, Box, SharePoint, Facebook, and Instagram among the supported sources. Imported files count toward the storage limit of your plan.
Accepted formats and size limits
Canva’s upload rules (Help Center, October 2026) set the limits below.
- JPEG, PNG, HEIC/HEIF, and WebP files must be under 50MB each and no more than 250 million total pixels, and WebP has to be a static image.
- SVG files need to be under 3MB and between 150 and 200 pixels wide, saved with the SVG 1.1 profile.
- Upload storage is 5GB on Canva Free and 100GB on Canva Pro.
- Background Remover takes photos under 9MB and doesn’t accept vector images.
HEIC support means iPhone photos upload without conversion. Canva’s template guidance also recommends SVG for icons and illustrations that need to scale and recolor.
Free versus Pro
The swap itself carries no plan requirement in Canva’s replace steps. The content you swap in can.
On Canva Free you can replace images, upload files, and use the standard library. Background Remover is not included, and AI tools draw on a small monthly allowance of up to 20 uses of Standard or Premium tools, with no access to Ultra tools.
Pro adds Background Remover and the full stock library. Its AI allowance is also much larger, at up to 200 uses of Premium tools or 20 uses of Ultra tools, per Canva’s Pro page and AI usage page.
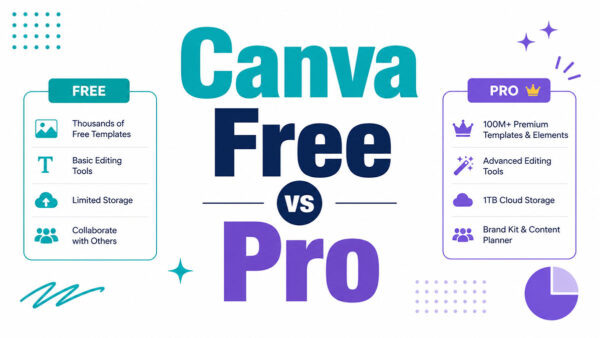
Image generation and the Image Upscaler are Standard AI tools. On paid plans they do not count toward the monthly allowance, though fair use limits apply. On Canva Free they draw from it. For a side-by-side look at what each plan covers, see this comparison of Canva Free and Pro.
Does replacing an image work differently on iOS, Android, and the desktop app?
The result is the same on every platform, but the input is not. Desktop gives you drag, right-click, and a toolbar button, while a phone gives you a tap and the toolbar Replace button.
Canva’s Help Center splits its steps into a Desktop tab and a Mobile tab only. There is no separate iOS or Android set.
On desktop (browser, Windows, macOS), drag the new image from the side panel onto the old one, right-click and choose Replace image, or select the image and click Replace in the toolbar. Double-click afterwards to reposition.
On iOS and Android, tap the image, then tap Replace in the toolbar. From there you pick from Uploads, the phone gallery, or the camera, and pinch and drag to scale and reposition.

Third-party walkthroughs for the phone apps agree on the tap-then-Replace sequence, and they are the source for the gallery and camera options. Canva’s own documentation for the mobile tab is thinner on this point.
A phone has no right-click, so that route simply doesn’t exist there. The Apps panel sits under the More tab on mobile (Canva Help Center), which matters when the replacement image lives in Google Drive or Dropbox.
Replacing one image across many pages or designs
Replace across designs in the Brand Kit swaps one logo or photo in every design you select, in a single run.
Canva’s Help Center (October 2026) says Canva Pro, Teams, Business, Education, and Nonprofits plans all include it, but only admins and brand designers can use it. Free accounts open each design and swap by hand, and what Canva Pro costs decides whether the upgrade pays for itself.
- Go to Brand in the side panel and open the Brand Kit that holds the logo or photo.
- Select Logos or Photos, hover over the image, and select the More (three-dot) icon.
- Select Replace across designs.
- Tick the designs where it appears, then select Continue.
- Drop or choose the replacement image.
- Select Preview to review the changes.
- Select Replace in [number of designs] design(s).
A confirmation message appears once the swap finishes.
The image has to be the identical file in every design, with the same file ID, and the replacement should match the original’s aspect ratio. You also need edit access to both the image and the designs. Logos can only be replaced with PNG or JPG files.
The option doesn’t appear when you lack edit access, when the image sits in only one editable design, or when the image was never added as a reusable Brand Kit or shared asset.
Canva’s advice for template builders is to keep images in the Brand Kit or shared folders, so an outdated logo can be replaced once across every relevant template. If no Brand Kit exists yet, setting up a Brand Kit comes first.
Canva’s Help Center lists the feature as available on desktop only.
Manual swaps still win when every page needs a different crop. Bulk replacement expects the image to be used identically everywhere, and Canva notes that designs where the image was cropped, filtered, or resized may not update.
Why an image will not replace, and how to fix it
A lock, a group, or a template restriction is usually behind it. Each one needs a different fix, so work out which applies before trying anything else.
| Lock type | Replace image? | Fix |
|---|---|---|
| Lock | Blocked | Select the element, click Unlock |
| Lock position only | Allowed for images and frames | None needed, position stays fixed |
| Page lock | Blocked | Unlock the page first, then the element |
Canva’s Brand Template documentation (October 2026) says a position-only lock on an image or frame still permits replace, crop, resize, and move within the original space. A padlock therefore doesn’t always mean the swap is blocked.
- If the element itself is locked, the floating toolbar shows an Unlock or Unlock position icon. Toggle until every lock on the element clears.
- If the page is locked, elements cannot be unlocked while their page is. Select the page and unlock it first, or press Alt+Shift+L.
- If the image sits inside a group, select the group, click the image inside it, and look for Replace. When the button is missing, select the whole group and choose Ungroup.
- If the group itself is locked, Canva’s developer documentation says it cannot be ungrouped and its elements cannot be edited. Unlock the group before anything else.
- In a Brand Template, only admins and brand designers can apply or adjust locks, and they set them before publishing. Ask one of them to republish with Lock position only on the frame.
- Canva ties lock changes and bulk replacement to edit access, so check the share permission on the design.
Education accounts add one more case. A student cannot unlock an element a teacher locked, and the lock icon shows a message that the lock cannot be edited.
Sources disagree on grouped images. Canva’s Help Center says you can click a group and then select a single element inside it to edit. Many third-party troubleshooting pages say to ungroup first.
Try selecting inside the group before ungrouping, since ungrouping changes how the pieces move together. For the full workflow, see this guide to grouping and ungrouping elements in Canva.
Page-level locks have their own steps, which this walkthrough on unlocking a Canva page covers.
Common Questions About Replacing an Image in Canva
Is replacing an image the same as Magic Edit’s AI Replace?
No. Replace swaps a whole image for another file, while Magic Edit changes part of one image.
You brush over an area and describe what should appear there instead, according to Canva’s AI Replace page.

Can I undo a replacement?
Yes. Press Ctrl+Z (Cmd+Z on Mac) or click Undo straight after the swap.
Files you uploaded stay in the Uploads tab, so you can also drag the old one back onto the new image later.
Why does the replaced image look blurry?
The new file doesn’t have enough pixels for the space it fills, so Canva scales it up and the detail softens.
Swap in a larger version of the photo, or run the image through Canva’s AI Image Upscaler.
Does replacing a logo work the same way as replacing a photo?
Yes. Drag the new logo over the old one, or select it and click Replace.
Logos in a Brand Template are often fully locked, so unlock the element first or ask a brand designer to do it.
How do I swap a video instead of an image?
Frames accept videos as well as images, and the toolbar Replace button lists Videos next to Uploads and Photos.
A video background uses a different command. Right-click it and choose Replace background.
What to Check Before Sharing the Updated Design
After replacing an image in Canva, look at the crop first. It decides what sits behind the text, so it comes before anything else.
Then check that overlays and transparency are intact, and last, that no line of text now covers the new subject.
Replace across designs trades this per-design review for speed. After a bulk run, open one design from each template layout and run the same checks.
Canva notes in its mobile navigation article that it is rolling out navigation changes gradually, so some Help Center steps may not match what appears in the app. The Help Center, checked in October 2026, holds the current wording for every button named here.
Once the layout holds, saving the finished design as a PDF is the usual next step.

Renowned for his expertise in logo design and visual branding, Bogdan has developed a multitude of logos for various clients.
His skills extend to creating posters, vector illustrations, business cards, and brochures. Additionally, Bogdan's UI kits were featured on marketplaces like Visual Hierarchy and UI8.
He also wrote in the past years on sites like Design Your Way, WebDesignerDepot, WPDean, Designmodo, Speckyboy, Slider Revolution, and more.
- How to Replace an Image in Canva Without Breaking the Layout - 12 November 2026
- When Shared Hosting Is the Right Choice for Your Website - 11 November 2026
- The YouTube Logo History, Colors, Font, and Meaning - 10 November 2026

Bogdan Sandu is a seasoned designer who has been designing websites since 2008. Renowned for his expertise in logo design and visual branding, Bogdan has developed a multitude of logos for various clients. His skills extend to creating posters, vector illustrations, business cards, and brochures. Additionally, Bogdan's UI kits were featured on marketplaces like Visual Hierarchy and UI8. He also wrote in the past years on sites like Design Your Way, WebDesignerDepot, WPDean, Designmodo, Speckyboy, Slider Revolution, and more.
You Might Also Like