Hanging a poster is the process of securing paper artwork to a wall surface using mounting methods like tape, pins, frames, or adhesives.
Users need this when decorating spaces, displaying artwork, or organizing visual information without wall damage.
Understanding how to hang a poster correctly prevents common issues like corner curl, adhesive residue, and crooked alignment.
This guide covers 6 steps requiring 15-30 minutes and basic tools.
Prerequisites
Before starting, gather these materials:
- Poster (paper weight and size determined)
- Wall surface type identified (drywall, plaster, concrete, brick)
- Mounting method selected (frame, adhesive strips, poster putty, push pins, clips)
- Tools: measuring tape, pencil, level (4-inch or longer)
- Optional: stud finder (for framed posters), hammer (for nails)
Time estimate: 15-30 minutes.
Skill level: Beginner.
Check your wall texture before selecting adhesive options.
Different surfaces require different mounting materials to prevent damage.
Step 1: How Do You Choose the Right Wall Location?
Select the wall position by measuring eye-level height (57-60 inches from floor to poster center), checking for wall studs if using frames over 5 pounds, and confirming adequate lighting.
The location determines viewing comfort and poster preservation.
Action
Stand 8-10 feet from intended wall. Mark potential spots at 57-60 inches height.
Check wall condition for cracks, moisture, direct sunlight exposure.
Press hand against wall to confirm stability.
Purpose
Proper placement prevents poster damage from sunlight, moisture. Straight hanging requires careful visual hierarchy planning at the start.
Step 2: What Mounting Method Should You Select for Your Poster?
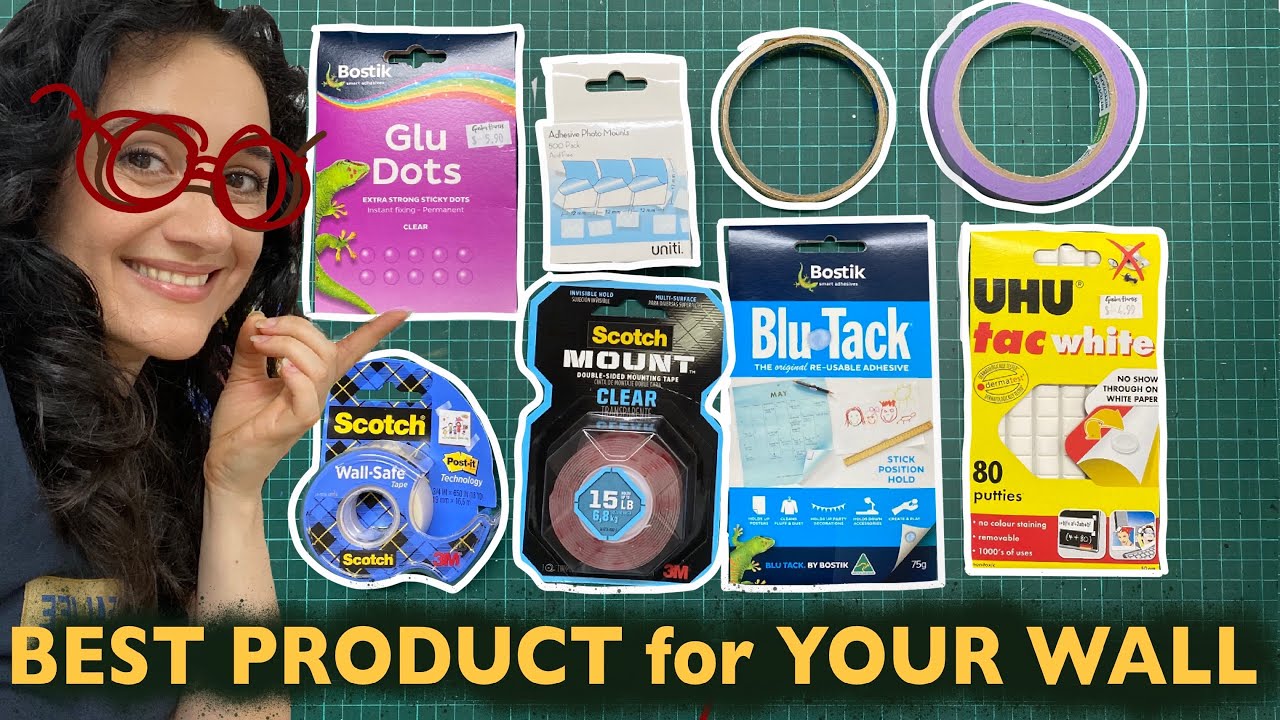
Choose mounting hardware based on poster weight, wall type, and damage tolerance.
Different methods offer varying hold strength and removal ease.
Action
For temporary mounting (rental walls): Use poster putty, removable adhesive strips, or poster hangers.
For permanent mounting: Select frames with appropriate hanging hardware.
Wall-specific selection: Drywall accepts all methods; plaster requires gentle adhesives; concrete needs adhesive strips or frames with anchors.
Professional poster design deserves appropriate mounting that protects the artwork.
Purpose
Correct mounting method prevents wall damage and poster tearing while ensuring secure attachment.
Framing adds protection but increases weight requirements.
Step 3: How Do You Measure and Mark the Hanging Position?

Calculate exact placement coordinates using poster dimensions and mark reference points with pencil.
Accurate measurements prevent crooked hanging and wall damage from repositioning.
Action
Measure poster dimensions in inches (height and width).
Mark center point at 57-60 inches from floor with light pencil.
Calculate upper edge: From center mark, measure up half the poster height, mark lightly.
Mark corners using level to ensure straight alignment horizontally.
Purpose
Pre-marked positions eliminate guesswork and reduce wall damage from incorrect mounting attempts.
Understanding the rule of thirds helps position posters within room layouts effectively.
Step 4: Where Do You Apply the Mounting Adhesive or Hardware?
Position mounting materials at marked coordinates following manufacturer weight specifications.
Adhesive placement affects hold strength and poster stability.
Action
For adhesive strips: Place one strip every 12 inches along poster top edge, press firmly for 30 seconds.
For poster putty: Roll four pea-sized balls, place in each poster corner on back side.
For frames: Install hanging wire or D-rings 1/3 down from top frame edge, thread wire through both rings leaving 2-inch slack.
For push pins: Insert at 45-degree angle through poster corners into wall.
Purpose
Proper adhesive distribution prevents poster sagging, corner peeling, and uneven weight distribution.
Quality adhesives maintain balance across the entire poster surface.
Step 5: How Do You Attach the Poster to the Wall?
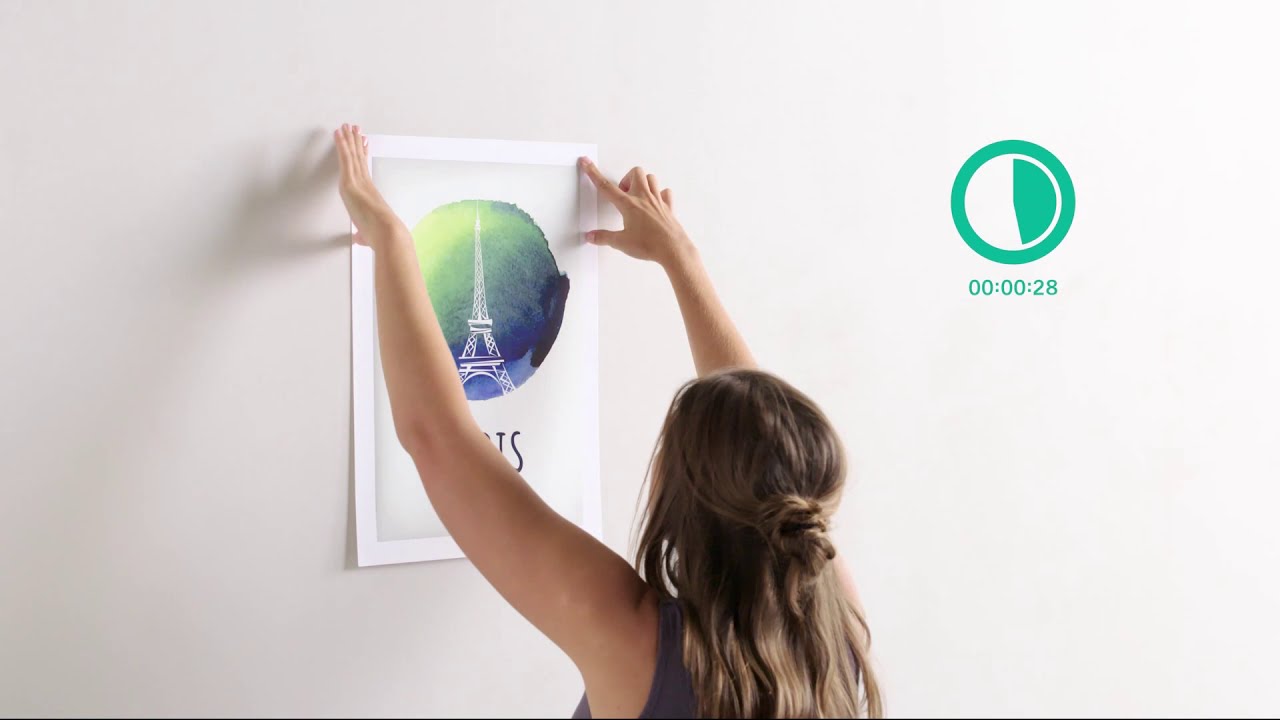
Press poster against wall at marked positions using level to maintain straight alignment.
Mounting technique varies by adhesive type and poster material.
Action
Align poster top edge with upper pencil marks (hold corners gently).
Place 4-inch level on poster top edge, adjust until bubble centers.
Press adhesive points with firm pressure for 30 seconds per attachment point (working from center outward).
For frames: Hook wire onto wall nail or picture hanger at marked position.
Purpose
Controlled application prevents air bubbles, wrinkles, and misalignment that compromise poster appearance.
The focal point of your poster should sit at natural eye level after mounting.
Step 6: How Do You Verify Straight Alignment and Secure Attachment?
Confirm poster hangs level and adheres completely to wall surface.
Final verification prevents future sagging or detachment.
Action
Place level on poster bottom edge. Check bubble position (adjust corners if needed).
Run hand gently across poster surface, press any loose sections for additional 30 seconds.
Step back 6 feet and visually inspect for gaps, bubbles, or tilt.
Test stability by gently pressing poster corners to confirm secure attachment.
Purpose
Proper verification ensures long-term poster stability and professional appearance.
The principles of contrast and white space affect how posters display within room layouts.
Verification
Stand 8-10 feet from poster.
Top and bottom edges appear parallel to floor and ceiling.
All corners attach flush to wall with no visible gaps.
Poster center sits at 57-60 inches from floor.
No wrinkles or air bubbles visible.
Symmetry in poster placement creates balanced room aesthetics.
Troubleshooting
Issue: Poster Corners Curl Away From Wall
Apply additional adhesive (one extra poster putty ball per curling corner).
Press firmly for 45 seconds.
For persistent curling, place small weight against corner for 2 hours.
Issue: Poster Hangs Crooked After Attachment
For adhesive strips (remove within 1 hour of application, reposition using level).
For poster putty (gently pull bottom corners to adjust, recheck with level).
Proper baseline alignment prevents tilted appearance.
Issue: Adhesive Strips Remove Paint When Poster Removed
Pull strips slowly at 45-degree angle downward.
Hold for 5 seconds between each inch of removal.
Use dental floss to separate stubborn adhesive from wall by sliding behind strip.
Issue: Poster Develops Air Bubbles After Hanging
Pierce bubble edge with pin.
Press air toward hole opening, smooth from center outward with credit card edge.
Understanding graphic design principles helps evaluate poster quality before mounting.
Issue: Frame Feels Unstable on Wall
Locate wall studs using stud finder for frames over 5 pounds.
Install appropriate drywall anchors if studs unavailable at desired location.
Check hanging wire tension (should have 2-inch slack maximum).
Related Tasks
Creating Gallery Walls
How to make a poster becomes relevant when building custom artwork collections.
Multiple poster arrangements require proximity planning and consistent spacing.
Standard poster sizes affect gallery wall layouts and frame selection.
Frame Selection and Protection
How to frame a poster properly protects artwork from moisture and UV damage.
Glass coatings filter harmful light wavelengths that fade ink over time.
How to flatten a poster before framing removes shipping creases and roll marks.
Professional Mounting Techniques
How to mount a poster on foam board creates rigid backing for frameless displays.
Foam board mounting prevents poster sag in large formats (24×36 inches or larger).
How to wrap a poster for storage or gifting protects corners and edges from damage.
Design Considerations
Fonts for posters affect readability at viewing distances of 8-10 feet.
Typography choices impact poster hierarchy and message clarity.
Color theory principles determine poster visibility against different wall colors.
Room lighting affects saturation and hue perception in displayed artwork.
FAQ on How To Hang A Poster
How do you hang a poster without damaging the wall?
Use removable adhesive strips, poster putty, or poster hangers designed for temporary mounting. These options remove cleanly without pulling paint or leaving residue. Avoid permanent adhesives, nails, or staples on rental property walls to preserve your security deposit.
What is the best way to hang a large poster?
Frame large posters (24×36 inches or bigger) with hanging wire secured to wall studs. Alternatively, mount on foam board using spray adhesive, then attach board to wall with heavy-duty removable strips. Large format posters need multiple attachment points to prevent sagging and corner curl.
How high should you hang a poster on a wall?
Position poster center at 57-60 inches from floor to match standard eye-level height. This measurement works for most room types and viewing distances. Adjust 2-3 inches higher in rooms where people typically stand, lower in spaces with primary seating arrangements.
Can you use tape to hang a poster?
Double-sided tape works for lightweight posters under 2 pounds on smooth drywall surfaces. Avoid regular tape (leaves residue and damages poster edges). Painter’s tape offers temporary hold but often fails on textured walls. Mounting tape provides stronger adhesion than standard options for heavier artwork.
How do you hang a poster in a dorm room?
Use poster putty or Command strips approved for temporary mounting. Check housing guidelines before installing any wall attachments. Most dormitories prohibit nails, thumbtacks, or permanent adhesives. Remove all mounting materials carefully before move-out to avoid damage fees and ensure full deposit return.
What can I use instead of a poster frame?
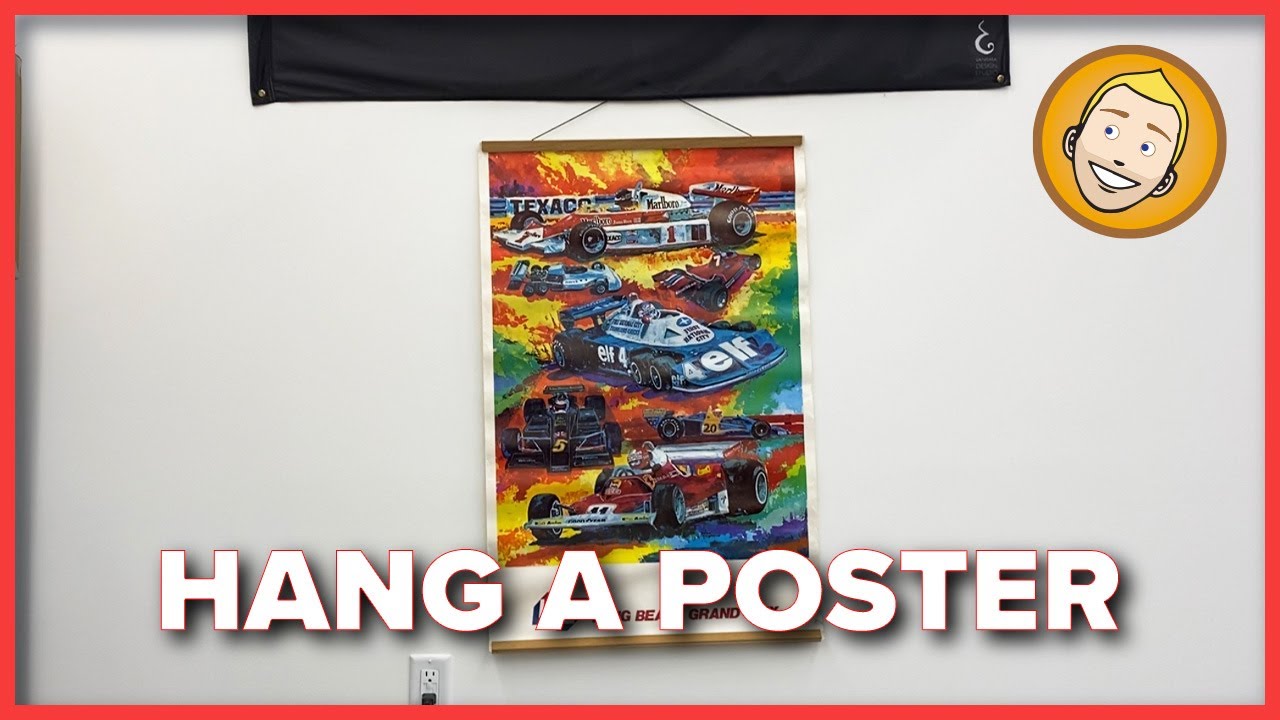
Poster rails (top and bottom magnetic or wooden strips) create frameless displays. Binder clips attached to string provide industrial-style hanging. Washi tape borders add decorative edges without covering artwork. Clipboards offer quick-change mounting for rotating displays in home offices or studios.
How do you keep poster corners from curling?
Apply extra poster putty to curling corners, pressing firmly for 45 seconds. Place books or weights on corners for 2-3 hours before hanging. Store rolled posters with printed side facing outward. Frame posters under glass or acrylic to eliminate curl permanently through compression mounting.
How far apart should posters be hung in a gallery wall?
Space posters 2-3 inches apart for cohesive gallery arrangements. Maintain consistent spacing between all pieces regardless of size variations. Plan entire layout on floor before mounting. Use painter’s tape to mark positions, ensuring proper proximity and balance across the display area.
Can you hang posters on textured walls?
Textured walls require stronger adhesives than smooth surfaces. Use foam mounting squares or heavy-duty removable strips with higher weight ratings. Poster putty often fails on rough textures. Frames with appropriate wall anchors provide most reliable mounting. Test adhesive in inconspicuous corner before full application.
How do you straighten a poster after hanging?
Place 4-inch level on poster edges while adhesive remains workable (within first hour). Gently pull bottom corners to adjust tilt for removable mounting methods. For permanent attachments, remove completely and reposition using fresh adhesive. Mark baseline alignment with light pencil before initial mounting to reduce adjustments.
Conclusion
Mastering how to hang a poster transforms blank walls into personalized spaces without permanent damage or excessive cost.
The mounting method you select depends on wall surface type, poster weight, and whether you need temporary or permanent display options.
Proper measurement and level alignment prevent crooked installations that require time-consuming adjustments.
Understanding adhesive strength ratings, attachment point distribution, and removal techniques protects both your artwork and wall surfaces from unnecessary harm.
Whether you’re creating gallery walls with multiple pieces or displaying a single statement poster, these techniques apply across all poster sizes and frame types.
The principles of emphasis and movement affect how displayed artwork interacts with room layouts.
Taking 15-30 minutes for careful installation ensures years of stable, professional-looking poster displays.

Renowned for his expertise in logo design and visual branding, Bogdan has developed a multitude of logos for various clients.
His skills extend to creating posters, vector illustrations, business cards, and brochures. Additionally, Bogdan's UI kits were featured on marketplaces like Visual Hierarchy and UI8.
He also wrote in the past years on sites like Design Your Way, WebDesignerDepot, WPDean, Designmodo, Speckyboy, Slider Revolution, and more.
- The Windsurf Logo History, Colors, Font, And Meaning - 10 October 2026
- How to Remove Background From Product Photos (No Photoshop) - 10 October 2026
- How Designers can Build a Stronger Online Creative Identity - 9 October 2026

Bogdan Sandu is a seasoned designer who has been designing websites since 2008. Renowned for his expertise in logo design and visual branding, Bogdan has developed a multitude of logos for various clients. His skills extend to creating posters, vector illustrations, business cards, and brochures. Additionally, Bogdan's UI kits were featured on marketplaces like Visual Hierarchy and UI8. He also wrote in the past years on sites like Design Your Way, WebDesignerDepot, WPDean, Designmodo, Speckyboy, Slider Revolution, and more.
You Might Also Like