Mounting a poster on foam board permanently attaches printed material to rigid backing using spray adhesive, creating a flat, self-supporting display piece.
You need this when preparing posters for presentations, creating wall art without frames, or displaying printed graphics at events.
This guide covers how to mount a poster on foam board in 6 steps requiring 20-30 minutes and basic craft skills.
Prerequisites
Before starting your poster mounting project, gather these materials:
Required Materials:
- Foam board (3/16″ or 1/4″ thickness, matching poster dimensions)
- Poster (trimmed to final size)
- Spray adhesive (repositionable type like 3M Super 77 or Elmer’s Craft Bond)
- Utility knife or craft knife
- Metal ruler or straight edge (24″ minimum)
- Self-healing cutting mat
- Microfiber cloth
- Newspaper or drop cloth
Workspace Requirements:
- Clean, flat surface (minimum 2x poster size)
- Well-ventilated area (open windows or outdoor space)
Optional Tools:
- Brayer or squeegee for smoothing
Skill level: Beginner.
Time estimate: 20-30 minutes from workspace preparation to finished display.
Step 1: How Do You Prepare the Workspace and Materials?
Preparing the workspace creates a clean, protected mounting surface that prevents adhesive damage and eliminates debris causing poster bubbles.
Cover your workspace with newspaper extending 12 inches beyond poster edges on all sides.
Place foam board smooth side up on the covered surface.
Check both the poster and foam board surfaces for dust, fingerprints, or debris that could interfere with adhesive bonding.
Wipe surfaces with a clean, dry microfiber cloth if you spot any contaminants.
Why This Matters:
Dust particles or fingerprints trapped between poster and backing create permanent bumps visible on the finished piece.
Spray adhesive needs direct contact with clean surfaces for proper adhesive strength.
Protecting your workspace prevents sticky residue on furniture or floors requiring difficult cleanup later.
Step 2: What Cutting Adjustments Should You Make to the Foam Board?

Cutting foam board to exact poster dimensions ensures professional edges without visible backing extending beyond your print.
Place foam board on your cutting mat to protect the work surface underneath.
Measure your poster dimensions with a metal ruler and record the exact width and height measurements.
Mark the foam board to match poster size exactly (or add 1/8″ margin on all sides if your poster has bleed areas).
Cut foam board using a utility knife pressed against the metal ruler as a guide, making 2-3 passes for clean edges through the core.
Purpose of Precise Cutting:
Foam board larger than your poster creates distracting white borders around the mounted piece.
Undersized backing leaves poster edges unsupported and prone to curling over time.
Clean, straight cuts produce professional results matching standards for poster design and presentation boards.
Multiple shallow passes with the utility knife prevent foam core from tearing or creating ragged edges.
Step 3: How Do You Apply Spray Adhesive to the Foam Board?

Spray adhesive application creates an even, tacky coating that bonds poster material without wrinkles or repositioning problems.
Move to a well-ventilated area with open windows or work outdoors to avoid inhaling adhesive fumes.
Shake the spray adhesive can vigorously for 30 seconds to mix the adhesive compounds properly.
Hold the can 8-10 inches from the foam board surface at a perpendicular angle for even coverage.
Spray in continuous sweeping motion across the board, overlapping each pass by 50% to eliminate gaps in adhesive coverage.
Wait 30-60 seconds for the adhesive to become tacky (check your specific product instructions for exact tack time).
Why Proper Application Matters:
Uneven adhesive coverage causes air pockets between poster and backing that create visible bubbles.
Insufficient tack time leads to poster sliding during placement, ruining your careful alignment.
Correct spray distance prevents wet spots that soak through thin poster paper or create adhesive puddles.
The tacky stage provides temporary repositioning ability before the bond becomes permanent.
Step 4: Where Do You Position the Poster on the Adhesive-Coated Board?
Poster positioning requires precise alignment before contact because repositioning after full adhesion damages both materials.
Hold your poster by opposite corners with the printed side facing down toward the adhesive.
Align the poster’s top edge with the foam board top edge, hovering about 2 inches above the tacky surface.
Lower the poster center first while maintaining tension at both corners to prevent sagging.
Once the center contacts the adhesive, release both corners simultaneously and let the poster settle from center outward.
Critical Positioning Technique:
Corner-first placement traps air under the poster center, creating bubbles impossible to remove without completely re-mounting.
Center-first contact with corner tension allows air to escape naturally toward all four edges.
Hesitating too long after applying adhesive reduces tack and causes weak bonding in sections.
Maintaining poster tension during placement prevents wrinkles from forming as material contacts adhesive.
This technique produces bubble-free mounting matching professional standards for print design work.
Step 5: How Do You Eliminate Air Bubbles and Secure Complete Adhesion?
Smoothing removes trapped air while activating full adhesive bond across the entire mounted surface.
Place a clean cloth or paper over your poster surface to protect the print from scratches.
Press from center outward using a brayer or squeegee with firm, overlapping strokes toward all edges.
Apply consistent pressure across the entire surface, working methodically to push air toward the perimeter.
Inspect for remaining bubbles visible as raised areas or soft spots when pressed lightly.
Fixing Stubborn Bubbles:
Small bubbles (under 1/4″): Use a straight pin to puncture the bubble center, then press air toward the pin hole and smooth with your brayer.
Large bubbles (over 1″): Lift the nearest poster corner while adhesive remains workable, re-spray lightly if needed, then re-position using the center-first technique.
Work quickly since most spray adhesives fully cure within 10-15 minutes of application.
Why Complete Smoothing Matters:
Air bubbles create pressure points causing eventual poster delamination from the foam core backing.
Incomplete adhesion in sections allows moisture infiltration that warps both poster and backing over time.
Proper smoothing ensures uniform surface texture critical for professional display quality.
The process activates adhesive bond strength, transforming tacky coating into permanent mount.
Step 6: What Post-Mounting Trimming Steps Perfect the Edges?
Edge trimming removes excess poster material and smooths foam board edges for clean, professional presentation without frayed corners.
Place your mounted poster face-up on the cutting mat to protect both the print surface and your work area.
Run a utility knife blade along foam board edges, cutting flush against the board perimeter in single continuous strokes.
Hold the knife at 45-degree angle for beveled edges (optional but creates polished look).
Trimming Technique:
Make one continuous cut per edge rather than multiple passes that create ragged, uneven edges.
Apply firm, consistent pressure while moving the blade smoothly along the metal ruler edge.
Replace dull blades before trimming since fresh blades produce cleaner cuts through poster paper.
Why Edge Finishing Matters:
Overhanging poster material collects dust, peels away from foam core, and appears unprofessional in presentations.
Flush edges create seamless appearance where poster and backing become unified display piece.
Clean trimming prevents moisture from seeping between poster layers at exposed edges.
Professional edge finishing elevates DIY mounting to match commercial poster sizes and display standards.
Verification
Check mounted poster quality by holding it at eye level against natural light.
The surface should appear completely flat without visible bubbles, wrinkles, or gaps between poster and board.
Press gently across the entire surface, confirming uniform adhesion without soft spots indicating weak bonding.
Edges should align perfectly with foam board perimeter without overhanging poster material or exposed backing.
Quality Standards:
Tilt the mounted piece at different angles under light to spot subtle surface imperfections.
Run your palm lightly across the surface feeling for any raised areas or texture changes.
Inspect corners closely since these areas most commonly show incomplete adhesion or trapped air.
Professional mounting produces rigid, flat display maintaining its shape when held horizontally by one edge.
Troubleshooting
Large Air Bubble After Mounting
Issue: Bubble appears after mounting and cannot be smoothed out with brayer.
Solution: Use a straight pin to puncture bubble center, press air toward pin hole, smooth area firmly with brayer.
For bubbles larger than 1 inch: lift nearest poster corner, re-spray adhesive lightly on that section, re-position using center-first technique and smooth immediately.
Work within 2-3 minutes while adhesive remains tacky enough for repositioning.
Poster Wrinkles or Folds During Placement
Issue: Wrinkles or folds form when lowering poster onto adhesive-coated board.
Solution: Immediately lift poster from foam board while adhesive remains tacky.
Re-position using center-first technique with increased corner tension to prevent material sagging.
If adhesive has dried, apply fresh light coat and wait proper tack time before attempting again.
Adhesive Creates Wet Spots Through Paper
Issue: Spray adhesive creates visible wet spots showing through thin poster paper.
Solution: This indicates over-application of adhesive spray.
Allow 5 minutes for adhesive solvents to evaporate fully before evaluating damage.
For future mounting: reduce spray distance to 10-12 inches, use lighter and faster passes, consider light-tack adhesive for papers under 20lb weight.
Wet spots typically dry clear without permanent damage unless paper is extremely thin (under 16lb).
Poster Slides on Board After Placement
Issue: Poster slides or shifts position after being placed on foam board.
Solution: Adhesive was not sufficiently tacky when poster contacted surface.
Remove poster carefully, allow existing adhesive to dry 10 minutes, apply second light coat, wait full recommended tack time (check product label).
Test tack by touching adhesive lightly with knuckle (should feel sticky but not wet).
Foam Board Warps After Mounting
Issue: Mounted poster develops curve or warp days after completion.
Solution: Moisture imbalance between poster and backing causes warping.
Store mounted pieces flat with weight distributed across entire surface for 24 hours.
For severe warping: place mounted poster face-down, mist backing lightly with water, place under even weight overnight to allow moisture rebalancing.
Future prevention: use thicker foam board (1/4″ minimum) for posters larger than 18×24 inches.
Edges Peel After Trimming
Issue: Poster edges lift away from foam board within hours or days of mounting.
Solution: Insufficient adhesive coverage at edges during initial spray application.
Apply thin line of craft glue under lifted edges using toothpick, press firmly, weight edges for 30 minutes.
For extensive peeling: remount poster using proper adhesive coverage extending to all edges.
Related Processes
After mounting posters on foam board, add hanging hardware for wall display.
Sawtooth hangers (for pieces under 2 pounds) attach to foam board backing with included nails or adhesive strips.
Adhesive mounting strips work for temporary wall hanging without damaging paint or leaving residue.
Sealing for Durability:
Outdoor or high-humidity display requires protective sealing over mounted poster surface.
Apply clear acrylic spray in 2-3 light coats, allowing 15 minutes drying time between applications.
Sealing prevents moisture damage and UV fading for pieces displayed long-term.
Batch Processing:
Multiple poster mounting projects benefit from assembly-line workflow reducing total project time by 40%.
Cut all foam boards first, spray adhesive on all boards in sequence, mount posters consecutively, trim edges in final batch.
Create foam board cutting templates for frequently used poster sizes to eliminate repeated measuring.
Alternative Mounting Methods:
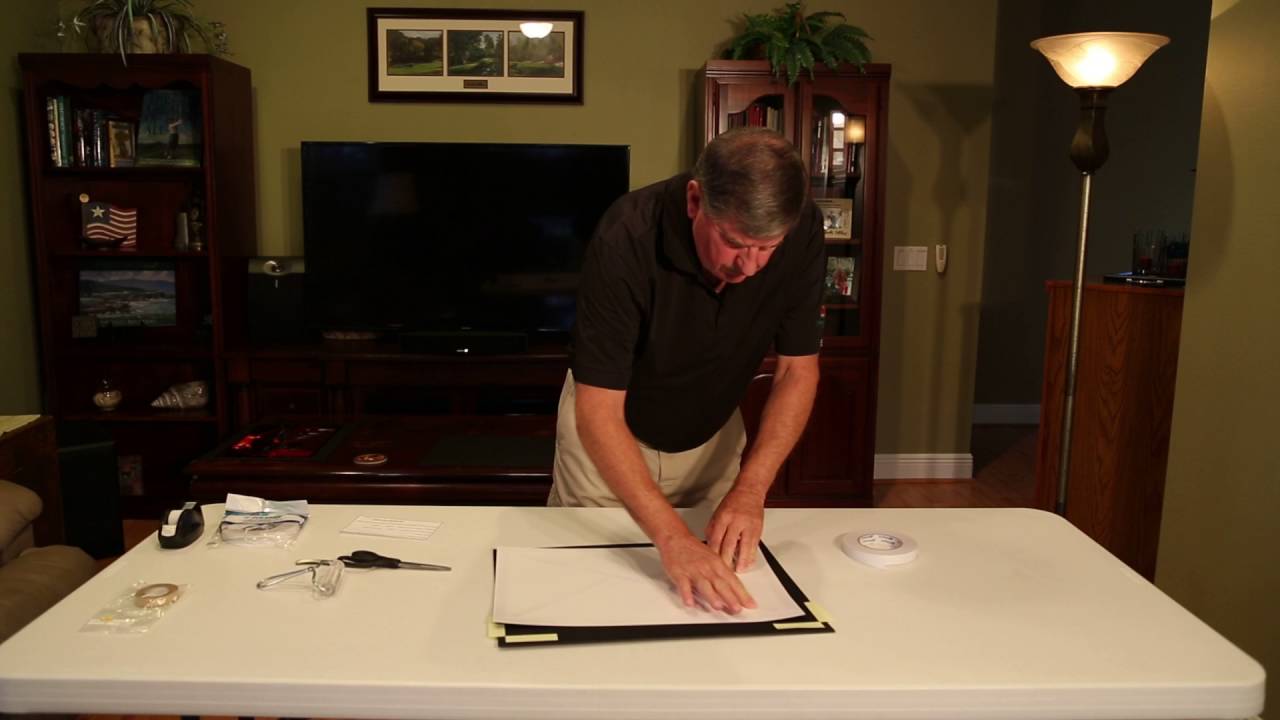
Double-sided mounting tape provides removable mounting option requiring 15 minutes less time than spray adhesive.
Tape mounting offers lower adhesion strength unsuitable for posters exceeding 18×24 inches or pieces requiring permanent installation.
Heat-activated mounting film produces archival-quality results for valuable prints but requires specialized heat press equipment.
Display Enhancement:
How to frame a poster adds protective glass and decorative borders around foam-mounted pieces for gallery presentation.
How to hang a poster covers various hanging methods including wire systems, clips, and brackets for different wall types.
Foam board mounting serves as stable backing inside frames, eliminating need for additional matting in many cases.
Design Considerations:
Before mounting, ensure poster design follows proper graphic design principles including appropriate visual hierarchy and balance.
Check that fonts for posters remain readable at intended viewing distance after mounting.
Mounted pieces become permanent, so verify color theory and contrast work in actual display environment before committing to adhesive mounting.
FAQ on How To Mount A Poster On Foam Board
Can you use glue stick instead of spray adhesive to mount a poster?
Glue stick creates uneven adhesive coverage causing bubbles and wrinkles across the poster surface. Spray adhesive provides uniform coating necessary for smooth, professional mounting. Stick glue also dries too slowly, allowing poster material to shift during application and compromising final alignment.
How long does spray adhesive take to dry on foam board?
Spray adhesive becomes tacky in 30-60 seconds and reaches full bond strength within 24 hours. You can handle mounted posters after 15 minutes, but avoid applying pressure or hanging for first hour. Complete curing requires overnight drying before adding protective coatings or frame mounting.
What foam board thickness works best for poster mounting?
3/16-inch foam board suits posters up to 18×24 inches. 1/4-inch thickness handles larger posters up to 24×36 inches without warping. Thicker boards (1/2-inch) provide rigidity for oversized prints exceeding 36 inches but increase material costs and storage space requirements significantly.
Can you remove a poster from foam board after mounting?
Permanent spray adhesive creates irreversible bonds between poster and foam core backing. Removal attempts tear poster paper and damage printed surface. Repositionable adhesive allows careful removal within first 10 minutes before full cure, but bond weakens with each repositioning attempt made.
Does mounting on foam board damage the poster?
Proper mounting technique preserves poster condition indefinitely when using acid-free foam board and archival spray adhesive. Standard foam core contains acids causing paper yellowing over decades. Heat, humidity, and direct sunlight degrade mounted posters faster than mounting process itself damages material.
What’s the difference between foam board and foam core?
Foam board and foam core describe identical products featuring polystyrene foam center sandwiched between paper or plastic facings. “Foam core” is the trademarked brand name, while “foam board” represents the generic product category used interchangeably in craft and presentation material contexts.
Can you mount a rolled poster without flattening it first?
Rolled posters require flattening before foam board mounting to prevent curling and incomplete adhesion. Place poster face-down, weight edges with books for 24-48 hours until completely flat. Attempting to mount curled posters creates air pockets and wrinkles impossible to remove afterward.
How do you prevent foam board from warping after mounting?
Use foam board matching poster dimensions to prevent moisture imbalance causing warping. Store mounted pieces flat in climate-controlled environments avoiding temperature extremes. Apply spray adhesive evenly across entire surface since concentrated wet areas create differential drying rates producing bowed boards.
What spray adhesive works best for poster mounting?
3M Super 77 provides strong permanent bonds for most poster materials. Elmer’s Craft Bond offers repositionable tack suitable for beginners. Professional archivists prefer acid-free mounting adhesive preventing long-term yellowing. Light-tack formulas work better for thin poster papers under 20lb weight specifications.
Can you mount laminated posters on foam board?
Laminated posters mount successfully using stronger permanent adhesive formulas since plastic coating resists standard spray adhesive penetration. Rough laminated surface lightly with fine sandpaper before spraying to improve adhesive bonding. Wait 90 seconds for tack development instead of standard 30-60 second timing.
Conclusion
Mastering how to mount a poster on foam board transforms printed graphics into professional, self-supporting displays ready for presentations, events, or frameless wall art.
The mounting process requires basic craft supplies, clean workspace preparation, and careful attention to adhesive application timing for bubble-free results.
Proper poster alignment and center-first placement technique prevents wrinkles while ensuring uniform adhesion across the entire mounted surface.
Edge trimming creates polished, professional finish matching commercial display standards. Store mounted pieces flat in climate-controlled environments to prevent warping or moisture damage over time.
Whether preparing presentation boards, creating gallery-quality wall displays, or producing event signage, foam board mounting delivers rigid backing and professional presentation without expensive framing costs.
Practice improves technique, and batch processing multiple posters reduces total project time significantly.

Renowned for his expertise in logo design and visual branding, Bogdan has developed a multitude of logos for various clients.
His skills extend to creating posters, vector illustrations, business cards, and brochures. Additionally, Bogdan's UI kits were featured on marketplaces like Visual Hierarchy and UI8.
He also wrote in the past years on sites like Design Your Way, WebDesignerDepot, WPDean, Designmodo, Speckyboy, Slider Revolution, and more.
- Canva vs PowerPoint: Which Is Better for Presentations? - 22 September 2026
- How to Install Fonts on Mac (Step-by-Step Guide) - 20 September 2026
- From Mockup to Code: How AI-Augmented Development Speeds Up the Design Handoff - 19 September 2026

Bogdan Sandu is a seasoned designer who has been designing websites since 2008. Renowned for his expertise in logo design and visual branding, Bogdan has developed a multitude of logos for various clients. His skills extend to creating posters, vector illustrations, business cards, and brochures. Additionally, Bogdan's UI kits were featured on marketplaces like Visual Hierarchy and UI8. He also wrote in the past years on sites like Design Your Way, WebDesignerDepot, WPDean, Designmodo, Speckyboy, Slider Revolution, and more.
You Might Also Like