


A well-designed flyer still outperforms most digital ads. 53% of consumers find print flyers more credible than online advertising (WinSavvy, 2024).
Knowing how to make a flyer in Canva gives you a fast, practical path to professional-looking print and digital flyers, no design background needed.
This guide covers everything from picking a flyer template and customizing your layout, to editing text, adding images, setting up your brand kit, and downloading a print-ready PDF file with the correct bleed settings.
By the end, you’ll have a complete, export-ready flyer built for either print distribution or digital sharing.
What Is a Canva Flyer?
A Canva flyer is a digital or print-ready promotional document built inside Canva’s drag-and-drop editor. It can be downloaded as a finished file, ordered as a physical print through Canva Print, or shared digitally as a link or social post.
Canva reached 260 million monthly active users in 2025 and has had over 30 billion designs created on the platform (Canva, 2025). That scale shows just how normalized browser-based flyer design has become.
If you’re new to what Canva is as a platform, the short version: it’s a web and mobile design tool aimed at non-designers, with a library of templates, stock images, fonts, and brand tools built in.
Free vs. Pro: What Actually Differs
Canva Free gives access to over 1.6 million templates and 5GB of cloud storage (Style Factory Productions, 2025). That’s genuinely a lot for someone making an occasional event or business flyer.
Canva Pro runs at $12.99/month and unlocks premium templates, full Brand Kit functionality, the one-click resize tool, background removal, and 100GB of storage (PostermyWall, 2025). For regular flyer creators, the resize tool alone saves a lot of time.
| Feature | Canva Free | Canva Pro |
|---|---|---|
| Templates | 1.6M+ (free only) | All templates including premium |
| Brand Kit | Colors only | Colors, fonts, logos, brand controls |
| Resize tool | Not available | One-click resize across formats |
| Storage | 5GB | 100GB |
| Background removal | Not available | Included |
Output Formats for Canva Flyers
Canva exports flyers in 4 primary formats: PNG, JPG, PDF Standard, and PDF Print. The right choice depends entirely on where the flyer ends up.
- PNG: Digital sharing, social media posts, email
- JPG: Web use, lightweight sharing, email attachments
- PDF Standard: General digital distribution, presentations
- PDF Print: Commercial printing with bleed and crop marks
Default flyer canvas size in Canva is 8.5 x 11 inches (US Letter). Custom dimensions are available under “Custom Size” during canvas setup.
—
What Do You Need Before Starting a Flyer in Canva?

Before touching the editor, the two decisions that matter most are distribution format (print vs. digital) and flyer purpose (event, product, service, nonprofit). These two choices determine canvas size, export format, and which template categories to filter.
78% of small businesses use flyers as part of their marketing strategy (WinSavvy, 2024). Getting setup right before design starts is what separates a usable flyer from one that needs to be redone twice.
Account and Access Checklist
Canva Free works fine for most flyer projects. Canva Pro is worth it if you’re managing brand assets across multiple flyers or need the resize tool.
- A Canva account (free at canva.com)
- Canva Pro if you need Brand Kit, premium templates, or one-click resize
- Your logo file in PNG or SVG format
- Brand hex color codes if you have them
- Any photos you plan to use, ideally at 300 DPI resolution for print
Print vs. Digital: Why the Decision Comes First
Print flyers need a minimum of 300 DPI image resolution, PDF Print export format, and a 0.125-inch bleed on all four sides (Figma Resource Library, 2024).
Digital flyers are typically exported as PNG or JPG at 72-150 DPI. Bleed settings don’t apply. Canvas size may shift depending on where the flyer gets posted (email, Instagram, website).
Deciding this upfront stops you from building a flyer at the wrong size and scrambling to fix it before a print deadline. I’ve seen this happen enough times to know it’s the most skippable step that causes the most rework.
—
How to Open a Flyer Template in Canva

Opening a flyer template in Canva takes under 60 seconds. Type “flyer” into the search bar on the Canva homepage, and the results page returns thousands of categorized templates instantly.
Finding the Right Template
Canva’s template filter system lets you narrow by category, style, color scheme, and free vs. Pro status. Using filters before browsing saves significant time on larger projects.
Template categories relevant to flyer design include:
- Event flyers (concerts, fundraisers, community events)
- Business flyers (promotions, service announcements, grand openings)
- Nonprofit and charity flyers
- Real estate flyers
- Social media flyer formats (1080 x 1080px square)
85% of Fortune 500 companies use Canva (Cropink, 2024). Most of them are not starting from a blank canvas. Neither should you.
Starting from a Blank Canvas
If no template fits, click “Custom Size” from the Canva homepage, enter your dimensions, and the blank editor opens. Standard US flyer: 8.5 x 11 in. Half-page flyer: 5.5 x 8.5 in. Social media flyer: 1080 x 1080px.
The Canva Editor Workspace
Once a template loads, the Canva editor opens with 3 main zones.
| Zone | Location | What It Contains |
|---|---|---|
| Left sidebar | Left panel | Templates, Elements, Uploads, Text, Apps, Brand Kit |
| Top toolbar | Above canvas | Font, size, color, alignment, position controls |
| Canvas area | Center | Active design workspace, drag-and-drop zone |
—
How to Customize the Flyer Layout in Canva

Layout customization is where most people spend the most time and make the most mistakes. The goal is to adjust the template structure before adding your actual content, not after.
Good alignment and balance are the two layout principles that separate a professional-looking flyer from one that looks rushed. Canva’s built-in guides help with both.
Moving and Removing Elements
Click any element to select it. Drag to reposition. Use the delete key to remove. Most flyer templates include placeholder elements you won’t need.
Elements worth removing immediately on most templates: decorative dividers that don’t match your brand, generic icons, and placeholder images that are too small for print at your intended size.
Using Canva’s Alignment Tools
Canva’s “Position” panel (top toolbar, “Position” button) gives precise control over element placement. Options include center on page, align left/right/top/bottom, and distribute spacing evenly.
Smart guides appear automatically as you drag elements, showing alignment relative to other objects on the canvas. These are particularly useful when setting up grid systems across multiple layout zones.
Layer Order and Locking
Right-click any element to access layer controls: Bring Forward, Send Backward, Bring to Front, Send to Back.
Lock background elements using the lock icon in the top toolbar after selecting them. This prevents accidental nudges when placing text or images on top. It’s a small habit that saves real frustration on complex flyer layouts.
Changing the Background
Click the canvas background (not an element) to open background color options in the top toolbar. Canva supports solid colors, gradients, and background images.
For color selection, entering a hex code directly in the color picker gives exact brand color matching. RGB and CMYK values matter here if you’re preparing a print flyer and need accurate color output at the printer.
—
How to Edit Text on a Canva Flyer

Double-click any text box to enter edit mode. The top toolbar updates immediately to show font family, size, weight, color, alignment, letter spacing, and line height controls.
53% of consumers consider flyers more credible than online ads (WinSavvy, 2024). Typography is one of the main reasons for that perception difference. A poorly set flyer headline undercuts the message before it’s even read.
How to Add and Style a Headline
Headline font size for a standard 8.5 x 11 flyer: typically 48-72pt, depending on headline length. Shorter headlines go bigger. Anything under 36pt risks getting lost against competing visual elements.
For typography choices on flyers, the typographic hierarchy should be obvious at a glance: headline reads first, subheading reads second, body copy reads third. If someone has to work to figure out what to read next, the layout needs adjusting.
Use fonts built for flyers rather than defaults. Canva suggests font pairings natively, but understanding how to pair fonts yourself gives more control over the result.
How to Adjust Font Size for Print Readability
Body copy on a print flyer should be a minimum of 9pt to remain legible. Most designers use 10-12pt for body text on US Letter flyers.
Check leading (line spacing) and tracking (character spacing) if your text looks too dense or too spread out. Both controls are available in Canva’s text toolbar under the spacing options.
For contrast between text and background, the WCAG minimum ratio is 4.5:1 for normal-weight body text. Canva doesn’t have a built-in contrast checker, but you can use the color contrast checker tool to verify before downloading.
Adding New Text Boxes
Open the “Text” tab in the left sidebar to insert a new text element. Options include heading, subheading, and body text presets, or a blank text box you can style from scratch.
—
How to Add Images and Graphics to a Canva Flyer

Images on a flyer work harder than the copy does. 64% of consumers have visited a store after receiving a flyer (WinSavvy, 2024). A poorly chosen or low-resolution image breaks that effect immediately.
Uploading Your Own Images
Click the “Uploads” tab in the left sidebar. Supported upload formats include JPEG, PNG, SVG, HEIC, and MP4 for video flyers.
For print flyers, uploaded photos need to be at minimum 300 DPI at their intended print size (Figma Resource Library, 2024). Web-sourced images are typically 72 DPI and will print blurry. This is the single most common print quality error on Canva flyers.
Canva flags low-resolution images with a warning icon on the canvas. If you see it, the image needs replacing before downloading for print.
Using Canva’s Stock Library
The “Elements” and “Photos” tabs in the left sidebar give access to Canva’s built-in stock library. Filter results by free vs. Pro assets using the toggle at the top of the panel.
Stock photo quality in Canva is solid for most flyer use cases. The free library is large enough for most event and business flyers. Pro unlocks a significantly wider selection of premium photography, particularly for lifestyle and editorial styles.
Canva’s image library includes vector graphics and bitmap-based photos. Vectors scale cleanly at any size. Bitmaps need to be the correct resolution before you start designing, not after.
Replacing Template Images
Drag your own image from the Uploads tab directly onto an existing template photo placeholder. Canva snaps it in and fits it to the frame automatically.
To reposition the image inside the frame, double-click to enter crop mode, then drag the image to adjust. The white handles control the crop boundary.
Adjusting Images with the Edit Panel
Select an image and click “Edit Image” in the top toolbar to open the adjustment panel. Controls include brightness, contrast, saturation, tint, blur, and a range of preset filters.
For brand consistency across multiple flyer images, applying the same filter or brightness setting keeps the color palette cohesive across the design. Starbucks and Zoom, both Fortune 500 Canva users, apply consistent color treatment to all their visual assets for exactly this reason (Cropink, 2024).
—
How to Use Canva Brand Kit on a Flyer

Canva’s Brand Kit centralizes brand colors, fonts, and logos into a single panel accessible inside any design. It’s a Canva Pro feature. On Canva Free, you can save a color palette but can’t store fonts or logos in the same way.
For anyone making more than a handful of flyers, Brand Kit removes the need to manually re-enter hex codes and re-upload logos every time. That alone makes it worth the Pro upgrade if you’re doing consistent branded work.
Setting Up Brand Kit
Access Brand Kit from the left sidebar inside the Canva editor, or from the Canva homepage under “Brand Kit” in the left navigation.
Setup requires 3 steps:
- Upload your logo files (PNG with transparent background recommended)
- Add brand colors using hex codes or by clicking the color picker
- Set brand fonts, including primary (headline) and secondary (body copy) typefaces
Once configured, the Brand Kit palette appears in every color picker inside Canva. One click applies your brand colors to any selected element, no manual hex entry needed.
Applying Brand Kit to a Flyer
Brand Kit colors show up at the top of the color picker under a “Your Brand Colors” section. Brand fonts appear as the top options in the font dropdown.
For teams, Brand Kit also supports brand controls and element locking. This means specific brand elements (logo placement, color zones) can be locked so team members can’t accidentally change them. It’s a feature that brand guidelines documents normally try to enforce manually. Brand Kit enforces it structurally.
Brand Kit Workaround for Canva Free
Canva Free allows saving up to 3 color palettes. Create a palette with your brand hex codes and name it clearly. It won’t store fonts or logos, but it cuts out the most repetitive part of color matching on every new flyer.
For fonts on Free, upload them via the “Uploads” tab under “Upload a font.” Canva Free supports custom font uploads, which is one of the less-known free tier features.
How to Add QR Codes and Links to a Canva Flyer
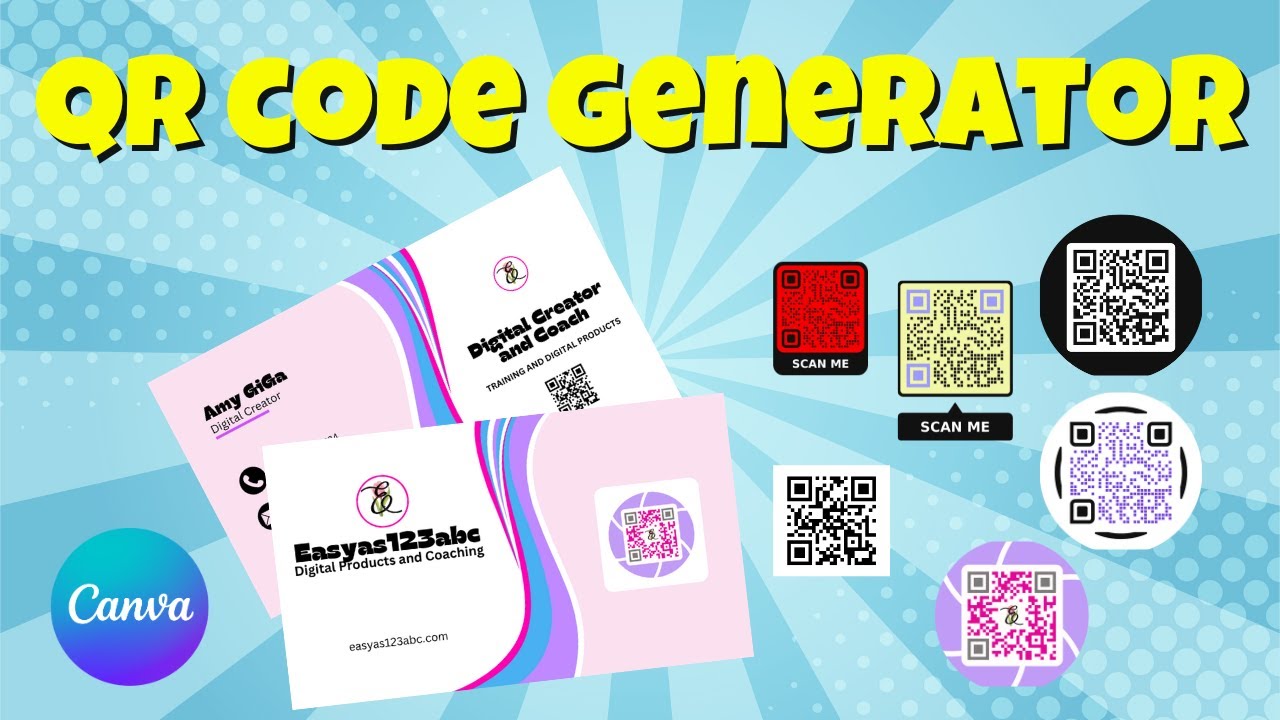
QR codes on flyers bridge print and digital in a single scan. Marketing and advertising saw a 323% rise in QR code scans in 2023 alone (QR Code Chimp, 2024). Adding one to a flyer is no longer optional for most campaigns.
Canva has a built-in QR code generator inside the Apps tab. No third-party tool needed for basic static codes.
Using Canva’s Built-In QR Code Generator
Open the “Apps” tab in the left sidebar and search “QR Code.” Select the tool, enter your destination URL, and Canva generates the code as a design element you can drag directly onto the canvas.
45% of US consumers report using QR codes from marketing or advertising materials, according to a study published by The Drum. That number makes the placement decision worth thinking through carefully.
- Minimum print size for reliable scanning: 1 x 1 inch
- Keep at least 4 pixels of white margin around the code
- Avoid placing the QR code over busy background patterns
- Test the scan with multiple devices before downloading for print
Hyperlinking Text and Buttons for Digital Flyers
Hyperlinks work only in digital PDF flyers, not in printed versions. Select any text element or button shape, then click the chain-link icon in the top toolbar to add a URL.
This makes Canva digital flyers functional for email campaigns, website embeds, and direct message distribution. Print flyers need a QR code instead to send people online.
Canva QR Code Limitations to Know
Canva’s built-in QR generator creates static codes only. Static means the destination URL is fixed and cannot be changed after the flyer is printed.
For campaigns that need scan tracking, analytics, or the ability to update the destination link post-print, a dedicated tool like Bitly or QR TIGER is the better choice. Canva is excellent for quick one-off use. Not built for campaign management at scale (Scanova, 2024).
—
How to Resize a Canva Flyer for Different Formats

One flyer design rarely fits one format. A standard US Letter flyer needs to become a half-page handout, a social media square, and an email header. Canva handles this differently depending on whether you have Free or Pro.
Using the Canva Pro Resize Tool
Canva Pro’s one-click resize tool duplicates the design and scales it to a new canvas size automatically. Access it from the top toolbar via the “Resize” button.
| Format | Dimensions | Best Use |
|---|---|---|
| US Letter flyer | 8.5 × 11 in | Handouts, door drops, print |
| Half-page flyer | 5.5 × 8.5 in | Inserts, mailers, counter display |
| A4 flyer | 210 × 297 mm | International print distribution |
| Social media square | 1080 × 1080 px | Instagram, Facebook post |
After resizing, always check for text overflow and element misalignment. The resize tool scales the canvas, not necessarily the design logic. A headline that fits a Letter-size canvas will almost always need manual adjustment on a smaller format.
Resizing Without Canva Pro
Canva Free doesn’t include the resize tool. The workaround: create a new blank canvas at the target dimensions, then copy and paste elements from the original design into it.
It takes more time. But if you’re only resizing occasionally, it gets the job done without upgrading. The PX to Inches converter helps when you need to cross-check pixel dimensions against physical print sizes before setting up the new canvas.
Print Bleed and Safe Zones for Resized Flyers
Print flyers need a 3mm bleed on all sides (equivalent to 0.125 inches), added to your canvas size before designing (Aspect Printing, 2026). An A5 flyer at 148 x 210mm should be set up as 154 x 216mm.
Keep all critical text and logos at least 5mm inside the trim edge. Canva’s “Show Print Bleed” view in File settings displays a dotted line showing exactly where the paper will be cut. Elements that cross that line will be trimmed off in production (DocuCopies, 2024).
—
How to Download a Canva Flyer
Download settings are where most Canva flyers fail before they reach a printer or inbox. The wrong format, missing bleed, or an unflattened PDF are three problems that show up after the damage is done.
Click “Share” in the top right, then “Download” to open the export panel. File format is the first decision.
Choosing the Right File Format
PDF Print is the correct format for any flyer going to a commercial printer. It embeds fonts, preserves vector elements, and supports crop marks and bleed. PNG and JPG are for digital use only.
- PDF Print: commercial printing, professional output, includes bleed option
- PNG: digital sharing, social media, email, web
- JPG: lightweight web use, email attachments with smaller file size
- SVG: scalable export for logo-heavy designs, requires Canva Pro
Most web graphics default to 72 DPI. Printing a 72 DPI image at standard flyer size forces the printer to stretch limited dots over a large area, causing a blocky, distorted result (Chilli Printing, 2025). PDF Print avoids this entirely by exporting at full document resolution.
Enabling Crop Marks and Bleed on Export
After selecting PDF Print, tick the “Crop marks and bleed” checkbox before downloading. This adds trim lines your printer uses to cut the job accurately and includes the bleed area outside the trim boundary.
Canva automatically applies a 0.125-inch (3mm) bleed, which meets the standard requirement for most commercial print products including flyers and brochures (Little Rock Printing, 2025).
Using Flatten PDF for Print Submissions
Canva Pro includes a “Flatten PDF” option in the download panel. Enabling it merges all layers into a single flat image layer, reducing file complexity before sending to a printer.
Not every printer requires a flattened PDF. Check with your print provider first. For Canva Print orders placed directly through Canva, flattening is handled automatically during their pre-press process.
—
How to Share or Print a Canva Flyer Directly

Once the flyer is finished, Canva offers 3 distribution paths: sharing digitally, ordering physical prints through Canva Print, or exporting to a connected cloud service for team distribution.
Sharing a Flyer Digitally from Canva
Click “Share” in the top toolbar to access digital distribution options.
Available sharing methods:
- Shareable Canva link (view-only or edit access)
- Direct social media post (Instagram, Facebook, LinkedIn, Pinterest)
- Email invite to collaborators inside Canva
- Export to Google Drive or Dropbox via Canva integrations
71% of people who receive a flyer take action based on the content (WinSavvy, 2024). Digital sharing extends that reach to audiences you can’t physically hand a flyer to.
Ordering Physical Prints Through Canva Print
Canva Print lets you order physical flyers without leaving the platform. Available in the US, UK, Australia, and select markets. Access it from the “Share” menu by selecting “Print with Canva.”
Paper stock options for Canva Print flyers:
- Standard: everyday weight, budget option
- Premium: heavier stock, sharper color reproduction
- Recycled matte: uncoated texture, eco-friendly positioning
Standard delivery runs 5-8 business days in most markets. Expedited options are available at additional cost. For a real-world benchmark: a run of 200 save-the-dates through Canva Print on premium matte stock costs approximately $148 including envelopes, based on user-reported pricing (TikTok community reviews, 2024).
Distributing via Google Drive or Team Channels
Canva connects directly to Google Drive and Dropbox from the Share panel. One click exports the finished flyer to a shared folder, skipping the download-and-upload workflow entirely.
For teams using Canva for Teams (Canva’s business tier), completed flyer designs can be pushed to team folders with controlled view and edit permissions. It keeps version control clean when multiple people are working across a campaign’s print assets.
—
What Are Common Mistakes When Making a Flyer in Canva?
Most flyer problems are avoidable. They show up at the printer, in the inbox, or the moment someone picks up the flyer and can’t find the key information. The 5 mistakes below account for the majority of flyer failures.
Using Low-Resolution Images for Print
The industry standard for print-ready flyers is 300 DPI minimum at the intended print size (Figma, 2024). Web images default to 72 DPI. Printing them at US Letter size produces blurry, pixelated output that reflects badly on the brand.
Canva flags low-resolution uploads with a warning icon on the canvas. If you see it, replace the image before downloading for print. Don’t assume it will look better on paper than it does on screen.
Ignoring the Text Safe Zone
Critical text and logos placed within 5mm of the trim edge risk being cut off during printing. This is a non-negotiable technical requirement, not a stylistic suggestion (Aspect Printing, 2026).
Enable View Settings > Show Print Bleed in Canva before finalizing the layout. The dotted line that appears marks the trim boundary. Nothing important should sit between that line and the canvas edge.
Using Too Many Fonts
Using more than 3 font families on a single flyer breaks visual hierarchy and reads as unprofessional. Most effective flyer designs use 2 fonts: one for headlines, one for body copy.
Understanding how font psychology affects perception matters here. A playful script font in the headline of a law firm’s open day flyer sends the wrong signal. A heavy slab serif font on a children’s event flyer does the same.
Poor Color Contrast Between Text and Background
The WCAG minimum contrast ratio for normal-weight body text is 4.5:1. Most flyers with light-colored text on light backgrounds fail this threshold and become difficult to read in print, where screen brightness isn’t compensating for the low contrast.
This applies directly to color theory decisions in flyer design. A complementary color scheme produces natural contrast between text and background. Analogous colors look cohesive but can collapse contrast if chosen carelessly. Use the color contrast checker before finalizing any color pair for text.
Downloading as PNG Instead of PDF Print
PNG is a pixel-based format with no bleed, no crop marks, and no embedded font data. Sending a PNG to a commercial printer is the fastest way to get a job back with white edges and missing bleed (DesignWiz, 2025).
PDF Print is the correct format for every flyer destined for physical output. Always tick “Crop marks and bleed” before downloading. That single checkbox is what separates a print-ready file from a file that needs to be redone.
Also worth knowing: if your flyer uses non-standard or custom fonts, PDF Print embeds them into the file. PNG does not. A printer without your font installed won’t be able to render the design correctly without the embedded data that PDF provides.
FAQ on How To Make A Flyer In Canva
Can I make a flyer in Canva for free?
Yes. Canva Free gives access to over 1.6 million templates, the drag-and-drop editor, and basic image uploads. Some premium templates and stock assets require Canva Pro at $12.99/month, but most flyer creation tasks work on the free plan.
What size should a Canva flyer be?
The default flyer canvas is 8.5 x 11 inches (US Letter). Half-page flyers use 5.5 x 8.5 inches. For social media, use 1080 x 1080px. For print, always add a 3mm bleed on all sides when setting up your custom canvas dimensions.
How do I download a Canva flyer for printing?
Click Share, then Download. Select PDF Print as the file format, then tick “Crop marks and bleed” before downloading. This is the correct export format for any flyer going to a commercial printer or Canva Print.
What is the difference between PDF Print and PDF Standard in Canva?
PDF Print includes bleed settings, embedded fonts, and crop marks. PDF Standard is for digital distribution only. Always use PDF Print for physical flyers. Sending PDF Standard to a print shop risks white edges and missing bleed on the finished product.
Can I use my own fonts and brand colors in Canva?
Yes. Canva Free supports custom font uploads via the Uploads tab. Canva Pro adds the full Brand Kit, which stores logos, brand hex colors, and font pairings for instant one-click application across every flyer design you create.
How do I add a QR code to a Canva flyer?
Open the Apps tab in the left sidebar and search “QR Code.” Enter your destination URL, generate the code, and drag it onto the canvas. Minimum print size for reliable scanning is 1 x 1 inch. Test with multiple devices before downloading.
How do I resize a flyer in Canva?
Canva Pro users click the “Resize” button in the top toolbar, enter new dimensions, and Canva duplicates the design at the new size. On Canva Free, create a blank canvas at the target size and copy-paste elements from the original design manually.
What image resolution do I need for a print flyer in Canva?
Uploaded images need a minimum of 300 DPI at their intended print size. Web images default to 72 DPI and will print blurry. Canva flags low-resolution uploads with a warning icon on the canvas. Replace any flagged image before downloading for print.
Can I order printed flyers directly through Canva?
Yes. Canva Print lets you order physical flyers from the Share menu without leaving the platform. Available in the US, UK, Australia, and select markets. Paper options include standard, premium, and recycled matte. Standard delivery runs 5 to 8 business days.
How many fonts should I use on a Canva flyer?
Use a maximum of 2 to 3 fonts per flyer. One for headlines, one for body copy, and optionally one accent font. More than three breaks visual hierarchy and reads as unprofessional. Canva’s font pairing suggestions help narrow down combinations that work together.
Conclusion
This conclusion is for an article presenting a full walkthrough of the flyer creation process in Canva, from template selection to print-ready PDF export.
The steps covered here handle everything that matters: canvas setup, layout customization, image resolution, Brand Kit consistency, QR code placement, bleed settings, and file format selection.
Get those technical details right and the drag-and-drop design process becomes straightforward.
Whether you’re building an event flyer, a business promotion, or a nonprofit handout, Canva’s template library and export tools give you everything needed for both digital sharing and commercial printing.
The biggest gains come from decisions made before you start designing: choosing the right canvas size, gathering brand assets, and deciding between print and digital distribution upfront.

Renowned for his expertise in logo design and visual branding, Bogdan has developed a multitude of logos for various clients.
His skills extend to creating posters, vector illustrations, business cards, and brochures. Additionally, Bogdan's UI kits were featured on marketplaces like Visual Hierarchy and UI8.
He also wrote in the past years on sites like Design Your Way, WebDesignerDepot, WPDean, Designmodo, Speckyboy, Slider Revolution, and more.
- Versatile Work Sans Font Pairing for Every Project - 16 September 2026
- Organize Digital Files Like a Pro Before Your Next Client Handoff - 16 September 2026
- How to Set Up a Digital Menu Board: Hardware to Layout - 15 September 2026

Bogdan Sandu is a seasoned designer who has been designing websites since 2008. Renowned for his expertise in logo design and visual branding, Bogdan has developed a multitude of logos for various clients. His skills extend to creating posters, vector illustrations, business cards, and brochures. Additionally, Bogdan's UI kits were featured on marketplaces like Visual Hierarchy and UI8. He also wrote in the past years on sites like Design Your Way, WebDesignerDepot, WPDean, Designmodo, Speckyboy, Slider Revolution, and more.
You Might Also Like


