A design that looks great on a monitor can come back from the printer muddy, blurry or blocky. Screens are backlit and work in RGB. A shirt is fabric, often dark, and the ink sits on top of it or soaks into it. Most bad prints come down to a handful of file decisions made before anything reached the press.
Here is what to get right, whether you are designing merch for a band, shirts for a team, or a run for your own shop.
Know how it will be printed
The print method decides what your file needs to be, so find out first.
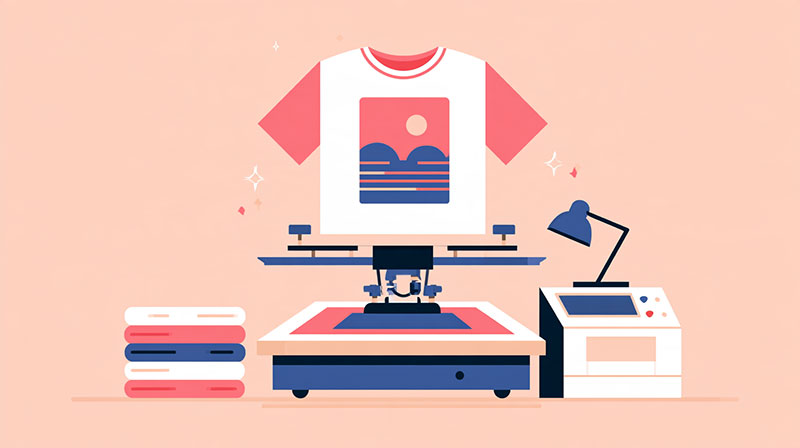
Screen printing pushes ink through a mesh screen, one screen per ink color. It gives bright, durable, opaque color and is the most economical choice for larger runs. Because every ink color needs its own screen, cost goes up with each color you add, and the art should be built from flat, separate colors.
Direct-to-garment (DTG) works like an inkjet printer for fabric. It can reproduce photos, gradients and unlimited colors, and it makes sense for small orders and complex art. The trade-off is that colors are usually a little softer than screen printing, especially on dark shirts.
Direct-to-film (DTF) and heat transfers print the design onto a film that is pressed onto the garment. They handle full color and work on fabrics DTG struggles with, but large solid areas can feel heavier than ink printed straight onto the shirt.
If you do not know yet, design as if it will be screen printed. Art that works with a few flat colors prints well by every method.
Get the resolution right at the real size
Raster images, like PNG, JPEG and PSD files, are made of pixels, and the number that matters is pixels at the size it will print. The usual target is 300 pixels per inch at print size.
A typical adult front print is about 10 to 12 inches wide. At 300 pixels per inch, a 12-inch print needs an image about 3,600 pixels wide. A 1,200-pixel image stretched to the same size is only 100 pixels per inch, and it will look soft and jagged on the shirt.
Two common mistakes:
- Upscaling in Photoshop does not add detail. Changing the image size from 72 to 300 pixels per inch without adding real pixels only makes a bigger blurry file.
- Images pulled from websites and social media are compressed and almost always too small for a full front print.
Use vector art when you can
Vector files, like AI, EPS, SVG and vector PDF, describe shapes mathematically, so they stay sharp at any size. Logos, type and illustration styles with clean edges should be vector whenever possible. For screen printing, vector art also makes color separation simple, because each color is already its own shape.
Before you send a vector file:
- Convert text to outlines so the printer does not need your fonts.
- Delete hidden layers, stray points and unused swatches. Leftover objects can end up on a screen.
- Expand strokes if you scaled the art, so line weights do not change unexpectedly.
If you only have a raster file, save it as a PNG with a transparent background rather than a JPEG. JPEG has no transparency, so you get a white box around the design, and its compression adds artifacts around edges.
Plan the colors for the shirt, not the screen
Bright RGB colors on a monitor, especially neons and electric blues, often cannot be matched exactly with ink. For screen printing, specify spot colors from the Pantone system so the printer mixes the ink you meant. For DTG, expect some shift and avoid relying on a very specific shade.
The shirt color is part of the design:
- Contrast matters more than anything. Navy on black or yellow on white looks fine as a thumbnail and nearly invisible from across a room.
- Dark shirts usually need a white underbase, a layer of white ink under the colors so they do not sink into the fabric. On a screen print that counts as an extra screen.
- You can use the shirt as a color. Leaving areas unprinted so the fabric shows through is a classic screen printing trick that saves an ink color.
Watch the fine details
Ink spreads slightly into fabric, so very thin lines and tiny type can fill in or break up. Keep strokes and small text comfortably thick at final size, and leave enough space between shapes that they do not merge. The simplest test is to print your design on paper at 100 percent scale and look at it from a few feet away.
Soft effects need planning too. Drop shadows, glows, feathered edges and partial transparency do not exist in ink the way they do on screen. In screen printing they have to be converted to halftone dots, and in DTG a semi-transparent area can print as a faint rectangle. If you want a soft look, ask your printer how they handle halftones, or design with hard edges.
Size and place it on purpose
Standard placements are a good starting point:
- Full front: about 10 to 12 inches wide for adult sizes, starting a few inches below the collar
- Left chest: about 3.5 to 4 inches wide
- Full back: up to about 12 to 14 inches wide
If you order a range of sizes, remember the same print looks bigger on a small shirt than on an XXL. Many printers use one print size for the whole order, so check your mockup on both ends of the size range.
Proof it before you print
Always look at a mockup of the design on the actual shirt color before ordering. Most online printers show one. A t-shirt design website like ooShirts lets you upload your file, place it on the garment, and see the result before you order. If your only copy of a logo is a small or blurry image, its art team can redraw it as vector so it prints cleanly, and a built-in tool can turn a full-color image into a simpler two-color version to cut screen printing costs.
A quick pre-print checklist
- Print method confirmed
- Raster art at 300 pixels per inch at full print size, or vector art
- Text converted to outlines
- Transparent background, no white box
- Spot colors chosen, with a plan for dark shirts
- No hairlines or tiny type
- Soft effects converted to halftones or removed
- Mockup checked on the real shirt color
Getting these right takes a few extra minutes in your design software, and it is the difference between a shirt people wear for years and one that ends up in the donation bag.

Renowned for his expertise in logo design and visual branding, Bogdan has developed a multitude of logos for various clients.
His skills extend to creating posters, vector illustrations, business cards, and brochures. Additionally, Bogdan's UI kits were featured on marketplaces like Visual Hierarchy and UI8.
He also wrote in the past years on sites like Design Your Way, WebDesignerDepot, WPDean, Designmodo, Speckyboy, Slider Revolution, and more.
- How to Design T-Shirt Art That Actually Prints Well - 19 November 2026
- How to Get Canva Pro for Free (Legit Ways) - 18 November 2026
- Why Website, SEO, and Advertising Work Better as One Growth System - 18 November 2026

Bogdan Sandu is a seasoned designer who has been designing websites since 2008. Renowned for his expertise in logo design and visual branding, Bogdan has developed a multitude of logos for various clients. His skills extend to creating posters, vector illustrations, business cards, and brochures. Additionally, Bogdan's UI kits were featured on marketplaces like Visual Hierarchy and UI8. He also wrote in the past years on sites like Design Your Way, WebDesignerDepot, WPDean, Designmodo, Speckyboy, Slider Revolution, and more.
You Might Also Like