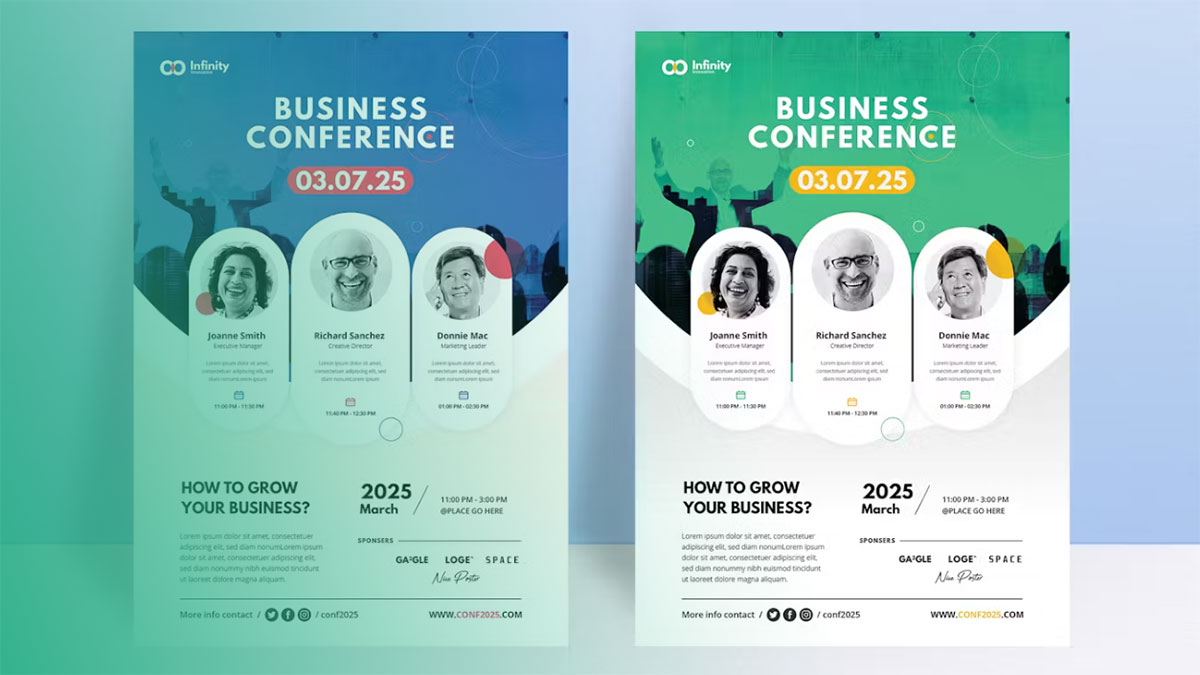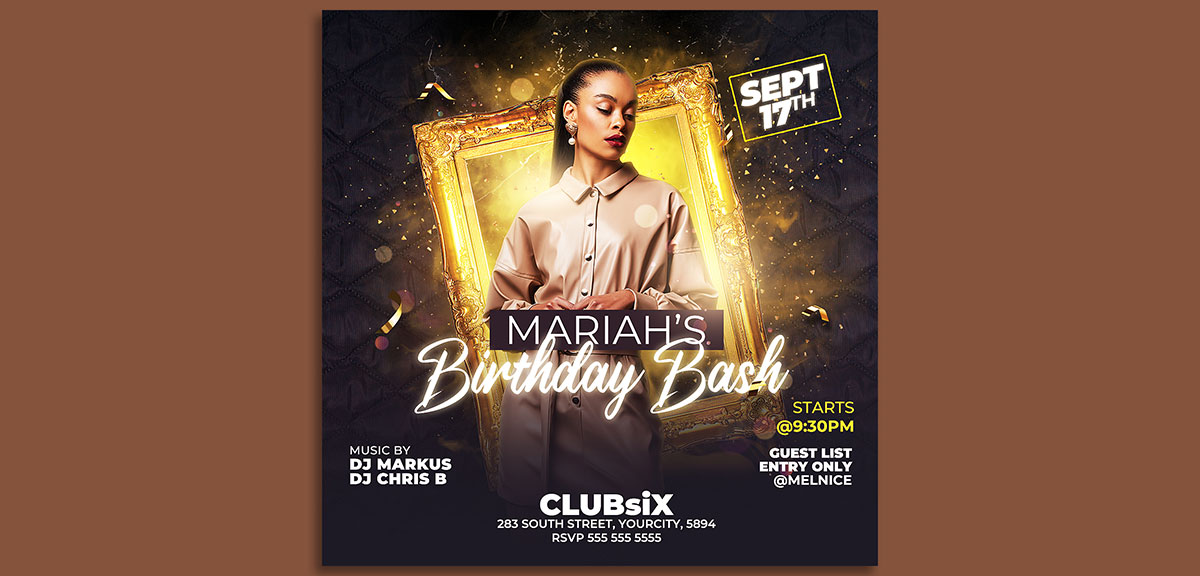
Start a birthday flyer by setting the canvas to the final print size. Then add the name, age, date, time, address and RSVP contact. Export a PDF if it’s going on paper and a PNG if guests will see it on a screen.
Canva handles most home projects. Adobe Express and Microsoft Word do too.
Export is where sharpness gets decided. Canva’s help center (September 2026) lists PDF Standard at 96 dpi and PDF Print at 300 dpi, so the wrong download option leaves a printed flyer soft.
What Must a Birthday Flyer Say?
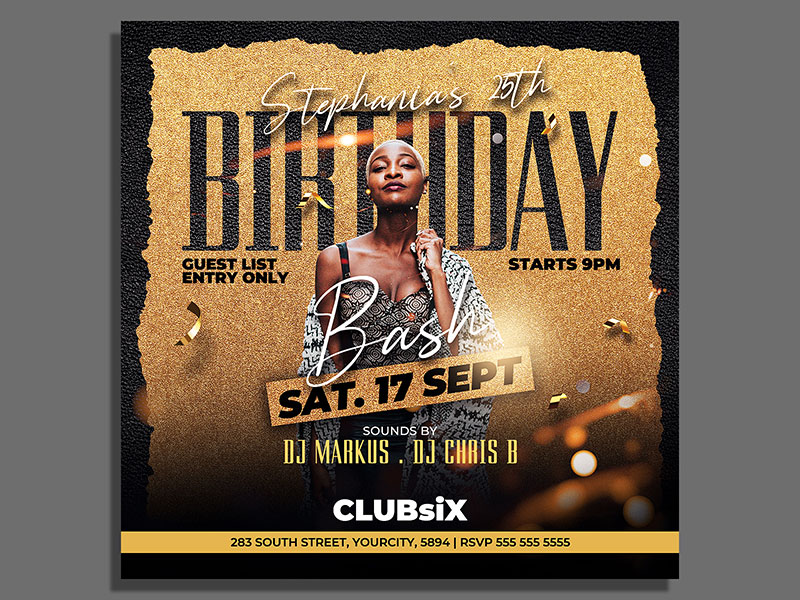
Guests want the name of whoever is celebrating, the date, the start time, the full venue address, and one RSVP contact with a reply deadline. Leave any of those out and somebody ends up texting you to ask.
The flyer pairs those details with a party theme on a single page. That makes it quicker to print or post than a folded invitation card.
- “Mia turns 7” or “Dan is 40” works better than a bare name, and a milestone number makes a good headline.
- Weekday plus date, so nobody has to open a calendar.
- Start and end times, which matter most at kids’ parties because parents plan pickup around them.
- The street address, with a note like “side gate” if the entrance is hard to spot.
- One phone number or email, and a deadline.
One RSVP channel beats three. Replies scattered between texts and DMs are hard to count.
Templates made for other occasions are a fine starting point, since the mechanics of making a flyer for an event don’t change: headline, focal image, details block and contact line.
Optional details
These are extras, and most flyers need only one or two.
- Theme or dress code
- A gift note, or “No gifts, please”
- Parking or entry instructions
- Food and allergy notes
Add only what a guest would otherwise text you about.
Wording for kids, adults and surprise parties
For a kids’ party, put the parent’s phone number on the flyer, along with drop-off and pickup times and a note about allergies.
Adult parties lean on a dress code, the venue name and a line about whether a plus-one is welcome.
A surprise party needs an arrival time earlier than the guest of honor’s, a “keep it secret” line, and private delivery only.
Skip long paragraphs. Guests read a flyer in seconds.
Leave the full home address off any flyer posted publicly, and send it with the RSVP reply instead.
What Size Should a Birthday Flyer Be?
Printed flyers go at 8.5 x 11 in (Letter). Canva calls it the most common flyer size, and it’s the default flyer size in Adobe Express. Handouts do better at 5 x 7 in or A5, and an Instagram post wants 1080 x 1350 px.
Outside the US and Canada, A4 (210 x 297 mm) takes the place of Letter in most countries.
On paper, 8.5 x 11 in or A4 suits doors and boards. Half-page handouts run 5.5 x 8.5 in or A5, and 5 x 7 in gives you a card-style flyer.
On screen, 1080 x 1350 px (4:5) makes a portrait feed post and 1080 x 1080 px (1:1) a square one. Stories run 1080 x 1920 px (9:16).
Half-page, square and long formats exist too, and a wider list of common flyer sizes is worth a look if Letter doesn’t fit the plan.
Pick the channel first and set the size before placing a single element. Resizing later shifts everything and forces a re-check of margins.
A design built at 1080 x 1080 px does not stretch into a print file, so a flyer meant for both paper and Instagram gets two separate canvases.
Instagram’s profile grid has previewed posts at 3:4 since early 2025. Keep the name and date near the center of a 4:5 post.
Which Tool Works Best for Making a Birthday Flyer?
Canva, for most people. The template library is large, the editor is drag and drop, and Canva’s flyer page states there is no charge to create, download or share a flyer.
Adobe Express, Microsoft Word, Google Docs and Photoshop each win in a narrower case.
| Tool | Cost | Best for | Main limit |
|---|---|---|---|
| Canva | Free plan, paid Pro | Beginners, fast template flyers | Premium assets sit behind Pro |
| Adobe Express | Free plan, paid Premium | Beginners, flyers with Adobe Stock images | Delivered print orders limited to select countries and regions |
| Microsoft Word | Free web version, paid desktop | Text-led flyers printed at home | No bleed or CMYK controls |
| Google Docs | Free | Quick drafts, shared editing | No bleed or CMYK controls |
| Photoshop | Paid subscription | Advanced users, photo compositing | Steep learning curve for a one-off |
Canva and Adobe Express
Canva’s pricing page (September 2026) lists 4.7 million+ photos, graphics, videos and audio files on the Free plan, against 141 million+ premium assets on Pro at US$144 a year.
Free covers a single birthday flyer comfortably. Pro pays off only for regular flyer makers or anyone who wants the premium library.
The gap goes beyond asset counts, and a breakdown of how the free and paid Canva plans differ is worth reading before paying.
Adobe says its Express free plan includes thousands of templates and hundreds of Adobe Stock images, with downloads in PDF, JPG or PNG.
Canva has the bigger template pool. Adobe Express makes more sense if you already live inside Adobe’s apps.
Word and Google Docs
Word and Google Docs are enough for a text-led flyer with one photo, printed on a home printer.
Neither offers bleed or CMYK controls, so a full-color background that runs to the paper edge needs a different tool.
Both cost nothing to try, which makes them the sensible pick for a quick flyer that only friends will see.
Photoshop
Photoshop earns its place when the flyer relies on photo compositing, custom lettering or exact color control.
For a one-off birthday flyer it’s overkill, though a step-by-step Photoshop flyer walkthrough shortens the climb if that’s the route you pick.
How to Lay Out a Birthday Flyer
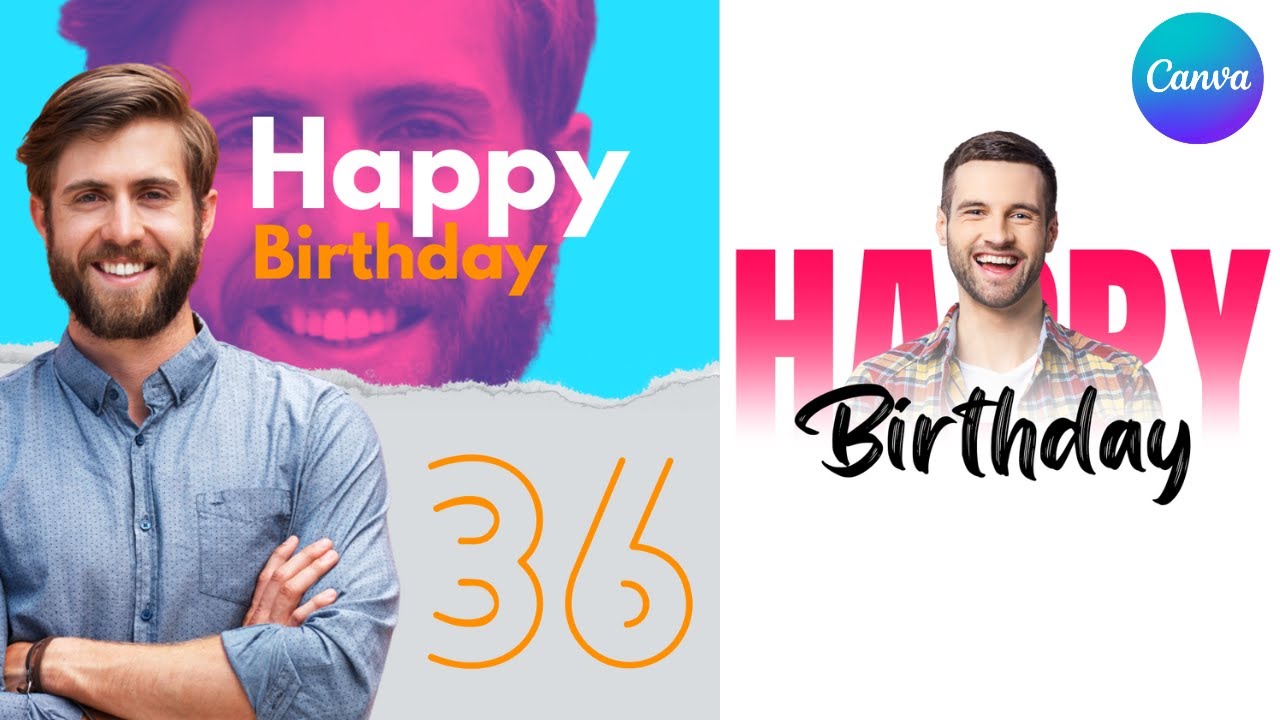
Work in a fixed order: background, headline, focal image, details block, RSVP line, then a contrast check.
- Set the background. One solid color or one image, never both at full strength.
- Place the headline with the name and age, at the largest size on the page.
- Add the focal image, either a photo of the guest of honor or a single illustration.
- Stack date, time and address in a left-aligned details block.
- Add the RSVP line at the bottom, with the deadline.
- Squint at the page. Anything that disappears needs more contrast or more size.
The order guests notice things in comes down to visual hierarchy, which runs size first, then weight, then color.
Name, date, place. If the eye reads them in that order, the layout works.
Fonts and readability
Two typefaces is the ceiling. Use one display face for the name and one plain sans for everything else.
The basics of pairing fonts come down to contrast, so set a bold display face against a quiet sans-serif rather than two similar scripts.
MOO’s flyer guidelines set 8 pt as the minimum for printed text. Guests read a flyer at arm’s length, so set the details at 12 pt or larger.
Google Fonts supplies free typefaces if the built-in choices in your tool feel dated.
Placing text over images
The W3C’s WCAG success criterion 1.4.3 sets a 4.5:1 contrast ratio as the minimum for normal text and 3:1 for large text.
WCAG is a web accessibility standard, not a print rule. It still gives a measurable target, and a busy party photo fails it more often than not.
A solid color panel behind the details is the quickest fix. A semi-transparent dark overlay on the photo works too, or the text can simply move onto a plain area of the image.
Choosing Photos, Illustrations and Colors
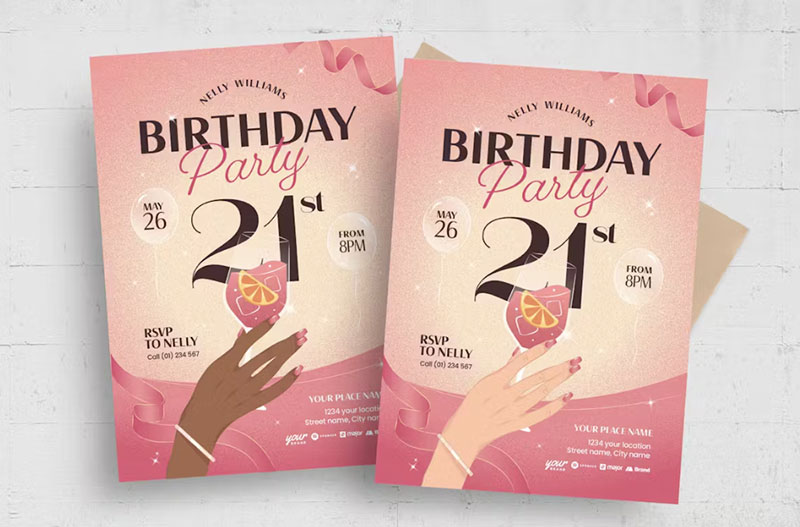
Pick one photo or one illustration style, then limit the palette to two or three party colors plus a neutral.
Photos
A photo works only if the source file is large. Photos saved from messaging apps and social feeds arrive compressed and small, and they print soft.
A photo that fills a Letter page needs about 2550 x 3300 px to reach 300 dpi.
Crop with the rule of thirds in mind. Put the guest of honor’s eyes near a third line, and the empty side becomes room for the headline.
Illustrations and clip art
Keep styles matched. Flat vector icons go with flat vector backgrounds, watercolor goes with watercolor, and a photo pairs best with minimal single-color icons.
Mixing clip-art packs is the fastest way to make a flyer look homemade.
Color palette
Kids’ parties suit bright primaries, or soft pastels for a first birthday. Teens tend to like neon accents on a dark background.
For adults, two-tone schemes such as black with gold, or navy with cream, look right.
Mood comes from color before anyone reads a word, and saturation does most of the work. High saturation reads playful, low saturation reads grown-up.
Where free images come from
Pexels doesn’t require attribution and allows edits, but its license bars selling unaltered copies and implying endorsement (Pexels license page). Unsplash needs no credit either, and its main stated restriction is compiling photos to build a competing service (Unsplash license).
Pixabay runs its own license, so read it before downloading.
A private party flyer sits well inside these terms. The limits start to matter for ticketed club nights and flyers you sell.
Setting Up a Birthday Flyer for Print
Photo resolution, bleed, color mode and paper all behave differently in print than they do on screen.
Get them right and the flyer prints the way it looks on screen. Miss one and the printer trims a white edge or softens a photo.
Photos should be 300 dpi or higher (MOO flyer guidelines). Bleed is 0.125 in past every trim edge, which turns an 8.5 x 11 in flyer into an 8.75 x 11.25 in file (4OVER4, 2026). On paper, flyer stock is 80 lb (120 gsm), against roughly 20 lb (75 gsm) for copy paper (Sticker Mule).
Logos and line art stay sharp only as vectors, which is why MOO asks for artwork as a vector PDF.
Bleed and safe area
Bleed is background color or image that extends past the trim line. Trimming a stack of paper is never exact, and bleed in print design exists to absorb that error.
Extend every background and edge image into the bleed, and hold text and logos inside the safe area.
Sources disagree on the exact bleed amount. 4OVER4 asks for 0.125 in, and Canva’s editor fixes bleed at that same 1/8 in with no way to change it. MOO’s Letter template works out to about 0.08 in per side (8.66 x 11.16 in with bleed around an 8.5 x 11 in trim).
Extending artwork 0.125 in satisfies both. A few printers ask for other amounts, so confirm before exporting.
One tool trap: Canva Docs has no bleed or crop mark settings, so build the flyer as a design, not a doc.
CMYK or RGB for the print file
Print colors come out duller than screen colors because ink covers a narrower range than light, according to Canva’s help center.
That gap is why print shops work in CMYK, while phones and monitors work in RGB.
Canva’s help center says to use CMYK colors for print and to proof the design before ordering. The CMYK profile option sits among features listed for Pro, Teams, Education and Nonprofits accounts.
OVER4 wants the flyer saved as a print-ready PDF in CMYK, not RGB. LittlePrint, a print shop, says to convert RGB files to CMYK as the last step before sending the artwork.
Utah State University’s brand toolkit agrees, telling staff to export Canva print files as PDF Print with crop marks, bleed and a flattened PDF, with the color profile set to CMYK.
The practical call is simple. If your plan offers a CMYK option, export CMYK for anything going to a print shop. If it doesn’t, export RGB and ask the shop whether it will convert the file before you order.
Home printer or print shop
Most home printers leave an unprintable margin, and borderless printing depends on the printer and paper type. They print on copy paper unless you load heavier stock. A handful of text-led copies is about their limit.
- A print shop trims from a larger sheet, so full-bleed color and photos work
- Flyer stock is heavier than copy paper
- Photo-heavy designs and bigger runs belong here
Paper weight and finish
Matte suits text-heavy flyers. Gloss suits flyers built around one photo.
OVER4 names 100 lb gloss text stock as its all-round flyer pick, while Sticker Mule prints its standard flyers on 80 lb matte.
Skip gloss if guests write on the flyer. Uncoated stock takes a pen, and glare works against small type.
Which File Format Fits Each Way of Sharing?
Use a PDF for anything headed to paper and PNG or JPG for anything viewed on a screen. Each channel also wants its own size and color mode, so export one file per channel.
| Channel | Size | Color mode | Format |
|---|---|---|---|
| Home printer | Letter or A4, content inside printable margins | RGB | |
| Print shop | Trim size plus 0.125 in bleed | CMYK (RGB only if the shop agrees to convert) | PDF Print |
| Instagram post | 1080 x 1350 px | RGB | JPG or PNG |
| Facebook event | 1920 x 1005 px, landscape | RGB | JPG or PNG |
| Email or WhatsApp | Original size | RGB | PDF (WhatsApp: as a document) |
Which Canva PDF option to use
PDF Print is built for paper. It keeps print-level dots per inch, adds bleed and crop marks, and offers a color profile choice (Canva help center, September 2026).
PDF Standard is a screen-resolution PDF for sharing and home printing, and password protection works only on this type.
A privacy catch sits inside both. Canva’s help center warns that a PDF keeps the original image behind any crop, so anyone with a PDF editor can recover the uncropped photo.
Delete or recreate the hidden part of a photo before sharing the file.
PNG or JPG for screens
JPG suits photos and PNG suits flat graphics and text.
Canva’s help center describes JPG as the small-file option for photographs and PNG as the one that supports transparency. Because JPEG compression discards fine detail, thin text over flat color can show fringing.
A flyer that’s mostly text and flat color goes out as PNG. A full-photo flyer goes out as JPG.
The quality slider, scale controls and transparent PNG export sit behind paid Canva plans, as of the help center’s September 2026 text.
Keep two exports, not one
Send guests the standard export and keep the print export for the shop.
Crop marks appear only in exported PDFs, not in the Canva editor, so a guest who opens the print PDF sees marks and extra edge that were never meant for a phone screen.
Sharing a Birthday Flyer Digitally
WhatsApp, Instagram, Facebook and email each crop, recompress or cap files in their own way, so give each platform its own export.
Sent as a normal photo, a flyer goes through WhatsApp’s compression, and small text arrives soft.
Sending it as a document skips that step, and the iOS changelog for version 23.24.73 added a built-in way to do it.
The catch is that a document shows no preview in the chat, so the recipient has to tap the file to see it.
Send both. The photo gives a quick look, and the document is there for guests who want to print.
Instagram and Facebook events
Instagram wants the image file, not the PDF. Feed posts take JPG and PNG.
Facebook event covers are landscape, and 1920 x 1005 px is the size most guides recommend.
A portrait flyer gets cropped there. Build a landscape version with the name and date near the center.
Gmail limits a message to 25 MB of attachments and swaps larger files for a Google Drive link (Appalachian State University IT documentation).
Attach the standard PDF and leave the print PDF out. Pasting the image into the body gives a quick preview.
A print PDF with full-resolution photos is the file most likely to trip that limit.
Digital plus paper
Pin a printed copy where guests without social accounts will see it. The digital file reaches most people, and the handout catches the rest.
When a DIY Birthday Flyer Falls Short
DIY stops working well in a few situations, and most of them come down to tools or volume.
- Full-bleed designs in Word or Google Docs print with a white border, since neither has bleed settings
- Large runs repeat any color shift or soft photo on every copy
- A tight deadline makes a rejected file expensive, because it costs a full revision round
- Club-night or branded flyers with logos and line art need vector files
Cost rarely decides it. MOO’s flyer guidelines list 50 US Letter flyers from US$51, and what it costs to print a flyer at a shop stays modest next to a botched home batch.
Rejected files are the most avoidable failure. Working through setting up a print-ready file before ordering takes minutes and saves the revision round.
Canva’s help center adds a caution for Canva Print orders: it may be unable to check a design for quality control, so proofing falls on you.
If the flyer needs full-bleed color, a photo-heavy layout and more than a handful of copies, use a print shop’s template and proofing.
For a handful of text-led copies on home paper, DIY is the right call.
Birthday Flyer FAQ
What is the difference between a birthday flyer and a birthday invitation card?
Flyers are single flat pages meant for wide sharing, printed in bulk or posted online. Invitation cards are usually folded, personal and sent to named guests.
Choose a flyer for open parties and group chats.
How much does it cost to print birthday flyers?
Size and quantity set the price. MOO’s flyer guidelines list 50 flyers from US$36 at 4.13 x 5.83 in and from US$41 at 5.5 x 8.5 in.
Home printing costs only paper and ink.
Can AI generate a birthday flyer?
Yes. Pixa’s flyer generator builds a design from a text prompt, and Canva’s pricing page (September 2026) lists up to 20 AI uses on the Free plan.
Proofread every name, date and address before printing, because generated lettering needs a manual check.
Can a birthday flyer be made on a phone?
Yes. Adobe says Adobe Express opens on desktop or mobile, and Canva runs on phones too.
For a file going to a print shop, set bleed and export options on a computer, where the menus are easier to check.
What to Do Once the Birthday Flyer Is Done
Proofread the final export, not the editor view, and print one proof copy. Send the digital file only after the proof passes, then print the rest.
The order follows the cost of a mistake. A wrong date in a shared image reaches every guest at once and can’t be pulled back from group chats, while a wrong proof costs one sheet.
The proof does add a full printing round before anything goes out, so a flyer needed within days should start its proof the day the design is finished.
Canva users can follow a separate guide to printing a finished design straight from Canva for both the proof and the full run.
This sequence holds as of September 2026. A change to how WhatsApp or Instagram compress uploads would justify rechecking the digital step.

Renowned for his expertise in logo design and visual branding, Bogdan has developed a multitude of logos for various clients.
His skills extend to creating posters, vector illustrations, business cards, and brochures. Additionally, Bogdan's UI kits were featured on marketplaces like Visual Hierarchy and UI8.
He also wrote in the past years on sites like Design Your Way, WebDesignerDepot, WPDean, Designmodo, Speckyboy, Slider Revolution, and more.
- Jujutsu Kaisen Font Generator - 12 October 2026
- The Windsurf Logo History, Colors, Font, And Meaning - 10 October 2026
- How to Remove Background From Product Photos (No Photoshop) - 10 October 2026

Bogdan Sandu is a seasoned designer who has been designing websites since 2008. Renowned for his expertise in logo design and visual branding, Bogdan has developed a multitude of logos for various clients. His skills extend to creating posters, vector illustrations, business cards, and brochures. Additionally, Bogdan's UI kits were featured on marketplaces like Visual Hierarchy and UI8. He also wrote in the past years on sites like Design Your Way, WebDesignerDepot, WPDean, Designmodo, Speckyboy, Slider Revolution, and more.
You Might Also Like