


Printers cut stacks of sheets with a blade, and the blade never lands in exactly the same spot twice. Bleed is the artwork you extend past the trim line so a cut that lands a little off still goes through ink and not bare paper.
The usual width is 0.125 inch (3 mm) past every edge. Adobe’s InDesign help notes that some print providers want more (Adobe Help, as of October 2026).
It goes on any piece where color or imagery reaches the finished edge. Business cards and postcards need it, and so do flyers and book covers.
Setting bleed in the layout doesn’t put it in the file. An InDesign export carries it only when Use Document Bleed Settings is ticked or the values are typed in by hand, according to 4OVER4 (2026).
What Is a Bleed in Print Design?
Look at a finished flyer with a colored background and you’re looking at the middle of a bigger sheet. The file ran past the edge, and the blade removed the extra after printing.
That extra strip is the bleed. It gives the blade ink to cut through, so a slightly misplaced cut doesn’t leave white paper at the edge.
The standard width is 0.125 inch (3 mm) beyond every edge. Mixam recommends 3 mm for most items (2024), and Gazette Print Services sets 0.125 inch as its minimum for most projects (2025).
The two values differ by less than 0.2 mm, so the unit you pick matters less than the printer you pick.
Take a letter page. Adding 0.125 inch on all four sides turns an 8.5 x 11 inch piece into an 8.75 x 11.25 inch file, and the extra band comes off in trimming.
Most printers can’t print edge to edge, so full-bleed pieces are printed oversized and cut down. That oversized file is what sets edge-to-edge work apart from the rest of print design, where layouts normally stay inside the sheet.
Bleed Area and Full Bleed
The bleed area is the band between the trim line and the outer edge of the file. A full bleed layout lets color or imagery reach the finished edge, and a no bleed layout keeps everything inside a white margin.
Corner lines called crop marks show the cutter where the trim line is. Bleed marks sit at the outer edge of the bleed instead, and the two are switched on separately at export.
Why Do Printed Pieces Need Bleed?
Sheets are stacked and cut in batches with a guillotine, and the blade drifts a little from one piece to the next. If there’s no artwork past the trim line, any drift outward leaves a white sliver of unprinted paper along the edge.
That drift reaches about 1/16 inch in either direction, according to 4OVER4’s cutting tolerance guidance (2026).
Anything that touches the edge needs the extra band. Background colors and photographs obviously do, along with borders and frames, and any logo or shape that reaches the edge.
Borders are the riskiest of the lot. A thin frame running parallel to the trim shows every fraction of drift as an uneven margin, which is why the same guidance advises keeping borders away from the trim line.
Drift inward causes the opposite problem. It clips anything sitting near the trim, and that’s what a safe zone absorbs.
When a Design Does Not Need Bleed
Bleed only matters when ink touches the edge. A layout with a white margin all the way around gives the blade nothing to expose.
A white background has nothing to extend, yet VIU Print Shop still tells Canva users to switch the bleed setting on for those files (as of October 2026).
Books split the rule. Amazon KDP requires bleed on every cover but lets an interior go without it when no artwork touches the page edge (KDP help pages, as of October 2026).
Backgrounds tend to arrive late in a project, so I’d just set bleed on every print document from the start and not think about it again.
How Do Bleed, Trim Line and Safe Zone Differ?
The trim line is where the blade is aimed. Bleed sits outside it, the safe zone sits inside it, and a print file needs all of them.
| Boundary | Position | What goes there |
|---|---|---|
| Bleed | Outside the trim, usually 0.125 inch | Background art that gets cut away |
| Trim line | The finished edge | Nothing important, the blade is aimed here |
| Safe zone | Inside the trim, 0.125 to 0.25 inch | Text, logos, QR codes |
| Margin | Inside the trim, any depth | Layout whitespace, never tighter than the safe zone |
The outside-versus-inside split, and the rule that a margin can be generous but never tighter than the safety line, come from 4OVER4’s file setup guide (2026).
Put anything you can’t afford to lose inside the safe zone. A cut that lands inside the trim line takes whatever sits there.
Build the document at the finished trim size and add bleed outside it. On a 3.5 x 2 inch business card built as a 3.75 x 2.25 inch file, trim guides sit 0.125 inch from the file edge and the safe line sits 0.25 inch from it (4OVER4, 2026).
Printers don’t agree on how deep the safe zone should be. 4OVER4 treats 0.125 inch as the minimum and 0.25 inch as safer, while TPH asks for 0.25 inch inside the trim (as of October 2026).
MOO’s standard business card template lists a 3.66 x 2.16 inch bleed area against a 3.34 x 1.84 inch safe area, which leaves 0.16 inch from the bleed edge to the safe edge on each side (as of October 2026).
Measured from the outer edge of the file to the safe line, the band runs from 0.16 inch at MOO to 0.25 inch under 4OVER4’s minimum and 0.375 inch under TPH’s rule.
The number is a printer rule, so read the template before trusting a generic figure.
How Much Bleed Should You Add?
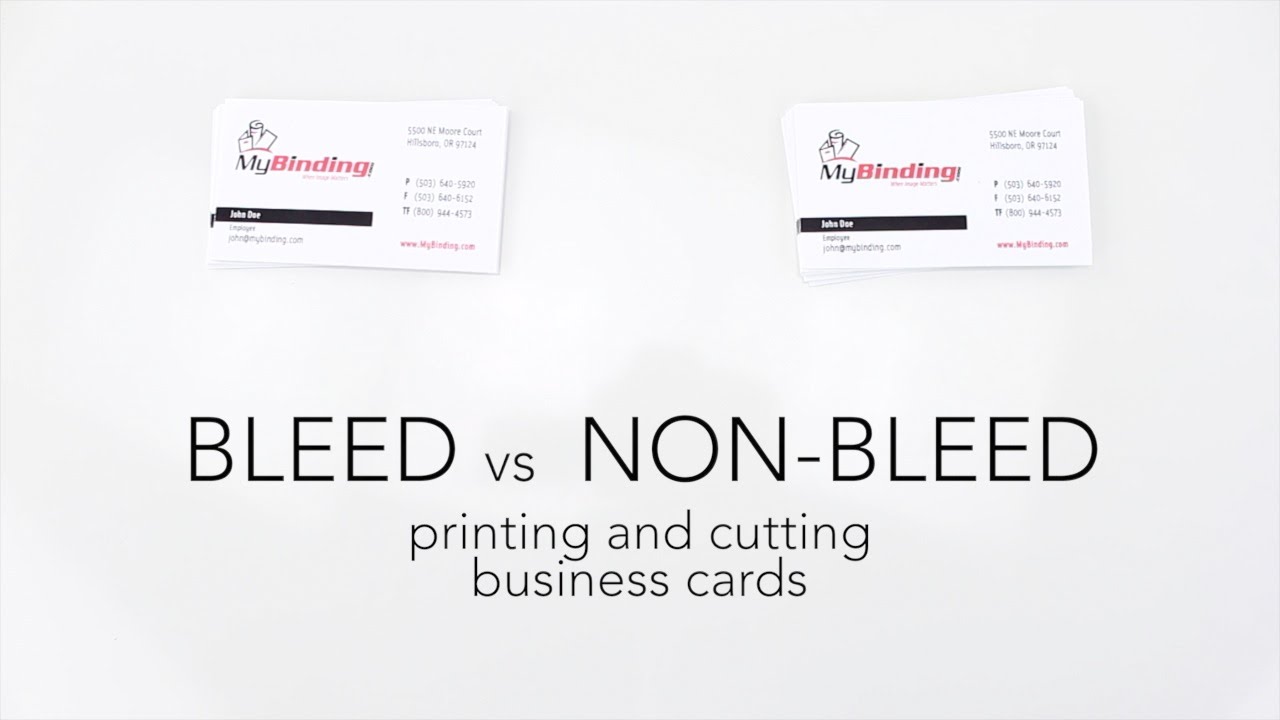
Add 0.125 inch (3 mm) on every side for most flat print, then check the printer’s spec sheet. Accepted values run from 2 mm at one printer to 5 mm for banners at another, and up to 0.5 inch for thick booklets.
| Product or printer | Bleed | Source |
|---|---|---|
| Flat print, US | 0.125 inch minimum | Gazette Print Services, 2025 |
| Flat print, metric | 3 mm | Mixam, 2024 |
| Flat print, Australian printer guide | At least 2 mm | Worldwide, 2019 |
| Stitch-and-trim booklets, 50+ pages | Up to 0.5 inch | Gazette Print Services, 2025 |
| Large banners, UK | 5 mm | Helloprint, 2026 |
Books on KDP need 0.125 inch (3.2 mm) on the top, bottom and outside edges and none on the inside edge. An interior with bleed is built 0.125 inch wider and 0.25 inch taller than the trim size (Amazon KDP help pages, as of October 2026).
Die-cut shapes get 0.125 inch past the cut path, with text kept 0.0625 inch inside it (4OVER4, 2026).
Thick booklets have two competing fixes for page creep. Gazette enlarges the bleed, while 4OVER4 keeps it at 0.125 inch and pushes the outside margin toward 0.375 inch above roughly 32 pages.
When a template and a generic guide disagree, the printer’s spec sheet wins.
With no spec sheet in hand, 0.125 inch is the safest single number. Going larger isn’t always safe either, since KDP’s cover rules cap bleed at the bottom of the page at 0.125 inch.
How Do You Set Bleed in Design Software?
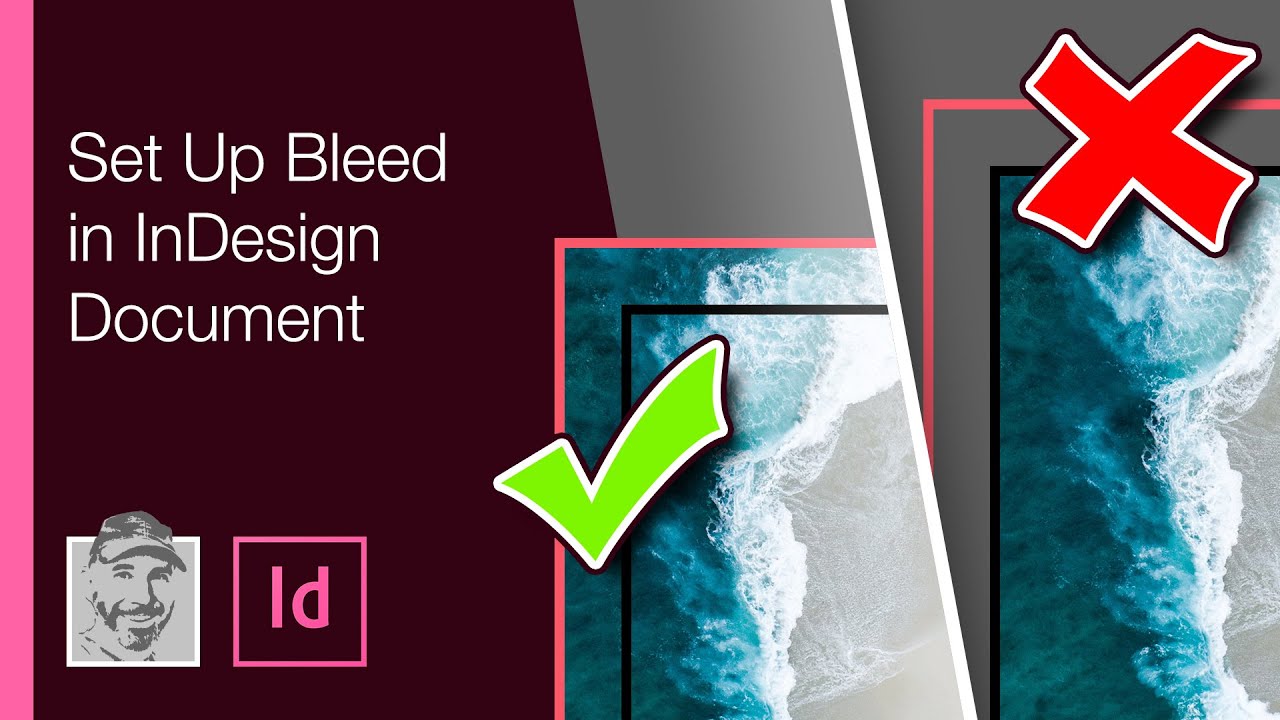
Enter the bleed value in the document’s bleed fields when you create the file, then drag every edge element out to the bleed guide. Photoshop has no bleed fields at all and Canva applies a fixed value, but InDesign, Illustrator and Affinity Publisher all have them.
Adobe InDesign and Illustrator
In InDesign, Bleed and Slug sit under the Print tab of the New Document dialog. On a document that already exists, File, then Document Setup, changes the values at any time, and the chain icon unlocks separate top, bottom, inside and outside values.
Illustrator keeps bleed in Document Setup too, and a red boundary appears around the artboard.
Adobe’s InDesign help notes that some print providers require more than the standard bleed, so the printer’s number goes in these fields, not a default (Adobe Help, as of October 2026).
A step-by-step guide to setting up bleed in Illustrator walks through the dialog in more detail. If the red boundary disappears, check View, then Hide Guides first, because Adobe Community users report that it hides the bleed line too.
Photoshop
Photoshop adds no bleed for you, so you build it by enlarging the canvas (4OVER4, 2026).
Open Image, then Canvas Size, tick Relative, and add 0.25 inch to both width and height. That places an even band of new space on all four sides.
Place guides at the trim edges before you resize. The new band arrives empty, so the artwork has to be extended or cloned into it.
That empty band is the usual Photoshop mistake. The canvas grows but the picture doesn’t, and an Adobe Community answer on exactly this problem says the image has to be extended into the bleed area.
Canva
Canva’s bleed is fixed. Turn it on under File, then Settings, with Show print bleed, and a dashed border appears near the edges of the design (Mississippi State University library FAQ, last updated 29 May 2026).
Canva draws the boundary and sets the size, and you can’t change that size. Everything else is on you. Backgrounds need to be stretched to cover any white gap at the edges, and they have to extend into the bleed area while you design, since the export only carries bleed that exists (4OVER4, 2026).
A fixed value becomes a problem when a printer’s spec asks for more.
Affinity Publisher
Affinity Publisher sets bleed in Document Setup, in the Bleed section. Enable Uniform (the link symbol) for one value on every edge, or switch it off to set Left/Inner, Right/Outer, Top and Bottom separately.
Bleed guides show as a red outline, and Affinity’s help pages describe them as a visual aid only (as of October 2026). The bleed reaches the output only when Include bleed is ticked in the export dialog.
How Do You Export a PDF That Keeps the Bleed?
Switch the bleed option on in the export dialog, add crop marks, then open the PDF and confirm the artwork runs past them. A bleed set in the document doesn’t carry through by itself, because every export dialog has its own bleed switch.
Export is the last step in preparing a print-ready file, and it is where most bleed gets lost.
- Finish the layout with every edge element extended to the bleed boundary
- Choose the PDF preset your printer recommends
- In InDesign, open Marks and Bleeds and tick Crop Marks and Use Document Bleed Settings
- In Affinity Publisher, tick Include bleed in the Export dialog
- In Canva, pick PDF Print, then tick Crop marks and bleed
- Open the PDF and check that artwork runs visibly past the crop marks on all four sides
The InDesign steps follow Adobe’s help page (as of October 2026). Canva carries bleed only through saving the design as a PDF with the PDF Print type, according to 4OVER4’s export guide (2026).
Set the crop mark offset to at least the size of the bleed so the marks stay outside the artwork (4OVER4, 2026).
Ticking only bleed marks is a common slip. They sit at the bleed edge and say nothing about the trim, which is why Adobe Community answers keep sending people back to Crop Marks.
How PDF Boxes and PDF/X Define Bleed
A print PDF records its bleed in page boxes, not only in the artwork. The BleedBox marks the trimmed page plus bleed, and the TrimBox marks the finished size.
| Box | What it marks | Size |
|---|---|---|
| MediaBox | Whole page, printer’s marks included | Largest |
| BleedBox | Trimmed page plus bleed | Between the two |
| TrimBox | Finished size after cutting | Smallest |
PDF-XChange’s documentation says the BleedBox is usually 3 to 5 mm larger than the TrimBox.
The PDF/X family, published under ISO 15930, sets the rules. PDF/X files need a MediaBox plus either a TrimBox or an ArtBox, never both (Wikipedia’s PDF/X summary and the PDF/X-3:2002 text quoted in a 2005 pdfTeX mailing list post agree on this).
Sources disagree on whether a BleedBox is mandatory. The 2005 pdfTeX mailing list post quoting the PDF/X-3:2002 text calls the BleedBox optional, while Wikipedia’s PDF/X summary requires it whenever the file is printed with bleed.
Define both boxes whenever the job has bleed, and the disagreement stops mattering.
In Acrobat Pro, the Set Page Boxes dialog shows the CropBox, ArtBox, TrimBox and BleedBox as colored rectangles (Adobe Help, as of October 2026). If the TrimBox and BleedBox report the same size, the PDF has no bleed.
What Goes Wrong With Bleed and How Do You Fix It?
Bad bleed shows up in a handful of predictable ways, and each one leaves its own symptom on the printed or exported piece.
| Problem | Cause | Fix |
|---|---|---|
| White edge after trimming | Art stops at the trim line | Extend art to the bleed edge |
| Bleed flagged as too small | Value below the printer’s spec | Reset the value, then re-extend art |
| Smeared or blurry edges | Thin strip stretched to fill the bleed | Stretch from a wider area |
| Clipped text or logos | Content in the bleed or near the trim | Move it inside the safe zone |
| No bleed in the PDF | Export option left off | Re-export with bleed on |
Changing the bleed value in document setup moves the guide, not the artwork. After any change, drag the edge elements out to the new boundary again.
How to Add Bleed to Finished Artwork
Illustrator’s Print Bleed button fills the bleed area with generated artwork and offers three variations to pick from, according to Adobe’s help page updated September 2025.
Outside Illustrator, you’re doing it by hand, and Printkeg’s prepress guide covers the usual methods. Scaling the whole piece up slightly is the fast one, but text near the edges can end up cut off.
Extending the canvas means adding space and then stretching the edge area over the new band with the transform tool. If edge text is a worry, shrink the art a little first and extend the canvas after, so the text stays clear. Or put a border around the layout and skip the stretching entirely.
Stretch from a wide strip of the image. The more area you grab with the tool, the less noticeable the stretching, which is why a thin sliver smears.
Manual extension beats scaling whenever text sits near the trim.
Export Errors That Remove Bleed
InDesign’s red bleed line is a guide that exists only inside InDesign, so an exported PDF shows crop and bleed marks and no red line (Adobe Community answer).
Switching bleed off to hide a white outline makes things worse. An Illustrator user in a 2023 Adobe Community case did exactly this, and the vendor reported the wrong file size.
Open the exported file and check it before blaming the printer.
Common Questions About Bleed
How is bleed different from slug?
The two get confused because both sit outside the trim line. Bleed holds artwork that extends past the edge. Slug is the area beyond the bleed for printer instructions or job sign-off notes, and Adobe’s InDesign help says slug objects print but are discarded at trimming (Adobe Help, as of October 2026).
Do home printers need bleed?
Usually not. Adobe’s InDesign help warns that some desktop printers cannot print to the page edge, so artwork past the trim line gains nothing there.
Keep a white margin for desktop jobs, and send edge-to-edge work to a print shop that cuts from a larger sheet.
Does adding bleed change the size of the printed piece?
No. You still order the finished trim size.
Only the file and the press sheet grow, because the printer prints oversized and cuts the piece down.
Is bleed needed for screen-only designs?
No. Bleed exists because a blade trims printed sheets, and a screen has no cut line. Build it only when the same artwork will also go to print.
What resolution should images in the bleed area have?
Same as the rest of the file, which means 300 dpi at final print size for pieces viewed up close (Mixam, 2024; 4OVER4, 2026).
Large banners viewed from a meter or two away run lower, around 200 dpi, according to Helloprint’s banner guide (2026).
Checking Bleed Before the File Goes to Print
Start with the printer’s spec, since that sets the value you build to. Then look at the PDF’s page size, which should be the trim size plus bleed on each bled edge. Last, zoom into the corners of the exported file and make sure artwork runs past the crop marks. Each pass catches a failure the others can’t.
The order follows cost. A wrong target value invalidates everything built after it, while a corner check takes seconds.
A 0.125 inch bleed is twice the 1/16 inch drift 4OVER4 documents, leaving 0.0625 inch to spare. Worldwide’s 2 mm minimum leaves only 0.4 mm, so it demands exact extension to the edge.
The larger value costs effort, since every extra millimeter means more artwork to extend. After bleed passes, standards for print resolution decide whether the edge artwork holds up at final size.

Renowned for his expertise in logo design and visual branding, Bogdan has developed a multitude of logos for various clients.
His skills extend to creating posters, vector illustrations, business cards, and brochures. Additionally, Bogdan's UI kits were featured on marketplaces like Visual Hierarchy and UI8.
He also wrote in the past years on sites like Design Your Way, WebDesignerDepot, WPDean, Designmodo, Speckyboy, Slider Revolution, and more.
- The Windsurf Logo History, Colors, Font, And Meaning - 10 October 2026
- How to Remove Background From Product Photos (No Photoshop) - 10 October 2026
- How Designers can Build a Stronger Online Creative Identity - 9 October 2026

Bogdan Sandu is a seasoned designer who has been designing websites since 2008. Renowned for his expertise in logo design and visual branding, Bogdan has developed a multitude of logos for various clients. His skills extend to creating posters, vector illustrations, business cards, and brochures. Additionally, Bogdan's UI kits were featured on marketplaces like Visual Hierarchy and UI8. He also wrote in the past years on sites like Design Your Way, WebDesignerDepot, WPDean, Designmodo, Speckyboy, Slider Revolution, and more.
You Might Also Like


