You don’t need to know HTML or CSS to build a website anymore.
Learning how to make a website in Canva takes about 30 minutes, and the result looks surprisingly professional.
Canva’s drag-and-drop website builder handles hosting, mobile responsiveness, and publishing in one place. No coding. No separate hosting fees.
This guide walks you through the complete process: accessing the builder, choosing a template, customizing text and images, adding buttons and links, previewing on different devices, and publishing your site live.
By the end, you’ll have a functional single-page website ready to share with clients, customers, or your portfolio audience.
How to Make a Website in Canva

Making a website in Canva is the process of designing and publishing a single-page scrolling site using Canva’s drag-and-drop editor and template library.
Users need this when creating portfolios, small business sites, landing pages, or simple online presences without writing code.
This guide covers 7 steps requiring 30 to 60 minutes and a free Canva account.
Unlike traditional web design that requires HTML and CSS knowledge, Canva handles all the technical stuff behind the scenes.
You get a visual editor, free hosting on the my.canva.site domain, and mobile responsive templates out of the box.
Prerequisites
Before you start, gather these requirements:
- Canva account (Free or Canva Pro)
- Web browser: Chrome, Firefox, Safari, or Edge
- Brand assets: logo files, images, hex color codes
- Written content: headlines, descriptions, contact information
- Time allocation: 30 to 60 minutes
- Skill level: basic computer and internet navigation
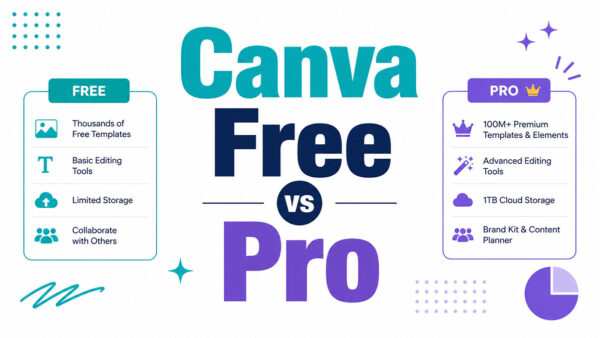
Canva Pro users get access to the Brand Kit feature, premium templates marked with a crown icon, and custom domain connection.
The free version works fine for most simple websites.
Step One: How Do You Access the Canva Website Builder?
Open your web browser and go to canva.com, then sign in to your account or create a new one using email, Google, or Facebook authentication. Click the Website icon on the homepage or search for “website” in the search bar to access the website builder section.
Action
- Navigate to canva.com in your browser
- Click Sign Up or Log In in the top right corner
- Select Templates tab > Website category, or type “website” in the search field
Purpose
This step opens the website template library where all design options are organized by category and style.
Step Two: How Do You Choose a Website Template?
Browse the template library and select a pre-designed layout that matches your website’s purpose, whether portfolio, business, event, or landing page. Filter results by style, color, or industry to narrow your options, then click Customize this template to open it in the Canva editor.
Action
- Scroll through templates or add qualifiers like “portfolio website” or “business website”
- Click any template to preview its full layout and page sections
- Select Customize this template to load it in the design editor
Purpose
Starting with a template gives you a professional foundation with proper visual hierarchy, layout structure, and responsive design already built in.
Template Selection Tips
Templates without a crown icon are free for all users.
Look for layouts with the number of sections you actually need. More sections means more scrolling for visitors.
Consider your color palette preferences since changing colors later takes extra time.
Step Three: How Do You Customize the Text and Content?
Double-click any text element on the template to edit it, replacing placeholder headlines and descriptions with your own content. Use the top toolbar to adjust font style, size, color, and alignment for each text box.
Action
- Double-click text > highlight > type your replacement content
- Select the text box > use toolbar options: Font dropdown, Size (number input), Color (A icon)
- Apply formatting: Bold (Ctrl+B), Italic, Underline, or adjust spacing via the Spacing option
Purpose
Custom text transforms a generic template into your branded website with messaging that speaks to your specific audience.
Text Formatting Options
The toolbar shows options for leading (line height) and letter spacing when text is selected.
Click Effects in the toolbar to add shadows, hollow outlines, neon glow, or curved text styling.
Need to add a text box in Canva? Press T on your keyboard or click Text in the left sidebar.
Typography Best Practices
Stick to two or three font families maximum. One for headings, one for body text.
Understanding typographic hierarchy helps visitors scan your content quickly.
Canva Pro users can upload fonts to Canva for brand consistency.
Step Four: How Do You Add and Edit Images and Media?
Click any placeholder image to replace it with your own visuals, or use the Elements tab to browse Canva’s library of photos, illustrations, and graphics. Upload your own files via the Uploads tab using drag-and-drop or the Upload files button.
Action
- Click image placeholder > select replacement from Uploads or Elements tab
- Drag corners to resize; double-click to crop in Canva
- Use Position in toolbar to layer elements or adjust placement on the page
Purpose
Custom images build trust and showcase your actual work, products, or team rather than generic stock photos.
Working with Media
To insert a YouTube video into Canva, go to Elements > Videos > paste your YouTube URL.
Canva automatically embeds the player. Visitors can watch directly on your published site.
Need to flip an image in Canva? Select the image, click Flip in the toolbar, choose horizontal or vertical.
Image Quality Tips
Upload images at least 1920 pixels wide for sharp display on desktop screens.
JPEG format works best for photographs; PNG preserves transparency for logos.
Canva Pro users can remove background in Canva with one click using the Background Remover tool.
Step Five: How Do You Create Buttons and Hyperlinks?
Add call to action buttons by searching “button” in Elements or creating a rectangle shape with text overlay, then attach hyperlinks by selecting the element and clicking the chain icon in the toolbar.
Action
- Elements tab > search “button” > drag onto canvas, or create using rectangle + text
- Select button > click chain icon (or Ctrl+K) > paste destination URL
- For internal navigation: Link > Pages in this document > select target section
Purpose
Buttons guide visitors toward specific actions: contact forms, product pages, booking systems, social media profiles.
Button Design
Use contrast to make buttons stand out from surrounding content.
Clear labels work better than clever ones. “Shop Now” beats “See What We’ve Got.”
Keep button text short: two to four words maximum.
Linking Best Practices
Test all external links before publishing. Broken links kill credibility fast.
Link text, images, or entire sections to external URLs, email addresses, or phone numbers.
The navigation menu automatically links to your page sections when enabled during preview.
Step Six: How Do You Preview Your Website on Desktop and Mobile?
Click the Preview button in the top right corner of the Canva editor to see how your website appears to visitors, then toggle between desktop and mobile views to check responsive behavior across screen sizes.
Action
- Click Preview (eye icon) in top toolbar
- Check “Resize on mobile” option at bottom of preview window
- Toggle device views: desktop icon, mobile icon; scroll through entire site
Purpose
Preview catches layout issues, text overflow, and broken elements before your site goes live.
Mobile Optimization Checklist
- Text remains readable without zooming
- Buttons are large enough to tap with a finger
- Images scale properly without cropping important content
- Navigation menu appears and functions correctly
Enable “Include navigation menu” in preview settings to see the auto-generated nav bar.
Step Seven: How Do You Publish Your Canva Website?
Click the Publish button in the top right corner, choose your domain option (free Canva subdomain or custom domain for Pro users), write a site description with relevant keywords, then click Publish to make your website live.
Action
- Click Publish > Website in dropdown
- Select domain: Free domain (yoursite.my.canva.site) or Connect custom domain (Pro)
- Edit site URL, browser tab title, and meta description (160 characters max)
- Click purple Publish button
Purpose
Publishing makes your design accessible to anyone with the link and indexes it for search engines unless you choose to hide it.
Domain Options
Free domain: yourname.my.canva.site format, hosted by Canva at no cost.
Custom domain: Canva Pro feature, connect a domain you own through your registrar’s DNS settings.
SEO Settings
Write a meta description that includes your main keywords naturally.
The browser tab title appears in search results, so make it descriptive and specific.
Toggle “Show in search engine results” off if you want a private or password-protected page.
Verification
Confirm your Canva website is live and working correctly:
- Open the published URL in a new browser window (not the editor)
- Click every button and link to verify destinations
- Test on an actual mobile device, not just browser preview
- Check load time; large images slow everything down
- Share the link with someone else to confirm public access
Your published site URL appears in a popup after clicking Publish. Copy it immediately.
Troubleshooting
Website Not Displaying Correctly on Mobile
Issue: Elements overlap, text gets cut off, or layout breaks on phone screens.
Solution: Return to editor > Preview > enable “Resize on mobile” > manually adjust element sizes and positions for mobile view, then republish.
Custom Domain Not Connecting
Issue: Domain shows error or doesn’t point to your Canva site.
Solution: Verify CNAME record in your domain registrar points to designsite.canva.com; allow 24 to 48 hours for DNS propagation.
Images Appearing Blurry After Publishing
Issue: Photos look pixelated or low quality on the live site.
Solution: Replace with higher resolution images (minimum 1920px width); avoid stretching small images beyond their original dimensions.
Navigation Menu Not Showing
Issue: Published site has no way to jump between sections.
Solution: Preview > enable “Include navigation menu” checkbox > republish the website.
Alternative Methods
Creating a Website from Scratch vs Using Templates
Template Method: 15 to 30 minutes, professional structure built in, limited layout flexibility.
From Scratch: 45 to 90 minutes, complete creative control, requires strong understanding of graphic design principles and balance.
Choose templates for speed. Choose blank canvas if you have a specific vision that no template matches.
Related Processes
- How to make a brand kit in Canva for consistent colors and fonts
- How to make a logo in Canva for your website header
- How to make a QR code in Canva linking to your published site
- How to save Canva as PDF for offline sharing
- How to make a presentation in Canva and convert it to a website
FAQ on How To Make A Website In Canva
Is Canva website builder really free?
Yes. Canva offers a free website builder with hosting on a my.canva.site subdomain. You get access to free templates, basic design elements, and publishing tools. Canva Pro adds premium templates, custom domain connection, and Brand Kit features.
Can I use my own domain with a Canva website?
Only with Canva Pro. Free users get a yourname.my.canva.site URL. Pro subscribers can connect a custom domain through DNS settings, typically by adding a CNAME record pointing to designsite.canva.com.
How many pages can a Canva website have?
Canva websites support up to 45 pages and 10 sections per page. However, the platform creates single-page scrolling sites. Multiple pages function as separate sections within one long scrollable layout, not traditional multi-page navigation.
Are Canva websites mobile responsive?
Yes. Canva templates are designed to be mobile responsive by default. Enable “Resize on mobile” in preview settings to see how elements adapt. Some manual adjustments may be needed for optimal display on smaller screens.
Can I add a contact form to my Canva website?
Canva doesn’t have native form functionality. You can embed third-party forms from Typeform, Google Forms, or Jotform by adding an embed code. Alternatively, link a button to an external form URL.
How do I add a navigation menu to my Canva website?
Canva auto-generates a navigation menu based on your page sections. Click Preview, check “Include navigation menu,” and the nav bar appears. Each section becomes a clickable menu item linking to that part of the page.
Can I edit my Canva website after publishing?
Yes. Open your design in the Canva editor, make changes, and click Publish again. Updates go live immediately at the same URL. No need to create a new site or change your link.
Does Canva provide SEO tools for websites?
Basic SEO only. You can edit the page title, meta description, and site URL during publishing. Canva lacks advanced features like analytics integration, sitemap generation, or structured data. Add Google Analytics manually via embed code.
What image format works best for Canva websites?
Use PNG for logos and graphics with transparency. Use JPEG for photographs. Upload images at minimum 1920 pixels wide for sharp desktop display. Canva compresses files automatically during publishing.
Can I sell products on a Canva website?
Canva websites don’t include e-commerce functionality. No shopping cart, payment processing, or product catalog features exist. You can link buttons to external platforms like Shopify, Etsy, Gumroad, or PayPal payment links for transactions.
Conclusion
You now know how to make a website in Canva from start to finish. The entire process takes under an hour.
Canva’s visual editor removes the technical barriers that once made website creation intimidating. No code required. No expensive developers.
Your site comes with free hosting, a shareable URL, and responsive design that works on desktop and mobile devices.
This approach works best for portfolio sites, small business pages, landing pages, and personal projects. Complex e-commerce or blog-heavy sites need more robust platforms.
Start with a template that matches your brand identity. Customize the text, swap in your own images, add buttons with clear calls to action, preview everything, then hit publish.
Your online presence is one click away.

Renowned for his expertise in logo design and visual branding, Bogdan has developed a multitude of logos for various clients.
His skills extend to creating posters, vector illustrations, business cards, and brochures. Additionally, Bogdan's UI kits were featured on marketplaces like Visual Hierarchy and UI8.
He also wrote in the past years on sites like Design Your Way, WebDesignerDepot, WPDean, Designmodo, Speckyboy, Slider Revolution, and more.
- Jujutsu Kaisen Font Generator - 12 October 2026
- The Windsurf Logo History, Colors, Font, And Meaning - 10 October 2026
- How to Remove Background From Product Photos (No Photoshop) - 10 October 2026

Bogdan Sandu is a seasoned designer who has been designing websites since 2008. Renowned for his expertise in logo design and visual branding, Bogdan has developed a multitude of logos for various clients. His skills extend to creating posters, vector illustrations, business cards, and brochures. Additionally, Bogdan's UI kits were featured on marketplaces like Visual Hierarchy and UI8. He also wrote in the past years on sites like Design Your Way, WebDesignerDepot, WPDean, Designmodo, Speckyboy, Slider Revolution, and more.
You Might Also Like