Photoshop has no font storage of its own. Everything in that Character panel dropdown comes from somewhere else, either the fonts installed on your operating system or whatever you’ve switched on through Adobe Fonts. Once that clicks, most font problems stop being mysterious.
So installing a font is really two things happening in sequence. The file gets registered with Windows or macOS, and then Photoshop rebuilds its own cached list of what’s available. Miss the second part and the font is technically installed but invisible.
Creative Cloud takes a different route. Activate a typeface there and it syncs across every signed-in Adobe application at once, no font folder involved.
Worth knowing what you’re actually installing, by the way. A single OpenType font, now the standard format for most modern font libraries, can hold more than 65,000 glyphs according to Adobe’s own type specification (Adobe). Most of the ones you download use a tiny fraction of that.
What Does It Mean to Add a Font to Photoshop
Nothing gets saved into Photoshop. The file lands in your system font folder, Photoshop reads the list, and that’s the whole relationship. Which is also why the same typeface turns up in Illustrator and InDesign without you doing anything extra.
A font is simply the file that tells software how each letter, number and symbol should be drawn on screen. Photoshop reads that file through the operating system’s font manager, not through anything inside Photoshop’s own preferences.
Manual installation through Windows or macOS puts the file on the machine and makes it available system-wide. Adobe Fonts activation works through the Creative Cloud desktop app and syncs the typeface into your account instead, skipping the local font folder entirely.
Here’s the part that catches people out. A font installed for Microsoft Word doesn’t automatically appear in Photoshop’s list, because Photoshop caches its own font index separately. The two lists line up after a proper install and a restart, not before.
Same story when you’re adding fonts to Adobe Illustrator, since both apps read from the identical OS-level font list.
What Font File Formats Does Photoshop Support
OpenType (.otf) and TrueType (.ttf) both work for live text entry, and so do variable fonts. PostScript Type 1 is the odd one out. Those stopped appearing in the font menu after Adobe retired the format from Photoshop in 2021.
| Format | Extension | Current status | Typical source |
|---|---|---|---|
| OpenType | .otf | Fully supported, preferred format | Adobe Fonts, type foundries |
| TrueType | .ttf | Fully supported | Google Fonts, OS defaults |
| Variable font | .ttf or .otf | Supported since 2018 | Google Fonts, Adobe Originals |
| PostScript Type 1 | .pfb / .pfm | Retired from font menu (2021) | Legacy foundry libraries |
OpenType came out of a joint effort between Adobe and Microsoft, wrapping PostScript or TrueType outlines into one cross-platform file. That single-file setup is the reason an .otf behaves the same on a Mac and on a Windows machine with no conversion step in between.
Variable fonts arrived in Photoshop with the 2018 Creative Cloud release (version 19.0, shipped October 2017 under Adobe’s “CC 2018” naming). One file covers a full range of weights and widths, so a variable font like Source Sans Variable stands in for the ten or so separate files you’d otherwise be installing. I’ll take that trade every time, though a few older plugins still handle them badly.
Type 1 support left Photoshop’s font menu in 2021, and full authoring support ended across all Adobe apps in January 2023. That closed out a format the company had shipped for more than three decades. Old files that already contain Type 1 text will still open. You just cannot select that font for a new text layer anymore.
Which Method Should You Use to Add a Font to Photoshop
Downloaded one file and want to be done with it? Manual installation. It works offline, needs no Adobe account, and you keep full control over what’s actually sitting on the machine. The annoyance shows up somewhere around the twentieth font, when locating the right folder and relaunching the app for every single install turns into a chore.
Adobe Fonts makes more sense if Creative Cloud is already part of the setup and file management sounds unappealing. The library draws from more than 150 type foundries, syncing happens on its own, and no font folder gets touched. Access disappears the day the subscription lapses, which is the catch nobody thinks about until a client asks for a file update two years later.
A dedicated font manager is for when the library has outgrown the system. FontBase or Monotype Connect (the font manager formerly sold as Extensis Suitcase Fusion, which Extensis has been retiring since its 2024 acquisition by Monotype) activate fonts on demand rather than loading everything at once, and they cut down on the naming conflicts that pile up when several people share a set of client typefaces. It’s another subscription and another piece of software to keep updated, so agencies land here far more often than freelancers do.
Occasional design work rarely needs anything past manual installation.
How Do You Install a Font File for Use in Photoshop
The file goes into your operating system’s font folder, then Photoshop needs a relaunch to rebuild its list. Windows and Mac differ a little in the middle steps. The end result, a font showing up in the Character panel, is identical either way.
On Windows
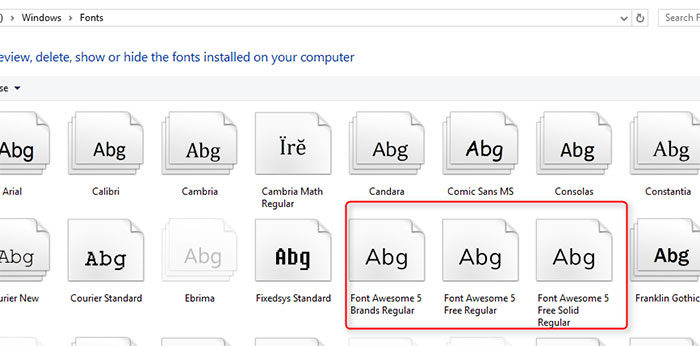
Windows reads fonts from a single system folder, and the whole thing usually takes under a minute.
- Download the .ttf or .otf file and unzip it if needed
- Right-click the font file and select Install, or drag it into the Fonts folder inside Control Panel
- Wait for Windows to confirm the install, a short progress window appears
- Quit and reopen Photoshop, then check the font dropdown in the Character panel
Still not visible? A full restart tends to sort it out faster than relaunching Photoshop over and over.
On Mac
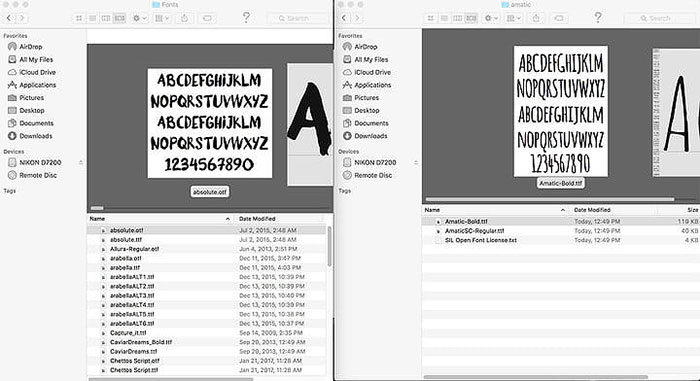
Font Book handles installation on macOS, and it validates the file before adding it. That validation step has saved me from a couple of broken downloads over the years.
- Double-click the .ttf or .otf file to open it in Font Book
- Click Install Font in the preview window
- Let Font Book run its validation check, which flags corrupted files before they cause problems
- Relaunch Photoshop to refresh its cached font list
The full walkthrough for installing fonts on Mac covers what to do when Font Book flags a file as invalid.
How Do You Activate an Adobe Fonts Font in Photoshop
No file ever touches your local font folder here. You switch the typeface on inside the Creative Cloud desktop app, Adobe handles delivery from its own servers, and the font syncs into every Adobe application signed into that account.
- Open the Creative Cloud desktop app and click the Fonts tab
- Select Browse Fonts, or go to fonts.adobe.com directly
- Find the typeface you want and toggle Activate
- Switch back to Photoshop and open the Character panel to confirm it appears
Sync usually finishes within a couple of minutes. A large batch of activations can drag on longer.
Deactivating a font pulls it from your active list. Any document already using it will flag the text as missing the next time it opens, which is normal behaviour and not a sign that something broke.
Where Can You Find Fonts to Use in Photoshop
Google Fonts covers most of what anyone needs for free, and Adobe Fonts covers a good chunk of the rest if you’re already subscribed. Past those two, dafont.com and Font Squirrel are the usual free-download hubs, while MyFonts sits at the paid foundry end. What actually separates them is cost, quality control, and how clearly the licensing gets spelled out.
Some numbers worth having in mind before you commit to a library:
- Adobe Fonts now holds more than 30,000 fonts from over 150 type foundries, after adding 1,500 fonts including Helvetica and Gotham in a single update (Adobe, April 2025)
- Google Fonts carried 1,826 font families as of May 2025, all released under open licenses, and has continued growing since (Photutorial, 2025)
- Font Squirrel and dafont.com both operate as free-download hubs with licensing terms set per font rather than site-wide, so checking the individual file still matters
The two big libraries solve overlapping problems in different ways, and the Google Fonts vs Adobe Fonts comparison is worth reading before committing a whole project to one of them.
MyFonts, now part of Monotype, leans toward paid, foundry-licensed type. That’s usually where branding work ends up when a free option won’t cut it.
For a shortlist built specifically around Photoshop projects, a curated set of fonts for Photoshop saves the trial and error of testing dozens of random downloads.
Is a Font’s License Valid for Commercial Use in Photoshop Projects
Free to download and free to use are two different things. A license only clears commercial Photoshop work if it specifically grants desktop or commercial rights, and plenty of free files don’t. Client work, logos, anything sold, all of it sits outside personal use.
A desktop license covers local installation and use in apps like Photoshop, for print or digital output. Personal-use terms block commercial application of any size, including the small jobs people assume nobody will ever notice.
Extensis surveyed more than 2,250 designers and creative professionals in its font usage report and found that almost a third source fonts without proper licensing, often without realizing it (Extensis).
The bill for that tends to arrive all at once. Production Type sued Nike in February 2023 for using its Kreuz Light typeface across marketing videos and social content, despite Nike having purchased only two desktop licenses and a single digital-audio license (Law360, 2023).
Reading the actual font licensing terms before a project ships matters more than checking whether a font was free to download. Free-for-commercial-use fonts do exist. The label just needs to come from the foundry itself, not from some download mirror that scraped the file.
Why Is a Newly Installed Font Not Showing Up in Photoshop
Nine times out of ten the install worked fine and Photoshop simply hasn’t refreshed its cached list yet.
| Cause | Fix |
|---|---|
| Photoshop cache not refreshed | Quit and reopen Photoshop |
| Font installed for one user only | Reinstall for all users, not just one profile |
| Duplicate font name conflict | Keep only one copy in the font folder |
| Corrupted font file | Delete the CT Font Cache and reinstall |
Adobe’s own troubleshooting page for Photoshop font issues names the CT Font Cache folder directly. Deleting it is safe. Photoshop rebuilds it automatically on the next launch (Adobe, 2023).
Keeping one version of each font in one folder, rather than scattered across several locations, heads off most of this before it starts.
- Turn off Font Preview (Type menu, Font Preview Size, None) if Photoshop is slow to load the font list
- Look for a red warning dot next to a font name in the Creative Cloud desktop app, which flags an installation conflict
- Uninstall and reinstall the one problem font instead of resetting every preference in the app
A single bad file can do real damage, too. One widely documented case involved a font nicknamed “mad\_homie,” which caused Photoshop to lag and eventually become unusable across four separate versions of the app until it was removed (Adobe Community, 2023). The person troubleshooting it ruled out external storage, checked for hardware issues, and tested the file on a second computer before isolating the font itself as the cause.
When Does Adding a Font to Photoshop Not Work
Some failures have nothing to do with the font file, and reinstalling it just burns an afternoon.
Adobe Fonts needs an active connection to activate a typeface, and Creative Cloud checks in periodically to confirm the subscription is still current (Adobe). Fonts already synced before you went offline typically stay available for a short window. A brand new activation simply will not start without a connection.
Account type matters as well. Adobe’s own documentation states you must be signed in with a named-user subscription to add fonts, since device and site-wide licenses are excluded from Adobe Fonts entirely (Adobe). And Adobe IDs registered in China can’t use Adobe Fonts at all, regardless of subscription tier (Adobe). That one is a platform restriction rather than a bug, and no local workaround changes it.
Variable fonts carried their own separate failure mode for a while.
- Photoshop versions 24.7.1 through 25.2.0 shipped with a confirmed bug where variable-weight fonts rendered inconsistently, some letters bold, some thin, inside the same word
- Plenty of users worked around it by removing the variable-weight font and installing static weights of the same typeface instead
- Adobe’s community team acknowledged the bug and it was resolved in the Photoshop 25.4 update (Adobe Community, 2023)
A restart won’t touch any of the first three. A dropped connection, the wrong subscription type, a region block, none of those live on your machine in a place a rebuilt font list can reach. The variable-font rendering problem was a different category altogether, a genuine Photoshop bug that got fixed for good once Adobe shipped version 25.4, rather than anything a user could change on their end.
FAQ on How To Add Fonts To Photoshop
Do You Need to Restart Photoshop After Installing a New Font
Usually, yes. Photoshop only rebuilds its font list on launch, so a font installed while the app is running tends to stay invisible until you quit and reopen it. Checking the Character panel over and over won’t speed that up.
What Is the Practical Difference Between a Free Font and a Paid Font for Client Work
Terms of use, mostly. Free fonts often carry personal-use-only restrictions, while paid or foundry-licensed fonts include commercial and desktop rights by default. For client work, a paid or Adobe Fonts-backed typeface closes the licensing gap that free downloads frequently leave open.
How Do You Remove or Uninstall a Font You No Longer Want Available
Take it out of the OS font folder (Font Book on Mac, Control Panel on Windows) and restart Photoshop. Adobe Fonts works differently. Toggling deactivate inside the Creative Cloud desktop app removes access without touching any local file.
Can You Preview a Font Before Fully Installing It
Yes. Windows and macOS both show a live preview window before you confirm the install. Adobe Fonts lets you preview every typeface on fonts.adobe.com before activating it, so nothing gets added to your system just to see what it looks like.
What Is the Difference Between Installing a Font System-Wide and Embedding It in a Single Document
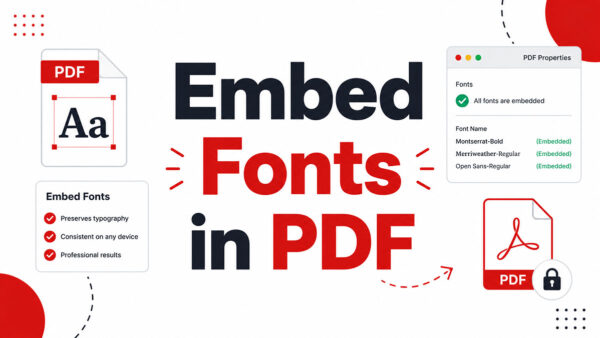
A system-wide install hands the font to every application on that machine, Photoshop included. Choosing to embed fonts in a PDF packages the data inside one file instead, so it displays correctly on a device that never installed it.
What Should You Check First in How To Add Fonts To Photoshop?
Font trouble in Photoshop usually breaks at the seam between the operating system and the Creative Cloud desktop app, not inside the font file itself. So the first question is which of those two is actually missing the typeface.
Order matters while you’re working through it:
- Confirm you’re online before assuming a corrupted file
- Restart Photoshop before resetting the font cache
- Check for a duplicate font name before reinstalling from scratch
Jumping straight to a font cache reset wastes time when the real block is a lapsed Creative Cloud subscription or a missing connection, since neither problem cares about a rebuilt font list.
That same connection-first logic follows the font into layout work, which is exactly where adding fonts to InDesign picks up.

Renowned for his expertise in logo design and visual branding, Bogdan has developed a multitude of logos for various clients.
His skills extend to creating posters, vector illustrations, business cards, and brochures. Additionally, Bogdan's UI kits were featured on marketplaces like Visual Hierarchy and UI8.
He also wrote in the past years on sites like Design Your Way, WebDesignerDepot, WPDean, Designmodo, Speckyboy, Slider Revolution, and more.
- The Windsurf Logo History, Colors, Font, And Meaning - 10 October 2026
- How to Remove Background From Product Photos (No Photoshop) - 10 October 2026
- How Designers can Build a Stronger Online Creative Identity - 9 October 2026

Bogdan Sandu is a seasoned designer who has been designing websites since 2008. Renowned for his expertise in logo design and visual branding, Bogdan has developed a multitude of logos for various clients. His skills extend to creating posters, vector illustrations, business cards, and brochures. Additionally, Bogdan's UI kits were featured on marketplaces like Visual Hierarchy and UI8. He also wrote in the past years on sites like Design Your Way, WebDesignerDepot, WPDean, Designmodo, Speckyboy, Slider Revolution, and more.
You Might Also Like