Ever hit a creative block? Imagine powering through by customizing every corner of your workspace, right down to the font. Yes, even in GIMP, that versatile tool teeming with potential yet slightly elusive when it comes to personalizing with custom typefaces.
It’s a liberating feeling to not just use software but to make it your own. This article takes you through how to add fonts to GIMP-a straightforward upgrade to your design environment.
By the end of this journey, you’ll not only master font installation but also how to harness GIMP’s text tool capabilities to expand your design possibilities. We’re diving deep into:
- Navigating GIMP’s font directory
- Refresh fonts effortlessly
- Best practices for font configuration to enhance workflow
Unlock the true potential of typography in GIMP with these essential tips and tricks. Make your projects stand out with just a little more flair!
How to add fonts to GIMP: The Quick Version
To add fonts to GIMP, you can follow these steps:
- Find and Download Fonts:
- Start by finding the font you want on websites like Google Fonts, DaFont.com, or FontSquirrel.com.
- Download the font and extract it to find the font file with the .ttf extension.
- Install Fonts to GIMP:
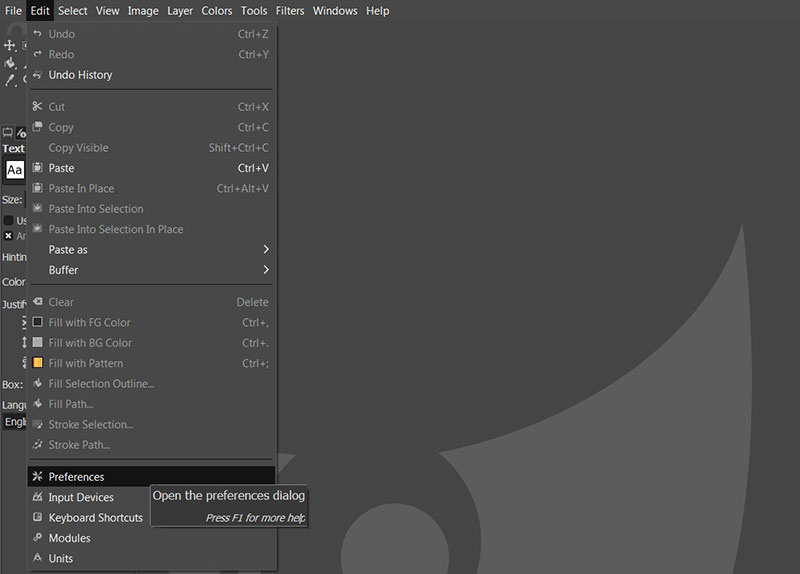
- Open GIMP and navigate to the Image Menu, click on Edit, then Preferences.
- In the Preferences dialog, go to Fonts under Folders.
- Copy the extracted font file and paste it into the selected location in GIMP.
- Verify Installation:
- In GIMP, navigate to the Image menu, click on Windows, then Dockable Dialogs, and select Fonts.
- If done correctly, you will see the Fonts dialog box added to the left, indicating the successful addition of the font.
- Use the Font:
- To use the font, add a text box in GIMP, choose the downloaded font, and start creating with your newly added font.
Congratulations on successfully adding fonts to GIMP! These steps will help you enhance your design projects with a variety of fonts.
How to add fonts to GIMP – Windows
Download the font you need
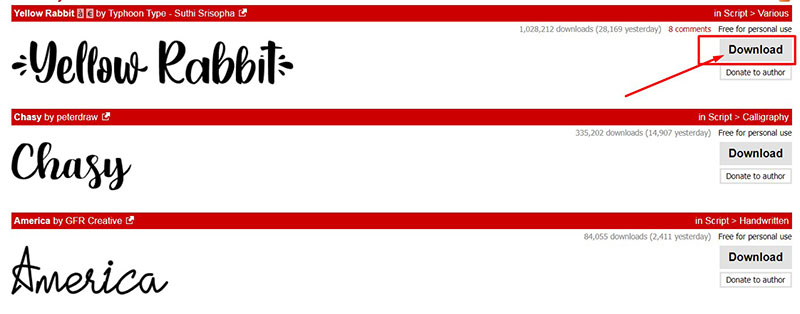
The first step to add fonts to GIMP is to find the file you want and download it to your computer.
There are many websites where you can download these files. The vast majority offer them for free, although they may have a limited number of characters or decent quality.
You can also opt for a Premium font, which will have much higher quality and a more complete gallery.
In both cases, it is recommended to pass the file you download through an antivirus before installing it to avoid problems.
Extract the file before installing it
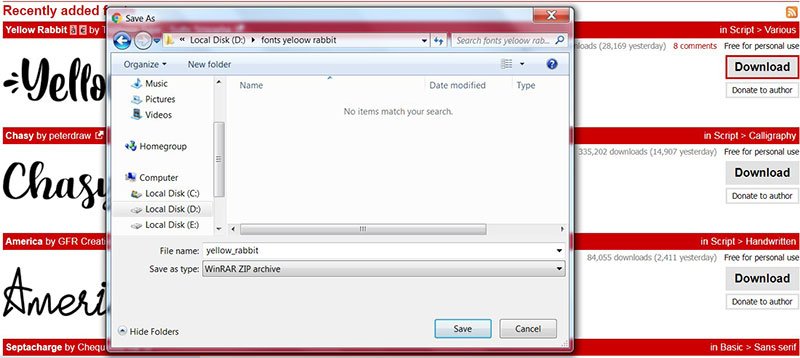
Although the GIMP font is a lightweight file, it will generally come in ZIP or RAR format. To use them, you will need a program to unzip them, such as WinRAR.
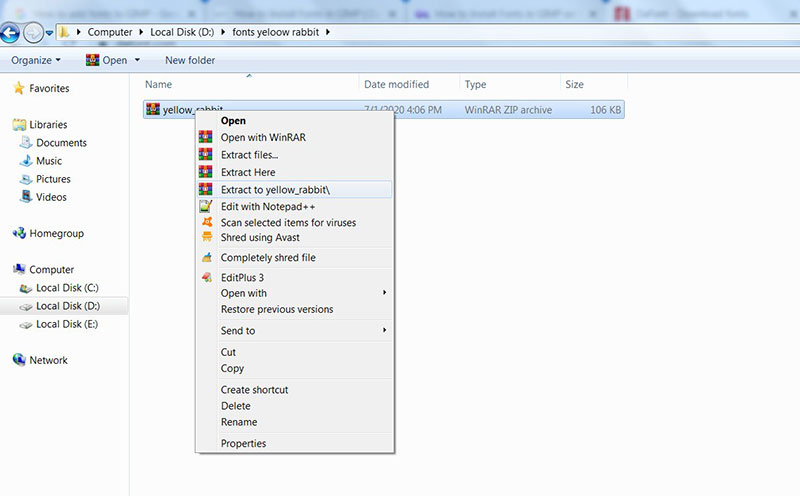
Inside you will find a folder that will include several files, some of which are simply text documents with instructions for installation or advertising on the website where you downloaded it.
Select the files you want to extract, right-click on them, and press “Extract”. You can also select “Extract files …” if you want to place them in a specific folder on the computer. Almost always what will interest you is the file with the TFF extension.
To make the next step easier, it is recommended that you create a unique folder to place fonts for GIMP.
Adding fonts to GIMP
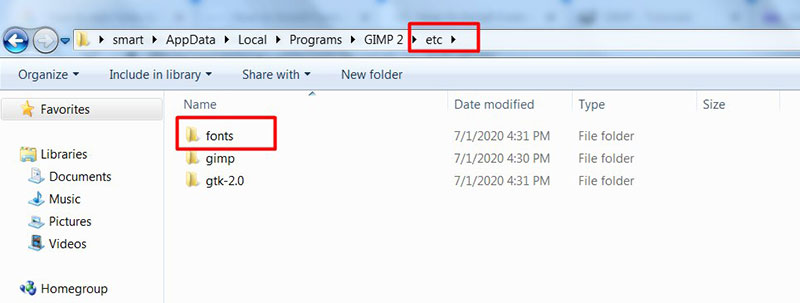
Now that you have the unzipped file, the next step is to add them directly to GIMP without having to install it in Windows. For this, you will have to locate the GIMP installation directory, which by default is on disk C, in the “Program Files” folder.
It is recommended that before continuing, close GIMP in case it is open so that the installation does not fail.
Within this directory, you should look for a folder called “etc”, and inside you should find another one named “fonts”. The font manager “fonts.conf” will be located here. You will need to edit this file using Notepad or any other text editor.
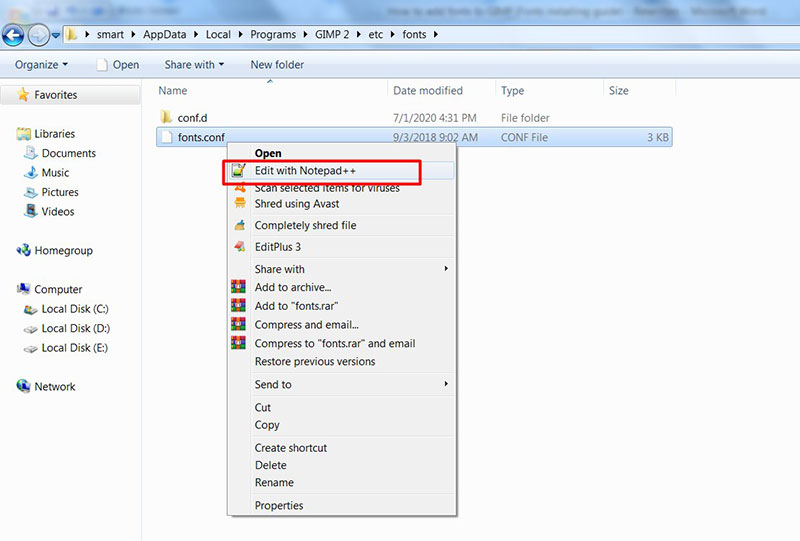
Now you need to look for a line where it prompts you to place an installation path for the fonts. Depending on where you left the file you extracted, you will have to enter the path manually. If, for example, you left it on the desktop, the path might be something like C/Desktop/Font.
Please save the file before closing so GIMP can start searching for the font.
Alternative ways of adding a font to GIMP
There are two alternative ways to add fonts to GIMP, which are the basic options for installing them on Windows. That is, with these ways you can use the fonts in other compatible programs.
Remember to close all the programs you have open for the installation to be effective.
Placing it directly in the font folder

The first option is to simply place the font file in the Windows Fonts folder. This will usually be on disk C, in the Windows folder, and in Fonts. Copy and paste the TFF or OTF file into the folder, and you should have it installed with this.
Sometimes downloaded fonts include both TFF and OTF files. On these occasions, we recommend that you install the OTF due to the greater number of options it has.
Using the installer
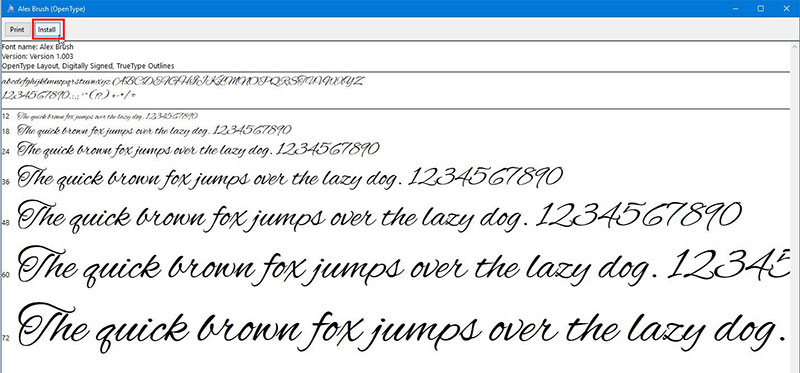
The second alternative is even easier, although it only works with TFF formats. Some fonts are immediately recognized by Windows, which means that by double-clicking them, an installer should open. From the installer, you should be able to see a preview of the font. Just press the “Install” button and you are done.
How to add fonts to GIMP – Linux

The process in Linux will depend on whether the Fontconfig utility has been correctly configured from the beginning.
If this is your case, you only have to put the font you downloaded in the ~/Fonts folder to appear in all programs that use the same utility.
As with Windows, there is the possibility to install the fonts exclusively in GIMP. You can do this by placing the font file inside the specially created fonts’ subdirectory in the GIMP installation folder. If you do not see the new characters in the program with this method, click on the “Update” button that appears when you select a font.
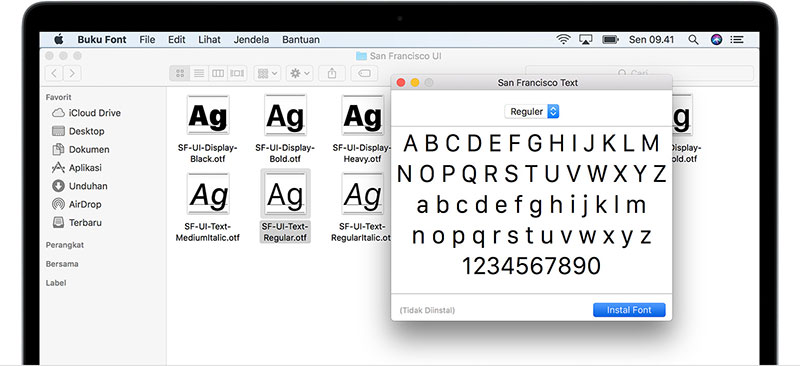
How to add fonts to GIMP – Mac OS X
Mac OS X also offers options very similar to those found in Windows. In the same way, you will have to close all the programs before proceeding with the installation.
Using Font Book
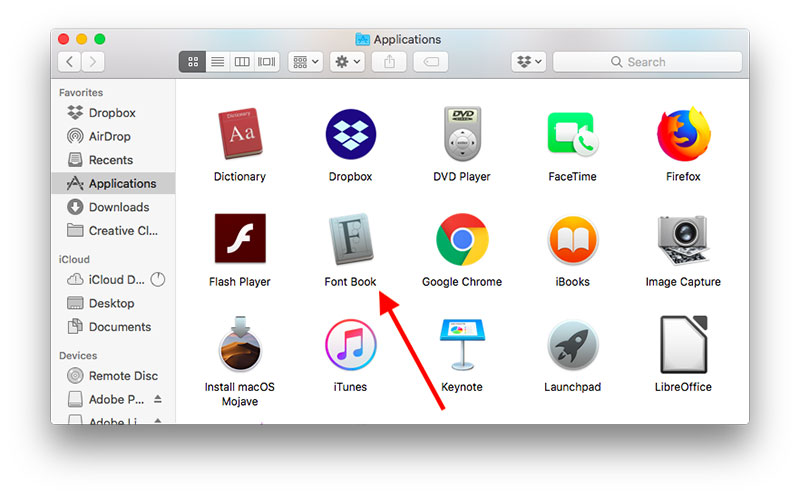
The first way is to use the Mac Font Book utility. This will automatically open when you double-click on any compatible font file.
Font Book will open, displaying a preview of the characters. Press the blue button that says “Install” to finish the process. In this way, the font will be installed in your entire system, not only in GIMP.
From Font Book you can also mark the fonts that you don’t want to use so that the operating system disables them without uninstalling them; this is useful when you want to keep a large gallery on your computer.
Placing the file in the “Fonts” folder
In the Mac OS X library, you can find a folder called “Fonts”. Here are all the characters used by the computer. Just drag the compatible file to the folder and it should appear in programs that can use it.
This way also lets you install fonts in GIMP for specific users. Before entering the “Library”, select the folder with the name of the user where you want to install the font. The path would end up being similar to User/Library/Fonts.
Test your new GIMP fonts
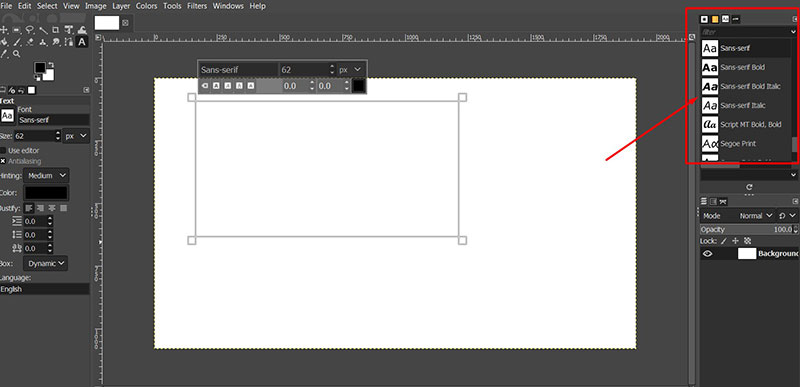
To know that the installation has been successful, you will have to open GIMP and look for it in the “Fonts” tab. Create any text to see the option, which will be identified with the “Aa” icon.
How to solve common problems
If the GIMP font pack does not load, try following these steps:
- In the “Edition” panel, open the “Preferences” tab. Here you must search the menu until you find the “Folders” option.
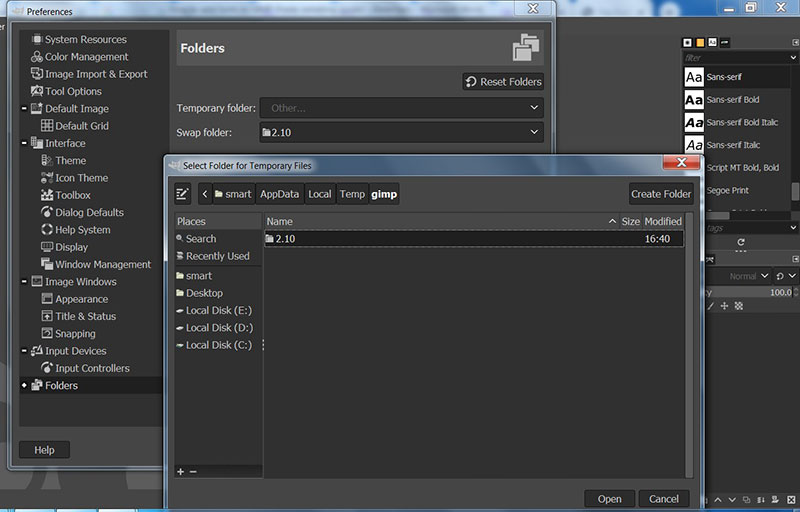
- From this menu, you can check if the font installation folder is appropriate. In this tab you can also add new locations, just click “Add a new folder”, and with the file selector, find the installation path.
- Press the “OK” button to save the changes.
FAQ On How To Add Fonts To GIMP
Where do I start with adding new fonts to GIMP?
First things first, make sure the font files you want to use are downloaded to your computer. They are usually in formats like TrueType (.ttf) or OpenType (.otf). Keep these handy as you’ll need to navigate to them.
How do I install fonts in GIMP?
Open GIMP and navigate to ‘Edit’ and then ‘Preferences’. Under ‘Folders’, locate and expand the ‘Fonts’ section. This shows you where GIMP searches for fonts. Simply drop your downloaded font files into this directory.
Can I use fonts in GIMP without installing them?
Absolutely! If you want a no-install method, use the ‘Fonts’ dialogue in GIMP to temporarily load fonts for use in your current session. Just remember, they won’t be available next time unless you install them.
Why can’t GIMP find my installed fonts?
Make sure your fonts are actually in GIMP’s font directory. If they are, sometimes a simple restart of GIMP or hitting the ‘Refresh’ button in the ‘Fonts’ dialogue solves this mystery.
How do I see newly added fonts in GIMP?
After installing your fonts, you might need to refresh the font list. Open the ‘Fonts’ dialogue box, find a small two-arrow circular icon at the bottom, and click it to refresh. Your new fonts should pop up!
Is there a limit to how many fonts I can add to GIMP?
There’s no specific limit to the number of fonts you can add. However, be mindful that having an excessively large font library might slow GIMP down, especially during startup.
How can I delete a font from GIMP?
If you need to declutter, navigate to the GIMP font folder via ‘Preferences’. Simply remove the unwanted font files from there, and don’t forget to refresh your font list afterward.
What types of font files can I use in GIMP?
GIMP supports a variety of font files, most commonly TrueType (.ttf) and OpenType (.otf). These are widely used and compatible across different platforms, making them ideal for GIMP projects.
How can I make sure fonts look good in GIMP?
For best results, consider the resolution and size of your project. Higher-quality font files perform better, especially in larger or more detailed designs. Experiment with anti-aliasing settings in GIMP to smooth out text appearance.
Can I convert fonts from one format to another for GIMP?
While GIMP itself doesn’t convert font formats, you can use third-party tools to convert fonts to compatible types like TrueType or OpenType before adding them to GIMP. This ensures compatibility and usability.
Conclusion
Embarking on the journey of how to add fonts to GIMP elevates your design game to another tier, granting you the flexibility and creative freedom essential in the eclectic world of graphic design. Whether it’s implementing TrueType fonts, exploring OpenType files, or just freshening up your existing typographic arsenal, mastering this skill is indispensable.
- Navigate effortlessly through the myriad font installation processes
- Use GIMP’s text tools with newfound expertise
- Equip yourself with a vast array of typographic capabilities
You’re now equipped to refresh fonts in GIMP, enhancing your projects visually and functionally. Remember, the right font can not only convey your message but also transform a basic design into an extraordinary one. Keep experimenting, continue learning, and never underestimate the power of a well-chosen typeface in your digital compositions. This is about making GIMP yours, and ultimately, letting your creativity flow unbounded.
If you liked this article about how to add fonts to GIMP, you should check out this article about how to add fonts to Photoshop.
There are also similar articles discussing how to add fonts to Adobe Illustrator, how to add fonts to Inkscape, how to add fonts to Paint.NET, and how to add fonts to InDesign.
And let’s not forget about articles on how to add fonts to FireAlpaca, how to add fonts to Clip Studio Paint, uploading fonts to Canva, and how to add fonts to GoodNotes.
Renowned for his expertise in logo design and visual branding, Bogdan has developed a multitude of logos for various clients.
His skills extend to creating posters, vector illustrations, business cards, and brochures. Additionally, Bogdan's UI kits were featured on marketplaces like Visual Hierarchy and UI8.
He also wrote in the past years on sites like Design Your Way, WebDesignerDepot, WPDean, Designmodo, Speckyboy, Slider Revolution, and more.
- The Airtable Logo History, Colors, Font, And Meaning - 12 July 2026
- How to Blur Background in Canva: A Quick Tutorial - 11 July 2026
- Typography Trends - 10 July 2026
Bogdan Sandu is a seasoned designer who has been designing websites since 2008. Renowned for his expertise in logo design and visual branding, Bogdan has developed a multitude of logos for various clients. His skills extend to creating posters, vector illustrations, business cards, and brochures. Additionally, Bogdan's UI kits were featured on marketplaces like Visual Hierarchy and UI8. He also wrote in the past years on sites like Design Your Way, WebDesignerDepot, WPDean, Designmodo, Speckyboy, Slider Revolution, and more.
You Might Also Like


