A sharp subject against a soft, blurred background is one of the cleanest ways to make a photo look intentional rather than accidental.
Knowing how to blur background in Canva means you can get that result without a professional camera or a Photoshop subscription. The tools are built in, and most of them are free.
This guide covers every method available, including the one-click Auto Focus tool, the brush-based selective blur, and the Pro-only Background Remover workflow. It also covers mobile, video, presentations, and the exact settings that produce clean output every time.
By the end, you will know which method fits your project and how to avoid the most common mistakes.
What Is Background Blur in Canva?

Background blur in Canva is a photo editing effect that reduces sharpness on the background layer of an image while keeping the foreground subject sharp and in focus.
It is available through 2 primary paths inside Canva’s editor: the native Blur tool under “Edit Image” > “Tools,” and the Background Remover combined with a blur slider (Canva Pro). These are distinct from applying a full-image blur, which softens the entire canvas including the subject.
The blur effect in Canva is non-destructive. You can adjust or remove it after applying without re-uploading the original image.
Canva also includes an Auto Focus tool that automatically detects the foreground subject and blurs the background in one click, no manual layer separation required.
| Blur Method | What It Does | Plan Required |
|---|---|---|
| Auto Focus | Detects the main subject and automatically blurs the background | Free |
| Blur Brush Tool | Lets you manually paint and blur specific areas of the image | Free |
| Background Remover + Blur Slider | Separates the subject from the background and applies a soft Gaussian-style blur effect | Pro only |
| Full Image Blur (Effects) | Applies blur across the entire image, including the subject | Free |
Blur applied to a background-set image in a presentation behaves differently than blur applied to a floating image layer. Both are covered further in this guide.
Understanding graphic design terms like depth of field, subject isolation, and foreground-background separation will help you make better decisions about which blur method suits your project.
How Does Background Blur Differ From Full-Image Blur?
Full-image blur applies a uniform softness across every pixel in the frame, subject included. Background blur targets only the area behind the subject, keeping the foreground crisp.
In Canva, the distinction matters for two reasons:
- Full-image blur is applied through “Edit Image” > “Effects” > “Blur” slider
- Selective background blur requires either Auto Focus or the Pro-only layer separation workflow
Using the wrong method blurs your subject along with the background, which defeats the purpose of the effect entirely.
Does Background Blur Work on Videos in Canva?
Background blur on video in Canva works differently than on static images. The blur effect under “Effects” on a video clip applies to the full frame, not selectively to the background layer.
Canva’s Virtual Background feature (available in live camera mode during Canva Presentations) does support real-time background blur. For pre-recorded video with selective background blur, you need footage edited externally in CapCut or DaVinci Resolve before importing into Canva.
Does Canva Have a Native Background Blur Tool?
Yes. Canva has 3 built-in blur tools accessible directly from the image editor. Which ones are available depends on your plan.
Canva reached 220 million monthly active users as of December 2024 (Backlinko), and a large portion of those users interact with image editing features including blur. The platform handles an average of 38.5 million designs created per day.
What Blur Tools Are Available on Canva Free?
Canva Free includes 2 blur tools:
- Auto Focus: one-click tool that detects the subject and blurs the background automatically, found under “Edit Image” > “Effects”
- Blur Brush: manual brush tool that paints blur onto a specific region, with adjustable brush size and intensity sliders
Both tools work on uploaded photos and Canva stock images. The Auto Focus tool does not require any layer separation. It is the fastest path to background blur for free users.
What Blur Tools Are Available on Canva Pro?
Canva Pro adds the Background Remover on top of everything available on the free plan. This tool uses AI to separate the subject from the background into 2 independent layers.
Once separated, you apply the blur slider to the background layer independently. This gives you the most control over blur intensity without touching the subject.
Canva Pro subscriptions rose by 15% globally in 2024 (SQ Magazine), with 21 million paid users as of September 2024. The Background Remover is consistently cited as one of the top reasons users upgrade.
Canva for Education and Canva for Teams both include Pro-level tools, including the Background Remover.
Where Is the Blur Tool Located in Canva?
Finding the blur tool catches a lot of first-time users off guard. It is not in the top toolbar by default.
The path is: click image > “Edit Image” > “Tools” > “See all” > “Blur.” From there, choose between blurring a specific area or the full photo. For Auto Focus, the path goes through “Edit Image” > “Effects” instead.
How to Blur the Background of a Photo in Canva (Pro)
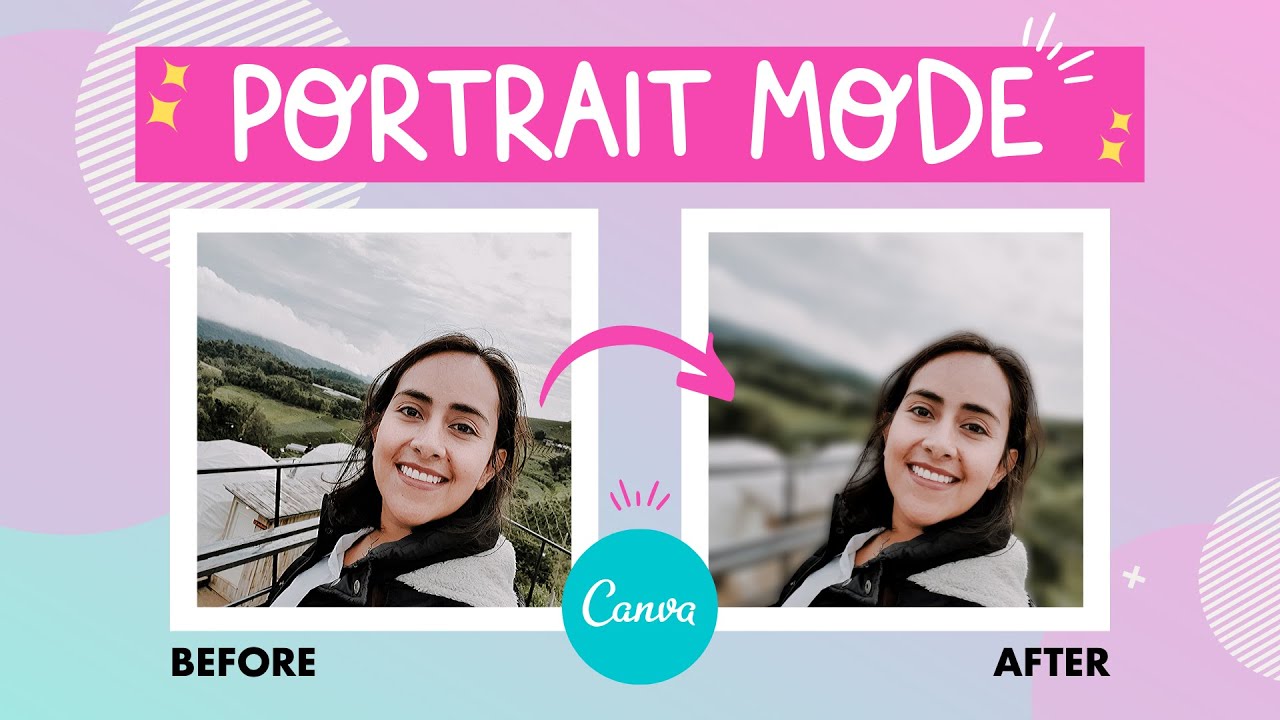
Blurring a photo background in Canva Pro takes 5 steps. The Background Remover handles subject isolation automatically, and the blur slider controls softness from 0 to 100.
Using the Background Remover Before Applying Blur
Step 1: Upload your image or select one from Canva’s stock library. Click the image to select it on the canvas.
Step 2: Click “Edit Image” in the top toolbar. Under “Tools,” select “Background Remover.” Canva’s AI processes the image in a few seconds and separates the subject from the background into 2 layers.
Step 3: After removal, use the “Restore” brush to fix any areas where the AI clipped into the subject. Hair and fine edges are the most common problem spots.
Step 4: With the background layer selected, go to “Edit Image” > “Adjust” and apply the blur. Alternatively, duplicate the original image underneath, apply blur to the full duplicate, then place the cut-out subject on top.
Step 5: Adjust the blur intensity slider and export as PNG to preserve transparency. Do not export as SVG as the blur effect does not carry over to that format.
The Kaleido acquisition in 2021 is what gave Canva the AI engine behind its background removal tool. Before that acquisition, the feature did not exist on the platform (Style Factory).
Adjusting Blur Intensity With the Slider
The blur slider runs from 0 (no blur) to 100 (maximum blur). There is no numeric readout. Intensity is judged visually.
Practical ranges by use case:
- 20-40: shallow depth-of-field look, works well for portraits and headshots
- 50-65: moderate softening, good for product photography and social graphics
- 70-100: full obscuration, useful for cluttered or distracting backgrounds
Setting blur above 80 on a low-resolution image (below 1000 x 1000 px) can produce visible pixelation artifacts at the blur boundary. Use PNG files at 1000 px minimum for clean results.
How to Blur Background in Canva for Free (No Pro Required)
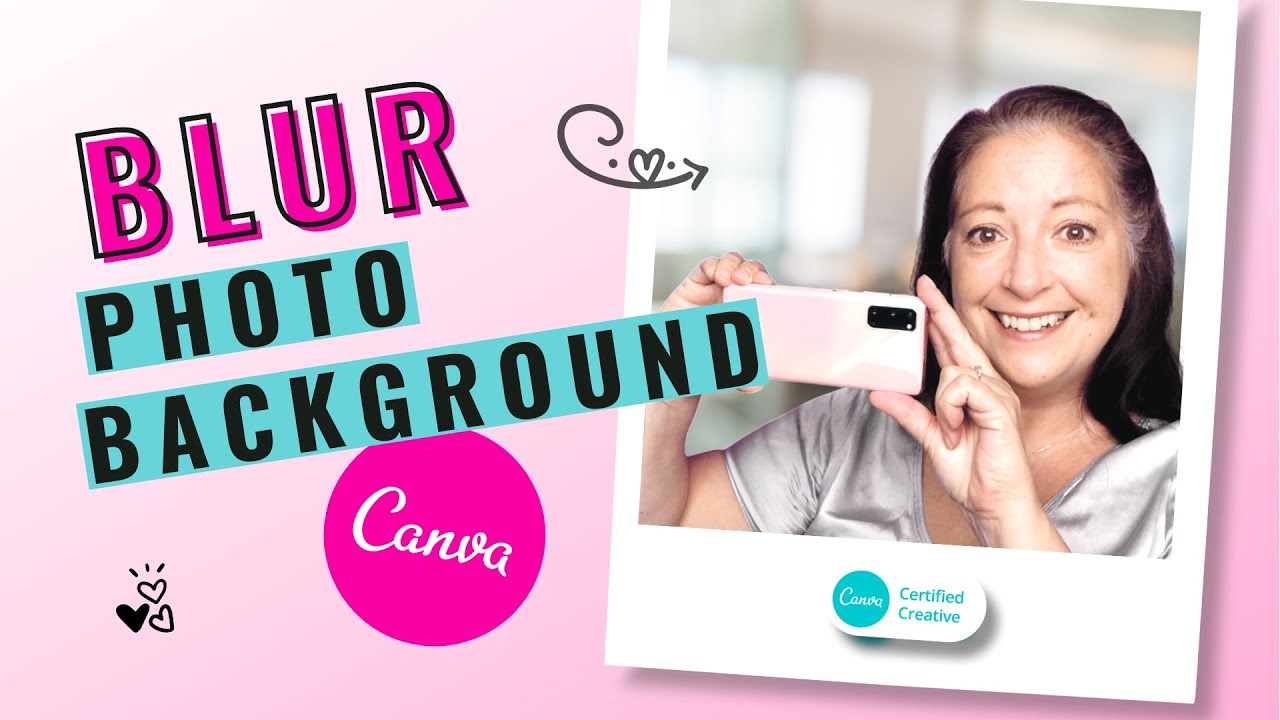
Free users have 3 practical options for simulating background blur without the Background Remover. Each involves a different tradeoff between speed and precision.
Using Auto Focus for One-Click Background Blur
Auto Focus is the fastest method available on the free plan. No layer separation needed.
Path: Click image > “Edit Image” > “Effects” > “Auto Focus.” Canva detects the subject automatically and blurs the surrounding background.
The limitation: you cannot control which specific areas get blurred. The tool decides based on its AI detection. For high-contrast images with a clear subject, results are reliable. For busy scenes or multiple subjects, the detection can be inconsistent.
Uploading a Pre-Blurred Background Image
This workaround takes more prep time but gives precise results. The process:
- Remove the background using a free tool like Remove.bg or Photoshop Express
- Blur the background in Snapseed (mobile) or the free version of Pixlr (browser)
- Export both the blurred background and the cut-out subject separately
- Import both into Canva, layer the subject over the blurred background
This gives the same visual result as the Pro workflow. The tradeoff is that it requires 2 external tools and more steps outside of Canva.
Using a Transparent Shape Overlay as a Blur Substitute
Not actual blur. But for many social media graphics and presentation slides, it works just as well visually.
Place a white or light-colored rectangle over the background. Reduce its opacity to between 40-70%. This softens the background visually and separates it from the foreground subject without any external tools.
Good for: text-heavy designs, quote cards, presentation slides. Not suitable for: portrait photography or product shots where blur realism matters.
How to Blur Background in Canva on Mobile
The Canva mobile app (iOS and Android) includes the same core blur tools as the desktop version. The workflow is slightly different due to the touch interface.
The Canva mobile app had over 100 million downloads on Android alone by 2022, and mobile usage has continued growing since (Answer IQ). The edit panel on mobile is accessed by tapping an image, then tapping “Edit Image” from the bottom toolbar.
Mobile Blur Workflow for Free Users
Auto Focus on mobile: Tap image > “Edit Image” > “Effects” > “Auto Focus.” Same result as desktop.
Blur Brush on mobile: Tap image > “Edit Image” > “Tools” > “See all” > “Blur” > select “Area.” Use your finger or stylus to paint the blur. The brush size and intensity sliders appear at the bottom of the screen.
Mobile slider precision is lower than desktop. For fine-edge work, desktop gives more control. For quick social media graphics, mobile is fully capable.
Mobile Blur Workflow for Pro Users
Background Remover is available on the Canva mobile app under the same Pro subscription as desktop. Tap image > “Edit Image” > “Background Remover.” Processing takes a few seconds longer on mobile than desktop.
Known limitation: Complex backgrounds with hair, fur, or fine edges produce less accurate cuts on mobile compared to desktop. This is an expected behavior tied to processing power, not a bug.
After removal, apply blur to the background layer using the same slider path as on desktop. Export as PNG, not JPG, for transparent layer support.
How to Blur Background in Canva Video

Selective background blur in Canva video requires a different approach than photo editing. The platform’s video effects apply to the full frame, not selectively to the background layer.
Applying Blur to a Full Video Frame in Canva
This is the only native video blur option in Canva’s standard editor.
Path: click the video clip on the canvas > “Edit Video” > “Effects” > “Blur.” The blur applies uniformly across the entire video frame. Use this for stylistic effects, overlays, or when the video is used as a background element behind text.
Not suitable for: portrait videos where you want the subject sharp and only the background blurred.
Selective Background Blur for Video in Canva
Canva does not natively support selective background blur on pre-recorded video as of 2025. There are 2 practical approaches:
- Pre-edit in CapCut: Use CapCut’s “Remove BG” on video, export with transparent background, import into Canva, layer over a blurred background clip
- Green screen setup: Record against a green screen, import into Canva, use the chroma key feature to replace the background with a blurred still or video
For live camera blur (not pre-recorded video), Canva Presentations supports Virtual Background blur in real time during active camera sessions.
If selective video background blur matters to your workflow, DaVinci Resolve handles it with frame-accurate masking and motion tracking. Canva is better suited for static photo editing in this context.
How to Blur Only Part of an Image in Canva
Canva does not have a native region-selection blur tool that lets you draw a freeform selection area. Selective blur is done through 2 methods, each with different precision levels.
Using the Blur Brush Tool for Selective Area Blur
The Blur Brush is the most direct method for blurring a specific area.
Path: click image > “Edit Image” > “Tools” > “See all” > “Blur” > select “Area.”
| Setting | What It Controls | Recommended Range |
|---|---|---|
| Brush Size | Controls the diameter of the blur area applied with each stroke | Use small sizes for edges and details, larger sizes for open areas |
| Intensity | Controls the strength of the blur effect | 30–60 for a natural-looking blur |
Use the “Remove” brush to undo blur from areas you painted by mistake. This is not a destructive edit. The original image underneath is unchanged.
Selective Blur Using Layered Duplicates (Pro)
This method gives cleaner subject edges than the brush tool.
- Duplicate the image on the canvas (right-click > “Copy” then paste)
- Apply full blur to the bottom copy using Effects > Blur slider
- Use Background Remover on the top copy to isolate the subject
- The sharp subject sits over the blurred duplicate, creating natural depth separation
This mirrors how the bokeh effect works in focal point design: one element draws the eye while surrounding elements recede visually.
For pixel-level selective blur, Photoshop’s “Select and Mask” with a Field Blur or Lens Blur gives more precision than either Canva method. Photoshop offers more than 14 blur types including Tilt-Shift and depth-map-based blur (Style Factory).
Limitations of Selective Blur in Canva
Canva’s mask tool is limited to preset shapes and basic crop outlines. There is no Bezier path or freeform polygon selection available.
This matters for images where the area you want to blur has an irregular or complex shape. If you need precise region-level control, Pixlr or Photoshop Express handle this better before you import the image into Canva.
How to Blur a Background in Canva Presentations
Blurring a background in a Canva presentation works through the standard image editing panel, but the behavior changes once an image is set as a slide background rather than placed as a floating layer.
Canva holds a 54% share of the online presentation software market (SQ Magazine), ahead of PowerPoint. A significant portion of that use involves slide background customization, making blur one of the more commonly needed presentation tools.
How to Set a Blurred Image as a Slide Background
Method 1 (pre-blur then set):
- Upload your image and place it on the canvas as a floating element
- Click “Edit Image” > “Adjust” and apply blur using the slider
- Right-click the blurred image and select “Set as background”
- Overlay your text and design elements on top
This locks the blur into the background layer. Text and shapes placed above remain completely sharp.
How to Blur a Background Already Set as a Slide Image
Took me a while to figure this one out. If you set an image as a background first without applying blur, the path is slightly different.
Click anywhere on the background image to select it, then click “Edit Image” from the top toolbar. The Adjust panel opens, and you can drag the blur slider from there. Changes apply directly to the background layer without affecting any overlaid elements.
This approach works on all Canva plans, including Free. The blur slider on a background-set image is accessible without a Pro subscription, which is a useful detail many users miss.
Why Background Blur Works Well in Presentations
Busy, detailed background images compete visually with slide text. Blurring them reduces that competition without removing the image entirely.
A blur value between 30-55 on a background image keeps color and texture visible while preventing the background from drawing the viewer’s eye away from slide content. Values above 70 create a near-solid tonal wash, which works well for quote slides and title cards.
What Are the Blur Intensity Settings in Canva?
The blur slider in Canva runs from 0 to 100. No numeric readout displays on screen. You judge intensity entirely by visual preview.
Blur Intensity Ranges by Use Case
| Slider Range | Visual Result | Best For |
|---|---|---|
| 0–20 | Slight softening while preserving most details | Subtle depth effects, editorial-style visuals |
| 20–40 | Creates a shallow depth-of-field appearance | Portraits, headshots, profile graphics |
| 50–65 | Moderate blur with recognizable but unfocused backgrounds | Product photos, social media graphics |
| 70–100 | Heavy blur that turns the background into a soft tonal wash | Hiding cluttered backgrounds, presentation slides |
How Blur Intensity Affects Export Quality
Canva recommends uploading images at 300 DPI for best results, and their help documentation confirms a minimum design dimension of 500×500 px before blur effects produce clean output (Canva Help Center).
Applying blur above 75 on a low-resolution source image (below 1000 px on the short side) produces visible pixelation artifacts at the blur boundary. The blur radius increases proportionally with slider value, and a small source image runs out of pixel data before the blur can render smoothly.
Practical fix: upload source images at 1500 px minimum on the short edge. Export as PNG, not JPG, since JPG compression adds its own softening artifacts on top of the intentional blur.
Does Canva Use Gaussian Blur?
Canva applies a Gaussian-style blur algorithm across all its blur tools. Pixel radius increases linearly as the slider moves right.
This is not a lens blur, tilt-shift blur, or motion blur. Those blur types simulate specific optical or motion effects and require depth map data or directional vectors. Canva’s slider-based blur is a uniform radial softening applied across the selected region or full image.
How Does Canva Background Blur Compare to Photoshop?
Canva blur is fast, non-destructive, and requires no technical knowledge. Photoshop blur is precise, layered, and built for professional output. They serve different users for different jobs.
According to G2’s 2024 design software comparison, Canva scores 4.7/5 from over 4,300 reviews, with ease of use consistently cited as the top benefit. Photoshop scores 4.5/5 from 3,500+ reviews, with professionals citing its power but beginners citing steep learning curves.
What Blur Tools Does Photoshop Offer That Canva Does Not?
Photoshop blur types not available in Canva:
- Lens Blur (simulates camera aperture with depth map)
- Tilt-Shift (selective plane blur)
- Field Blur (multiple focal points with feathering)
- Motion Blur (directional blur for speed effects)
- Radial Blur (spin or zoom blur)
Canva offers 1 blur type: a uniform Gaussian-style radial blur via slider. Photoshop offers 14 blur types with configurable parameters (Style Factory).
Where Canva Outperforms Photoshop on Background Removal
Background separation quality actually favors Canva in several real-world tests. Canva’s AI-powered Background Remover preserves fine edge details, especially on complex subjects like hair, better than Photoshop’s one-click remove background tool (Toolify AI).
Photoshop’s edge refinement advantage comes from manual control, not the automatic tool. When a designer uses “Select and Mask” with feathering, smooth, and contrast settings, Photoshop produces pixel-perfect cuts. But that workflow takes 5-10 minutes of manual work per image versus Canva’s 3-5 second automatic result.
Which Tool to Use and When
Use Canva when: social media graphics, quick headshots, presentation backgrounds, content created at volume.
Use Photoshop when: print work requiring 300 DPI precision, product photography with complex edges, images needing Lens Blur or Tilt-Shift optical effects, or any project where pixel-level edge control is non-negotiable.
Many professionals use both. Canva for day-to-day content output, Photoshop for high-value client deliverables that need professional-grade photo editing.
Common Problems When Blurring Backgrounds in Canva
Most blur issues in Canva come down to 4 repeating problems. Each has a direct fix.
Background Remover Cuts Into the Subject
The AI clips into hair, fine edges, or similar-toned areas between subject and background. This happens most on low-contrast images where the subject and background share similar colors.
Fix: Use the “Restore” brush under Background Remover to paint back the areas that were incorrectly removed. Adjust brush size to match the edge detail level. For images with very fine hair or fur, consider pre-processing in Remove.bg or Photoshop Express before importing into Canva.
Blur Applies to the Entire Image Instead of the Background Only
This is the most common mistake. Using “Effects > Blur” without first separating the subject blurs everything including the foreground.
Fix: Use the Auto Focus tool instead (free plan) or the Background Remover workflow (Pro). Both target the background while preserving subject sharpness. The Effects blur slider is an all-image tool, not a selective one.
Exported Image Loses the Blur Effect or Looks Pixelated
Two separate issues, two separate causes:
- Blur effect disappears: Exporting as SVG does not carry over raster effects including blur. Export as PNG or JPG instead.
- Pixelation at blur boundary: Source image resolution is too low. Canva’s help documentation recommends a minimum of 300 DPI for uploaded images (Canva Help Center). For screen use, 1500 px on the short edge is a reliable floor.
Blur Feature Not Available (Free Plan)
The Background Remover and the blur slider on isolated layers are Pro-only. Free users sometimes encounter locked tools after following tutorials that assume a Pro account.
Fix: Use Auto Focus (free) or the Blur Brush area tool (free) instead. Alternatively, pre-blur the background in Snapseed (mobile) or Pixlr (browser) before importing the image into Canva and layering the cut-out subject on top.
Best Image Types for Background Blur in Canva
Image format, resolution, and composition all affect how clean the blur result looks in Canva. Getting these right before you start saves significant re-editing time.
Which Image Formats Work Best
PNG is the better upload format for blur work. PNG uses lossless compression, meaning no pixel data is discarded on import. JPG files arrive with compression artifacts already baked in, and those artifacts become more visible when blur processing is applied on top.
For export after blurring, PNG is again the preferred format. JPG adds a second round of compression on top of the blur, which can create a soft-on-soft degradation effect particularly noticeable at blur boundaries.
What Compositions Produce the Best Blur Results
High edge contrast between subject and background is the single biggest factor in blur quality. Canva’s AI subject detection is color and contrast dependent.
Works well:
- Person against a plain wall or open sky
- Product against solid or lightly textured surface
- Subject wearing clothing that contrasts with background tone
Produces inconsistent results:
- Hair or fur against similarly toned backgrounds
- Transparent or translucent subjects (glass, fabric)
- Complex scenes with multiple subjects at different depths
Canva’s subject detection struggles with fine-edge subjects the same way most AI removal tools do. That is not a Canva-specific limitation. Remove.bg, PhotoRoom, and Photoshop’s automatic tool all show similar performance degradation on those image types (VectoSolve, 2026).
Resolution Requirements for Clean Blur Output
Canva’s official guidance sets the minimum recommended upload resolution at 300 DPI for print and a minimum design dimension of 500×500 px for clean digital output (Canva Help Center).
For background blur specifically, a practical working minimum is 1000×1000 px on the source image. At that size, the blur algorithm has enough pixel data to render smooth gradients at the blur boundary without pixelation artifacts at any slider value from 0 to 100.
Canva Pro users can download at 2x or 3x the design dimensions to compensate for any resolution loss introduced during editing. Free users should design at full intended output size and export as PNG to avoid double compression.
Understanding how pixel density affects editing output helps you set up source files correctly before any blur work begins. For projects that need to move from Canva into print workflows, knowing your DPI requirements before you start editing prevents resolution problems at the export stage.
If you work across multiple color output formats, understanding RGB versus CMYK color modes matters when exporting blurred images for print. Canva works in RGB by default. Print vendors typically require CMYK output, so plan your export format accordingly before sending files to a printer.
FAQ on How To Blur Background In Canva
Can you blur the background in Canva for free?
Yes. The Auto Focus tool and the Blur Brush are both available on the free plan. Auto Focus detects your subject automatically and blurs the background in one click. The Background Remover, which gives more precise layer control, requires Canva Pro.
Where is the blur tool in Canva?
Click your image, then select “Edit Image” from the top toolbar. Go to “Tools,” click “See all,” and select “Blur.” For Auto Focus, the path is “Edit Image” > “Effects” > “Auto Focus.” The location differs slightly on mobile but follows the same panel structure.
Does Canva have a background blur tool on mobile?
Yes. Both iOS and Android apps include Auto Focus and the Blur Brush. Canva Pro users can also access the Background Remover on mobile. Tap the image, select “Edit Image,” and navigate to Effects or Tools depending on which method you need.
How do I blur only part of an image in Canva?
Use the Blur Brush under “Edit Image” > “Tools” > “Blur” > “Area.” Paint directly over the region you want softened. Adjust brush size and intensity with the sliders. Use the Remove brush to undo any strokes applied to the wrong area.
Is background blur available in Canva video?
Full-frame video blur is available through the Effects panel on any video clip. Selective background blur on pre-recorded video is not natively supported. For that result, pre-edit in CapCut or use Canva’s green screen feature with a blurred background replacement.
Why does my blurred image look pixelated after export?
The source image resolution is too low. Canva recommends a minimum of 300 DPI for uploaded images. For digital use, keep source images at 1000 px minimum on the short edge. Export as PNG rather than JPG to avoid adding compression artifacts on top of the blur.
Does Canva blur the background in presentations?
Yes. Set an image as your slide background, click it to select it, then open “Edit Image” and adjust the blur slider. This works on all plans including Free. Text and elements layered above the background remain sharp and are not affected by the blur.
What is the difference between Auto Focus and the Background Remover in Canva?
Auto Focus blurs the background without separating layers. It is fast but gives limited manual control. The Background Remover (Pro) isolates subject and background into independent layers, letting you apply blur only to the background with precise intensity adjustment via the slider.
Can I blur the background in Canva without Canva Pro?
Yes, using 2 free methods. Auto Focus applies background blur automatically with one click. Alternatively, pre-blur your background in a free tool like Snapseed or Pixlr, then import both the blurred background and the cut-out subject into Canva and layer them manually.
Does background blur affect image quality when exporting from Canva?
Blur itself does not reduce quality. Export format does. Use PNG for the cleanest result since it applies lossless compression. Avoid SVG exports as blur effects do not carry over. JPG adds a second round of compression that can create visible softening artifacts at blur boundaries.
Conclusion
This conclusion is for an article presenting how to blur background in Canva, a process that is more flexible than most users realize.
Free plan users have the Auto Focus tool and the Blur Brush. Pro users get the Background Remover for precise layer-level control. Both paths produce clean results when the source image resolution is right.
Match the method to the job. Quick social graphic? Auto Focus. Portrait with fine hair edges? Background Remover plus the blur slider. Presentation slide? Set the image as background, then adjust directly.
For video and selective region blur, external tools like CapCut handle what Canva currently cannot. Use PNG on export every time, and keep source images above 1000 px to avoid pixelation at the blur boundary.

Renowned for his expertise in logo design and visual branding, Bogdan has developed a multitude of logos for various clients.
His skills extend to creating posters, vector illustrations, business cards, and brochures. Additionally, Bogdan's UI kits were featured on marketplaces like Visual Hierarchy and UI8.
He also wrote in the past years on sites like Design Your Way, WebDesignerDepot, WPDean, Designmodo, Speckyboy, Slider Revolution, and more.
- The Windsurf Logo History, Colors, Font, And Meaning - 10 October 2026
- How to Remove Background From Product Photos (No Photoshop) - 10 October 2026
- How Designers can Build a Stronger Online Creative Identity - 9 October 2026

Bogdan Sandu is a seasoned designer who has been designing websites since 2008. Renowned for his expertise in logo design and visual branding, Bogdan has developed a multitude of logos for various clients. His skills extend to creating posters, vector illustrations, business cards, and brochures. Additionally, Bogdan's UI kits were featured on marketplaces like Visual Hierarchy and UI8. He also wrote in the past years on sites like Design Your Way, WebDesignerDepot, WPDean, Designmodo, Speckyboy, Slider Revolution, and more.
You Might Also Like