


Something has to hold the pages together, and in print work that usually comes down to six methods: saddle stitch, perfect binding, case binding, spiral coil, Wire-O, and comb. Some use staples, one uses glue, a couple use thread, and the rest pass a coil, wire, or plastic comb through punched holes.
The choice sets page capacity, lay-flat behavior, spine type, and cost. It also changes the file itself, since a stapled booklet, a glued paperback, and a coil-bound manual each need a different page count, cover file, and inside margin.
Perfect binding trips people up. The folded sheets are not glued as folds. The bindery mills the folds off the spine, so every page becomes a loose leaf that the adhesive grips, and a weak glue line lets pages pull out (4over4).
Which binding types are used in print design?
Staples, adhesive, thread, and mechanical fixings cover everything here. Saddle stitch is the stapled method and perfect binding is the glued one. Case binding and section sewn binding rely on thread, while spiral coil, Wire-O, and comb all push a plastic or metal spine through punched holes.
Any print design project past a few pages runs into this choice early. It dictates the page-count rules, the cover layout, and how the spread opens in the reader’s hands.
| Binding type | Page range | Lay-flat | Spine |
|---|---|---|---|
| Saddle stitch | 8 to 64 | Partial | None, fold only |
| Perfect binding | 28 to 300+ | No | Flat, printable |
| Case binding | 75 to 550 | Good when sewn | Board-backed, printable |
| Spiral coil | 10 to 500+ | Full | None |
| Wire-O | Thickness-limited | Full | None |
| Comb | Thickness-limited | Partial | None |
Page ranges for saddle stitch, perfect binding, and coil follow AlphaGraphics (2026). Case binding follows Amazon KDP’s hardcover help page. Wire-O and comb are limited by the thickness of the block, not by a page count.
Cost climbs with construction effort. Saddle stitch is cheapest for thin publications, and case binding costs the most.
How does saddle stitch binding work, and where does it stop working?
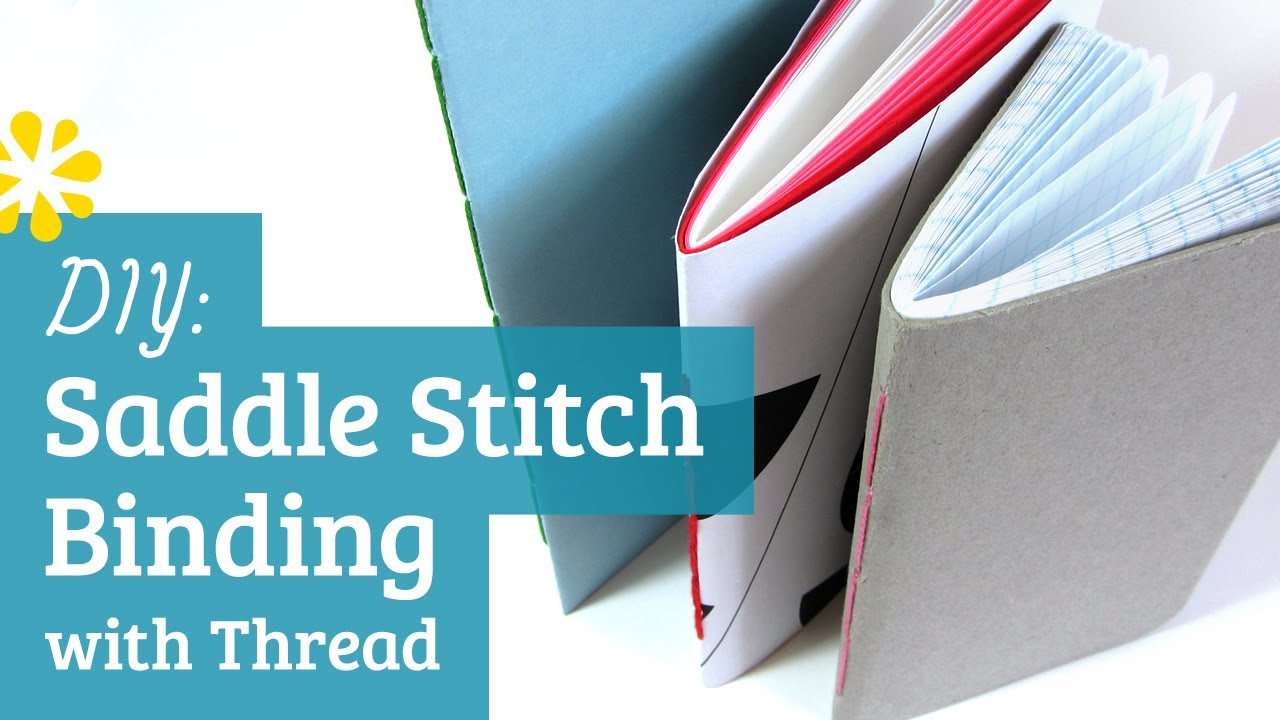
Folded sheets get nested inside a cover and stapled through the fold. That’s the whole method, and it explains the limits too, starting with a ceiling at about 64 pages.
The folded stack sits over a saddle-shaped rail and gets stapled twice along the spine fold.
Each folded sheet carries four pages, so the page count has to be a multiple of four. A 34-page booklet can’t be made. A 32 or a 36 can.
Heavy stock lowers the ceiling. AlphaGraphics (2026) advises cutting the maximum page count by about 30% when cover-weight paper runs throughout, and the gap between paper weight and thickness explains why: thicker sheets add bulk at the fold, so fewer fit inside the staples.
Creep is the other limit. Inner sheets push outward as they nest, so after trimming, the middle pages lose more of their outside margin than the outer pages do.
On the plus side, saddle stitch is the cheapest way to bind a thin publication, and since no adhesive has to cure, turnaround is short. Most printers do it in-house.
The downsides are all structural. There’s no printable spine because the fold is the spine, the page ceiling sits near 64, thicker booklets creep, and durability drops as the page count climbs.
Brochures, event programs, short magazines, and lookbooks are the usual products.
What is perfect binding, and when does it suit a project?

The spine edge gets milled, glued, and wrapped in a cover. That gives paperbacks, catalogs, and manuals their flat, printable spine, and it works for publications thick enough to carry one. What you give up is lay-flat behavior.
- Pages are gathered into a block.
- The spine edge is milled so the adhesive reaches every sheet.
- Hot melt adhesive goes on the spine and the wraparound cover attaches.
- The block is trimmed on the three open sides.
EVA hot melt has been the standard for a long time. PUR (polyurethane reactive) is the newer option, with a higher material cost and a need for specialized equipment.
PUR goes on thinner and stays flexible, so the book opens more easily, and it does not re-melt under heat once set.
Printivity reports PUR bond strength as much as 50% higher than EVA once set, and Mid-State Litho puts the page-pull and page-flex advantage at 40 to 60%. Both are printer-reported figures, not independent lab tests, so read them as a direction rather than a spec.
The glued edge limits how far the book opens, and part of the printed area disappears into the binding, so inside margins (the gutter) need extra room. Macmillan Learning’s Technical Communication text describes the method as the most formal-looking choice but a relatively fragile one that rarely lies flat.
If staples are still on the table, this saddle stitch versus perfect bound comparison covers where the two overlap.
| Pros | Cons |
|---|---|
| Flat spine that takes printed title text | Does not open flat, especially with EVA |
| Handles high page counts | Wrong adhesive or poor application causes page pull-out and spine cracking |
| Looks like a finished book | Needs enough thickness for a readable spine |
Catalogs, directories, paperback books, and manuals are the typical products.
Case binding and section sewn binding for hardcover books
A rigid board cover around a text block is case binding, and section sewn binding is the thread method that holds the block together. Paired up, they give the most durable construction covered here.
Smyth sewing, the machine standard, stitches through the fold of each signature and then links the signatures into one text block. Endpapers tie the block to the case.
The text block is folded signatures, sewn or glued into one unit. Endpapers do the joining: one half is pasted to the board and the other to the block, which makes the joint that carries the load every time the cover opens. The case is a front board, a spine piece, and a back board wrapped in cloth or printed paper, and cover art prints as one wrap across front, spine, and back, often laminated for scuff resistance.
Printers split the text block by run size. Acutrack builds case-bound books with a glued block for smaller runs and a Smyth sewn block for larger ones, and its support documentation says the sewn version is more durable and opens flatter.
IngramSpark makes hardcovers two ways, case binding and its Digital Cloth process, and offers spine text only on Digital Cloth books (IngramSpark help documentation). The variant decides what the cover file can carry.
Cost is the main brake. In Amazon KDP’s own worked example, a hardcover carries a fixed $5.65 per book plus $0.012 per page on Amazon.com, which puts a 300-page black-and-white book at $9.25 in printing cost.
It’s the strongest build here and it reads as a premium object, and a sewn block opens flat. Against that, unit cost is the highest, production takes longer, and there’s a thickness floor below which a board case looks out of proportion.
How do spiral coil, Wire-O, and comb binding compare?
Each one punches a row of holes along the binding edge and runs a plastic or metal spine through it, so none gets a printable spine. Coil and Wire-O open flat. Comb opens less flat.
Pages are loose single sheets rather than folded sections, so the page count only needs to be even. The multiple-of-four rule from saddle stitch does not apply.
Notebooks, calendars, manuals, and reports are the typical products.
Spiral coil binding

One continuous plastic helix threads through round holes. The pages turn a full 360 degrees and lie flat, and coil comes in a range of colors and diameters.
Teams often choose spiral binding for printed presentations, where handouts get folded back on a desk. Clear acetate fronts and rigid backs attach without changing the process.
Coil earns its place on manuals and workbooks used flat on a desk, and on thick documents, since the coil diameter scales with the stack. Covers with an acetate front work well too.
The common complaint is kinking at the crimped ends after heavy repeated use. There’s also no spine, so shelf-facing titles are out.
Wire-O binding
Wire-O sets double loops of metal wire into rectangular slots. The pages lie flat and fold back, and the wire comes in colors and metallic finishes that suit calendars, notebooks, and branded journals.
Friesens, a book printer, specifies Wire-O blocks from 0.0625 to 1 inch thick for softcover books and 0.09375 to 0.875 inches for hardcover.
| Pros | Cons |
|---|---|
| Lay-flat and fold-back opening | Rotates less freely than coil; printers disagree on whether pages turn a full 360 degrees |
| Tidy alignment across a double-page spread | Loops splay near their maximum diameter |
| More finished look than plastic coil | No spine for shelf titles |
Comb binding
Comb binding is the least polished of the three, and the page stack shows it. The tines pull pages into slight S-curves near the edge.
A plastic comb passes through rectangular slots. Pick the smallest comb that holds the stack with a few millimeters to spare.
Pages can be added or removed by reopening the comb, and the hardware is the simplest of the three. The catch is that pages don’t lie as flat as with coil or Wire-O, and there’s no printable spine. I’d keep it for internal documents.
Which less common binding types are worth considering?
A few methods sit outside the main families and still turn up regularly.
- Thermal binding uses a cover with a pre-applied glue strip along the spine, melted in a binding machine. It’s fast per document, though each one needs its own cover.
- Side stitch drives wire through the front cover and the stack near the edge instead of along the fold. Thick stacks get hard to page through.
- Japanese stab binding is thread sewn through the side of loose sheets, with the stitch pattern showing along the spine edge. The pattern consumes inside margin, and the result is decorative.
- Coptic stitch leaves exposed thread chains along the spine, with no glue and no staples.
Thermal binding has a catch. The glue strip struggles to grip glossy coated stock, and on wide-spine covers it fails to make full contact with a thin stack (MyBinding knowledge base).
Sources disagree on Japanese stab binding. Tiny Workshops lists it among the methods that lie flat, while Skillshare’s bookbinding guide says it will not.
Coptic stitch is the safer lay-flat bet: a Scalar book hosted by the University of Southern California says the structure keeps its strength while the open pages lie entirely flat. Both sewn methods are hand-sewing techniques, so they suit small batches and handmade editions.
How to choose a binding type by page count, run length, and use
Page count narrows the field first. Budget comes next, and whatever the piece will be used for settles what’s left. Sources agree on that order and disagree on where the page-count lines fall.
A few figures from the sources show where the lines get drawn.
- Saddle stitch is the only option under 40 pages (4over4)
- Perfect binding is the only option over 64 pages (4over4)
- Printer rule of thumb: stitch under 48 pages, perfect bind over 96 (PaperSpecs, updated January 2025)
- Perfect binding adds 10% to 15% to print cost on average (PaperSpecs)
- Saddle stitch runs 30% to 50% cheaper on 100 to 500 copies of a 24-page program (4over4)
Page count
Thickness sets the real limit, and page count only approximates it.
That is why the lines move. The 28-page floor for perfect binding in the overview table sits below 4over4’s roughly 40-page figure, and PaperSpecs expresses the floor as a spine thickness instead of a page count.
Bulk moves the other end too. Heavy coated stock lets perfect binding start sooner, and thin stock pushes the floor higher (4over4).
The overlap band produces real misses. At 48 pages, Fine Arts magazine, published for the fine arts museums of San Francisco, switched from perfect binding to saddle stitch and began to bow in the middle, according to PaperSpecs.
Run length and cost
The two cost figures above cannot both describe the same job. 4over4’s example uses a 24-page program, below the roughly 40-page floor its own binding guide sets for perfect binding, so it is a hypothetical comparison, not a typical quote.
Both are printer averages, not published studies. Get a quote at the real page count and paper before deciding.
My rule is simple. If the piece lives for one event, stitch it and put the savings into paper.
Product type
| Product | Binding | Reason |
|---|---|---|
| Event program, newsletter | Saddle stitch | Cheap, short-lived |
| Thick catalog, directory | Perfect binding | Printed spine, high page count |
| Workbook, manual, calendar | Spiral coil or Wire-O | Opens flat |
| Premium or reference book | Case binding | Durability, shelf presence |
| Short report | Thermal or comb | Quick, in-house |
Check the pick against the page count before committing to it.
When does a binding choice fail?
Failures usually come from thickness, paper, heat, or handling that falls outside what the method was built for. Most of them trace back to a spec the printer already publishes.
- A saddle stitched stack that grows too thick will not nest, and a perfect bound block below its minimum has too little paper to hold the glue.
- 4over4 warns that extreme heat can weaken perfect binding adhesive, and EVA, which can re-melt, is the exposed one.
- PaperSpecs advises against saddle stitch for pieces that take heavy use, because the wire takes its toll on the paper, and against perfect binding for cookbooks and instruction manuals that have to stay open hands-free.
- Thermal covers hold poorly on glossy coated paper.
| Binding | Minimum thickness | Maximum thickness |
|---|---|---|
| Saddle stitch | Not stated | 0.125 to 0.25 in |
| Perfect binding | 0.125 in with a printed spine, 0.0625 in without | 2.25 in |
Thickness figures come from PaperSpecs (updated January 2025). A printer’s own published limits override any general table.
Match the binding to the harshest condition the piece will meet, not the average one.
How does each binding type change file setup?
The binding changes how pages are supplied, what the cover file contains, how much inside margin the layout needs, and who applies compensation for paper bulk. Saddle stitch, perfect binding, case binding, and mechanical binding each set these differently.
Page count and cover layout
Most printers want single pages in reading order, not imposed spreads. 4over4 and Rogue Print and Mail both say so for stapled booklets.
Build the document as facing pages, export it as single pages, and confirm the format with the printer.
- For saddle stitch, pad short files with a notes page or an inside back cover, and count a cover on the same stock as four of the pages (4over4).
- Perfect binding wants an even page count, with the cover supplied as one flat file.
- Case binding cover templates come from the printer, because spine board is pre-cut in fixed sizes that differ between print partners (Cloudprinter documentation).
- With mechanical binding, ask for hole pattern, hole pitch, and margin clearance before building the layout.
Spine width for perfect binding
Spine width equals half the interior page count multiplied by the caliper of the actual paper, plus the cover thickness.
- Confirm the final interior page count. It has to be even.
- Divide by 2 to get the number of sheets.
- Multiply by the paper’s caliper, measured on the real stock rather than estimated from gsm.
- Add the cover thickness.
- Confirm the result with the printer before locking the cover file.
Use the real caliper, because paper thickness varies between mills and between coated and uncoated sheets at the same weight.
Cloudprinter’s documentation adds two cover thicknesses to the formula and warns that its bulk values are averages that differ between print partners. A wrong spine pushes cover art onto the front or back, per 4over4.
Gutter and margins
On a perfect bound book the glue takes a strip of the inside margin and the book does not open flat, so widen the gutter and keep headlines off the spine.
Saddle stitched books lie relatively flat (PaperSpecs), so the standard gutter works. Margin trouble shows up at the outer edge instead.
Mechanical binding needs text kept clear of the punched edge, since holes cut through anything placed there.
Bound books get trimmed on three sides after binding, so every edge that carries color needs its bleed area in the file.
How do you set creep in InDesign for a saddle stitch booklet?
Open File > Print Booklet, choose 2-up Saddle Stitch, and enter a creep value in the Setup area. InDesign spreads that value across the sheets, shifting each sheet’s pages slightly more than the sheet outside it.
- Finish the layout as single pages in reading order.
- Choose File > Print Booklet.
- Under Booklet Type, select 2-up Saddle Stitch. 2-up Perfect Bound also supports creep.
- In the Setup area, enter the creep value. A negative value moves inner pages toward the spine, and a positive value moves outer pages away from it.
- For 2-up Perfect Bound with negative creep, set Space Between Pages to at least the width of the creep value.
- Click Print, or Export to save a PDF.
InDesign divides the value you enter by the number of sheets minus one. In Adobe’s documentation, a 16-page booklet has 4 sheets, so 24 points of negative creep becomes 8 points per sheet.
The value itself depends on paper caliper and page count, so it comes from the printer.
Printers disagree on when creep starts to matter. Rogue Print and Mail’s creep guide says it affects booklets over about 40 pages and tells designers to allow 5 mm in the artwork, while its InDesign setup guide says to factor creep in above 80 pages.
over4 also puts the threshold near 40 pages and says creep barely shows on a 16 or 24 page booklet on text-weight paper.
Who applies it is the second disagreement. An Adobe Community reply says creep belongs in imposition, not in the layout, and both 4over4 and Rogue ask for single pages and impose them in-house.
InDesign’s creep setting therefore matters mainly when the printer asks for imposed spreads or the booklet prints in-house. Ask which case applies, so the correction happens once.
Whoever applies it, keep folios and live text well inside a safe zone at the outer edge.
Then export the PDF to the printer’s specification, following the same steps as any print-ready file.
Binding Types in Print Design FAQ
What is the difference between a self cover and a plus cover?
A self cover is printed on the same paper as the inside pages. A plus cover wraps heavier stock around lighter text pages, and the two are counted differently: a self cover counts as four of the booklet’s pages, while a plus cover is counted separately (4over4).
Does paper grain matter for a bound book?
Yes. In hardcover work the grain of the paper and board should run parallel to the spine.
Confirm the grain direction with the printer when you order, since it is set before the sheets reach the bindery.
How much longer does perfect binding take than saddle stitch?
AlphaGraphics (2026) lists 2 to 3 business days for saddle stitch and 5 to 7 for perfect binding, because the adhesive needs time to cure. PaperSpecs puts the gap at one extra day, so get the schedule from your printer.
Do blank pages count toward the page count?
Yes. Every page counts, blanks included, so the total used for pricing and spine width includes them (Jukebox Print support).
The cover stays out of the count unless it is a self cover on the same stock as the interior.
Can I mix paper stocks inside one bound book?
In perfect binding, yes: PaperSpecs says weights, colors, and finishes can be interleaved nearly anywhere. Saddle stitch is stricter, because each folded sheet carries four pages.
A stock change on one page therefore reaches the other pages printed on the same sheet.
Which binding options do print-on-demand services offer?
IngramSpark binds paperbacks by perfect binding with hot glue and hardcovers by case binding or its Digital Cloth process, and its help documentation also lists saddle stitch and spiral wire.
Amazon KDP offers paperback and hardcover, though hardcover is not available through Expanded Distribution.
What to Confirm With the Printer Before Locking Files
Once a binding is picked, a few answers still have to come from the printer, and the order matters because each one feeds the next.
- Final page count and paper caliper
- Spine width and cover file
- Who applies imposition and creep
Page count and caliper come first, since spine width derives from both. Creep ownership comes last, because it depends on the final bulk.
Spine text adds a threshold. At the 0.004 in sheet caliper in 4over4’s spine example, PaperSpecs’ 0.125 in printed-spine minimum takes 32 sheets, or 64 pages, well above the 40-page perfect binding floor.
There’s a trade-off, though. Freezing page count early freezes copy, because a late edit that adds two pages means a new spine measurement and a new cover file.
The guide to paper types for print projects covers the stocks that set caliper, the next decision after binding.

Renowned for his expertise in logo design and visual branding, Bogdan has developed a multitude of logos for various clients.
His skills extend to creating posters, vector illustrations, business cards, and brochures. Additionally, Bogdan's UI kits were featured on marketplaces like Visual Hierarchy and UI8.
He also wrote in the past years on sites like Design Your Way, WebDesignerDepot, WPDean, Designmodo, Speckyboy, Slider Revolution, and more.
- The Windsurf Logo History, Colors, Font, And Meaning - 10 October 2026
- How to Remove Background From Product Photos (No Photoshop) - 10 October 2026
- How Designers can Build a Stronger Online Creative Identity - 9 October 2026

Bogdan Sandu is a seasoned designer who has been designing websites since 2008. Renowned for his expertise in logo design and visual branding, Bogdan has developed a multitude of logos for various clients. His skills extend to creating posters, vector illustrations, business cards, and brochures. Additionally, Bogdan's UI kits were featured on marketplaces like Visual Hierarchy and UI8. He also wrote in the past years on sites like Design Your Way, WebDesignerDepot, WPDean, Designmodo, Speckyboy, Slider Revolution, and more.
You Might Also Like


