


Before any ink hits a substrate, before a box takes shape, there is a flat file that makes all of it possible.
Understanding what is a dieline in packaging design is the difference between artwork that folds correctly and a print run that gets scrapped. It is the technical foundation behind every folding carton, mailer box, and retail package you have ever held.
This guide covers the full picture: the anatomy of a dieline, how it fits into the print production workflow, the structural formats it applies to, and the file specifications printers actually need.
By the end, you will know how to read a dieline, build one, and avoid the mistakes that cause costly reprints.
What is a Dieline in Packaging Design

A dieline is a flat, 2D vector template that maps every cut, fold, score, bleed, and tab of a packaging design structure. It is the technical blueprint that connects graphic design to physical manufacturing.
Think of it as the unfolded version of a box before it becomes a box. Every panel, flap, and crease exists on a single flat plane.
The term comes from the physical steel-rule “die” used in cutting machines. When a press cuts packaging material, it follows the exact path defined in the dieline file.
72% of American consumers say packaging design affects their purchase decisions (Meyers, 2024). That means the dieline, as the foundation of every packaging file, has a direct line to sales performance.
The dieline lives as a vector file, typically built in Adobe Illustrator or structural software like Esko ArtiosCAD. It is not a photograph or a raster layout. Because the final die must be cut with precision, vector graphics are the only format that works here.
Without a dieline, a packaging designer is guessing dimensions. With a wrong dieline, the entire print run fails.
The Anatomy of a Dieline
A dieline is made up of distinct line types, each with a specific function. Most tools use color coding to separate them visually.
Cut Lines vs. Score Lines
Cut lines define where the material gets physically sliced. Score lines define where it bends. They look similar on screen but do completely different jobs in production.
| Line Type | What It Does | Common Color Code |
| Cut line | Trims the material completely | Red or magenta |
| Score/fold line | Creases without cutting | Blue or cyan |
| Perforation line | Partial cuts for tear strips | Green or dashed |
| Glue area | Marks adhesive zones | Yellow or shaded |
Color conventions vary by supplier. Always confirm the spec with your printer before finalizing any dieline file.
Bleed, Safe Zone, and Margin Explained
Bleed area: Print extends 2-3mm beyond the cut line so no white edges show if cutting is slightly off.
Safe zone: The inner boundary where logos, text, and key artwork must stay. Elements outside this zone risk being trimmed.
Margin: The buffer between the safe zone and the cut line. Anything in this gap is at risk.
Getting these three zones wrong is one of the most common reasons packaging artwork needs to be reworked before going to press. More on that in the mistakes section below.
How a Dieline is Used in the Packaging Workflow

The dieline comes first. Always. Artwork goes on top of it, not the other way around.
Here is where it sits in the full production process:
- Structural engineer or supplier provides the dieline file
- Designer places artwork on a separate layer above the dieline
- Both layers are reviewed and approved independently
- Printer extracts the die layer to set up the cutting tool
- Artwork layer goes to the press; die layer goes to the cutter
The dieline layer is never printed. It only exists as a guide and a production reference.
One thing I’ve seen trip up a lot of designers: making structural changes after the artwork is already built. If a panel dimension changes by even 2mm, every placed graphic shifts. Lock the dieline before touching the artwork.
The global packaging design services market reached $24.63 billion in 2023 and is projected to hit $32.42 billion by 2030 (Meyers, 2024). With that kind of volume moving through production pipelines, a clean and consistent dieline workflow is not optional.
When Tropicana redesigned its packaging in 2009 without properly testing structural and artwork alignment, the result was a costly reversal that damaged brand recognition. The dieline-to-artwork relationship was one part of a larger failure to validate production files before launch.
Common Packaging Structures and Their Dielines

Not all boxes fold the same way. Each packaging structure has its own dieline logic, its own panel count, and its own set of structural rules.
Retail and Consumer Box Types
Tuck-end box: The most widely used retail carton. Has top and bottom tuck flaps that lock without glue. The dieline includes four side panels plus two sets of tuck flaps.
Mailer box: Self-locking base, no glue needed for assembly. Dielines for mailer boxes include a built-in tray and lid structure on a single flat sheet.
Gable top box: Common for liquid food products. The dieline has angled roof panels that create the signature handle-top form.
Specialty Structures
Sleeve and tray combinations use two separate dielines. One for the outer sleeve, one for the inner tray. They are designed to fit together with specific tolerances so the sleeve slides cleanly.
Pillow boxes are simpler to produce but trickier to design. The curved shape means artwork placed flat on the dieline will distort slightly once folded. Designers need to account for that visually.
| Structure | Dieline Complexity | Common Use |
| Tuck-end Box | Low | Retail, cosmetics, food |
| Mailer Box | Medium | E-commerce, subscription boxes |
| Sleeve + Tray | High (Two dielines) | Premium retail, electronics |
| Pillow Box | Low | Gifts, small products |
Flexible packaging now holds a 67.1% share of the consumer packaging market in 2024 (Future Market Insights). That means dieline skills increasingly apply to non-rigid structures too, not just folding cartons.
How to Read a Dieline
Reading a dieline is a skill. Most designers pick it up by folding physical mockups and tracing back what each line corresponds to on the flat template.
Identifying Panels and Orientation
Start by finding the front panel. It is usually the largest or most central panel in the layout. From there, identify the back, two sides, top, and bottom by how they connect through fold lines.
Glue tabs are always the narrowest panels and sit at the edge of the layout. They fold under and bond to the opposite side panel during box assembly.
Grain direction matters here. Paperboard folds more cleanly with the grain than against it. Structural engineers factor this into the dieline orientation. If you receive a dieline and the layout looks rotated in an unexpected way, grain direction is often the reason.
Understanding Flat vs. Finished Dimensions
The flat dieline dimensions are always larger than the finished box size. Material thickness adds up. Score lines take space. Glue tabs add width.
- Flat width does not equal finished box width
- Flap lengths affect how the box closes and how tight the lock feels
- Bleed extends beyond the cut line and adds to the overall flat size
This confuses a lot of people the first time they see a dieline for a small box. The flat layout looks huge. Once folded, it becomes a compact tuck-end carton. That gap between flat and finished is completely normal.
Creating a Dieline
Most designers do not build dielines from scratch. They start from a supplier template or use dedicated software to generate one from a set of structural specs.
Software Tools for Dieline Creation
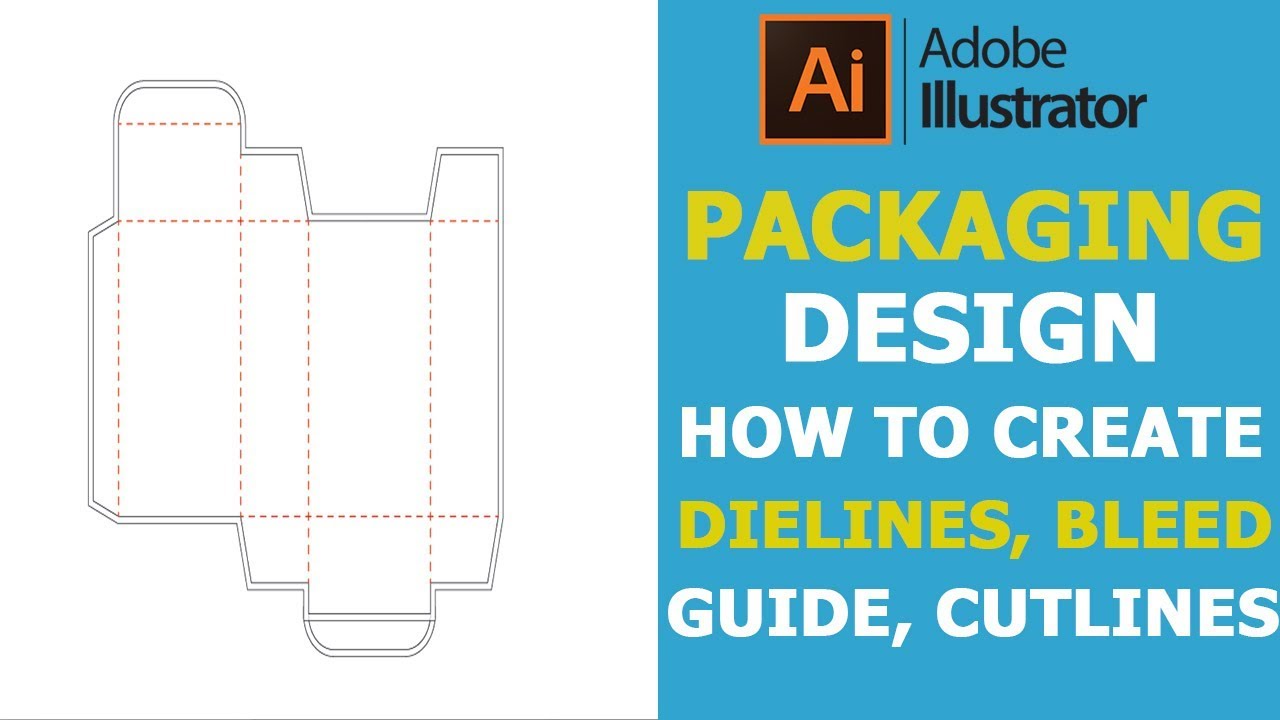
Adobe Illustrator is the standard for working with dieline files, even when the file originates elsewhere. Nearly every packaging printer accepts AI or PDF files built in Illustrator.
Beyond Illustrator, there are purpose-built structural tools:
- Esko ArtiosCAD: Industry standard for structural packaging design, widely used by manufacturers
- CAPE Systems: Focused on corrugated packaging structures
- Packly: Browser-based tool for generating standard dieline templates quickly
- Pacdora: Good for smaller brands and quick prototyping with a built-in 3D preview
For most branding and design agencies, getting a dieline from the printer or box supplier and building artwork on top of it in Illustrator is the most practical workflow.
Setting Up Layers and Spot Colors
Dieline files must use spot colors to separate the die layer from the artwork. The standard is to assign the cut and fold lines a custom spot color, often named “Die” or “Dieline,” so the printer can isolate that layer during prepress.
Using a Pantone color or a standard process color for the dieline layer is a common mistake. Process colors can conflict with artwork inks. A clearly named spot color removes any ambiguity.
Layer organization matters just as much. Keep the die layer locked and at the top of the layer stack. Artwork layers go underneath. When you send the file to print, the printer knows exactly what to pull.
A clean layer setup is the single best thing you can do to avoid prepress delays. Disorganized files are one of the biggest pain points in print production workflows, and packaging is no exception.
As Packola’s 2025 production data shows, locking dielines early with a 1-2mm tolerance on scores is one of the most direct ways to prevent weak folds and costly rework in final production runs.
Dieline vs. Mockup vs. Prototype
Three terms that get mixed up constantly. They are not interchangeable and they do not serve the same purpose in a packaging workflow.
| Format | What It Is | Stage Used |
| Dieline | Flat vector production file showing cut and fold lines | Before artwork begins |
| Digital Mockup | 3D visualization of the assembled package | Client approval and presentations |
| Physical Prototype | Printed and folded test sample (white or full color) | Pre-production validation and fit testing |
What the Dieline Does That Others Cannot
The dieline is the only format a printer can actually use. A digital mockup looks great in a pitch deck. It does nothing at the press.
According to Tycoon Packaging, a dieline is production-ready by definition, while a template may only be intended for design visualization. That distinction matters when files get handed off under tight production deadlines.
Wrong dielines cause cut-off text, misaligned graphics, failed compliance checks, and costly reprints, according to Cway’s 2025 packaging workflow research. The digital mockup will never flag those problems. A physical prototype will.
When to Use Each One
Digital mockup: show the client how it will look. Use tools like Pacdora, Esko Studio, or Adobe Dimension to wrap artwork around a 3D model.
Physical prototype: catch structural problems before full production. Zenpack reports that modern cutting tables like the Esko Kongsberg X22 can produce and ship physical prototypes within 24 hours.
BrewDog runs its annual Prototype Challenge partly as a public packaging trial, testing real label designs with consumer votes before committing to print runs.
The honest reality: most errors that reach the physical prototype stage could have been caught at the dieline review stage. Skipping structural validation costs money later.
Common Dieline Mistakes and How to Avoid Them
Wrong dielines, color shifts, and barcode issues lead to expensive reprints and launch delays, according to Ideal Custom Boxes (2024). Most of these problems are preventable.
Art Setup Errors
Using an outdated dieline: the most costly mistake at scale, especially when creative teams pull generic templates instead of getting files directly from the production partner (MAVRK Studio, 2025).
Raster artwork in the dieline layer: everything must be vector. Carepac’s packaging guide notes that print resolution standards for packaging require 300 DPI minimum for placed images, with 600+ preferred where possible.
Two more issues that come up constantly:
- Placing a logo or barcode outside the safe zone
- Designing in RGB and converting to CMYK at the end, which causes color shifts that are hard to predict
Proofing Failures
Disorganized files are one of the biggest prepress complaints from print shops, according to Kitprint (2024). If layers are unlabeled and colors are mixed, errors get introduced during file prep and missed in proofing.
Key proofing steps before any file handoff:
- Confirm dimensions against the supplier’s spec sheet, not a generic template
- Check that all placed images are linked correctly and not just embedded placeholders
- Verify the die layer uses a named spot color separate from artwork inks
- Run a physical fold test before approving for full production
Over 70% of purchase decisions happen at shelf (Confetti Design, 2025). A packaging file error that makes it to production does not just cost a reprint. It affects the brand’s shelf presence during the window it matters most.
Material and Structural Oversights
Material thickness is routinely ignored at the dieline stage. Board thickness adds up across all panels and affects how the box closes and whether tabs lock properly.
A 1-2mm tolerance on scores prevents weak folds, according to Packola’s 2025 production data. That level of precision only happens when structural specs are confirmed with the manufacturer, not assumed from a template.
Dieline File Specifications for Print Production
A production-ready dieline file needs to meet specific technical requirements. These are not suggestions. Printers will reject or modify non-compliant files, and modifications introduce errors.
Color and Format Requirements
All packaging artwork must be in CMYK color mode. NEWPRINT’s packaging file guidelines are direct: the dieline layer on its own separate layer, CMYK artwork on another, and any special finishes like spot UV coating or foil stamping each on their own individual layers.
For brand-critical elements like logos, Pantone spot colors provide exact color matching that CMYK process printing cannot guarantee.
File format requirements from most packaging printers:
- AI or EPS: preferred for editable source files with live layers
- PDF (print-ready): most universal format for final handoff
- Fonts must be outlined or embedded before export
Resolution and Vector Standards
All structural elements (cut lines, fold lines, glue areas) must be vector paths. No exceptions.
For placed photographic images, the minimum standard is 300 DPI at actual print size, according to Brillpack’s 2025 print-ready packaging guide. A photo that will print 4 inches wide needs to be at least 1,200 pixels wide in the source file.
Scaling a low-resolution image up to fit a panel is one of the most common reasons files come back from prepress. The fix takes longer than getting the right asset upfront.
File Handoff Package
What to include in every production-ready dieline submission:
- PDF of the full file with all layers intact
- AI source file (editable, with spot colors named correctly)
- Separate PDF exports per layer if special finishes are involved
- A printed color reference or print color profile if exact color matching is required
Some printers also ask for a crop marks reference and a separate call-out for bleed and safe zone boundaries, especially on more complex structural packaging where multiple panels have independent bleed settings.
Graphic Packaging International, one of the largest folding carton manufacturers in North America, publishes detailed prepress specifications that cover exactly these file requirements for their production workflow. Getting a spec sheet from your specific print partner before building the file is always the right starting point.
FAQ on What Is A Dieline In Packaging Design
What is a dieline in packaging design?
A dieline is a flat 2D vector template that maps every cut, fold, score, bleed, and glue tab of a packaging structure. It is the technical blueprint that connects graphic artwork to physical manufacturing and guides the cutting die during production.
What is the difference between a cut line and a score line?
A cut line trims the material completely. A score line creases it without cutting, creating a fold point. Both appear in the dieline file but serve entirely different functions in the box construction process.
What software is used to create a dieline?
Adobe Illustrator is the industry standard. Structural tools like Esko ArtiosCAD, CAPE Systems, and Packly are also widely used. For smaller brands, browser-based tools like Pacdora offer quick dieline generation with a built-in 3D preview.
What file format should a dieline be in?
AI and PDF are the most accepted formats. The dieline layer must use a named spot color to separate it from the artwork layer. EPS is also acceptable when the printer requests an editable source file.
What is the bleed area in a dieline?
The bleed extends 2-3mm beyond the cut line so no white edges appear if cutting shifts slightly. Artwork must fill this zone fully. Without it, even a minor trim misalignment leaves an unprinted strip along the edge.
What is the safe zone in a dieline?
The safe zone is the inner boundary where critical content must stay. Logos, text, and barcodes placed outside it risk being trimmed during production. Most packaging printers recommend keeping key elements at least 3-5mm inside the cut line.
Can I use a dieline template from the internet?
You can use one as a starting point, but always confirm dimensions with your production partner. Generic templates often lack material thickness adjustments and supplier-specific tolerances. Using an outdated or incorrect dieline is one of the most costly mistakes in packaging production.
What is the difference between a dieline and a mockup?
A dieline is a flat production file a printer uses to cut material. A digital mockup is a 3D visualization used for client presentations. Mockups look great on screen but cannot replace a production-ready dieline for actual manufacturing.
Does the dieline layer get printed?
No. The dieline layer is never printed. It exists only as a guide for the cutting machine and a reference for the designer. The printer extracts it separately from the artwork layer during the prepress process.
What color mode should packaging artwork use?
All packaging artwork must be in CMYK. Designing in RGB and converting later causes unpredictable color shifts. For brand-critical elements, Pantone spot colors provide exact matching that standard CMYK process printing cannot guarantee.
Conclusion
This conclusion is for an article presenting the full scope of the dieline packaging file, from cut lines and score lines to production-ready handoff specs.
A dieline is not a design detail. It is the structural foundation that determines whether a folding carton, mailer box, or retail package actually works.
Get the bleed area wrong and the print run shows it. Use a generic box template without confirming supplier tolerances and the prototype will tell you the same thing, just later and at higher cost.
The dieline vector file, the layer setup, the spot color conventions, the safe zone, the physical prototype. Each step depends on the one before it.
Treat the dieline as the first decision in any packaging project, not an afterthought, and everything downstream gets easier.

Renowned for his expertise in logo design and visual branding, Bogdan has developed a multitude of logos for various clients.
His skills extend to creating posters, vector illustrations, business cards, and brochures. Additionally, Bogdan's UI kits were featured on marketplaces like Visual Hierarchy and UI8.
He also wrote in the past years on sites like Design Your Way, WebDesignerDepot, WPDean, Designmodo, Speckyboy, Slider Revolution, and more.
- How to Install Fonts on Mac (Step-by-Step Guide) - 20 September 2026
- From Mockup to Code: How AI-Augmented Development Speeds Up the Design Handoff - 19 September 2026
- The Beehiiv Logo History, Colors, Font, And Meaning - 18 September 2026

Bogdan Sandu is a seasoned designer who has been designing websites since 2008. Renowned for his expertise in logo design and visual branding, Bogdan has developed a multitude of logos for various clients. His skills extend to creating posters, vector illustrations, business cards, and brochures. Additionally, Bogdan's UI kits were featured on marketplaces like Visual Hierarchy and UI8. He also wrote in the past years on sites like Design Your Way, WebDesignerDepot, WPDean, Designmodo, Speckyboy, Slider Revolution, and more.
You Might Also Like


