Microsoft Word sits on millions of computers, yet most people never realize it doubles as a capable poster design tool. You don’t need expensive design software or a steep learning curve to create professional event posters, classroom displays, or business announcements.
This guide shows you how to make a poster in Word using built-in templates, text boxes, shape tools, and image insertion features that transform blank documents into visual communication pieces.
You’ll learn page setup for custom poster dimensions, formatting techniques for headlines and body text, methods for adding graphics and backgrounds, plus export options for both home printing and professional print services. Word handles everything from simple flyers to complex presentation posters once you understand its layout design capabilities.
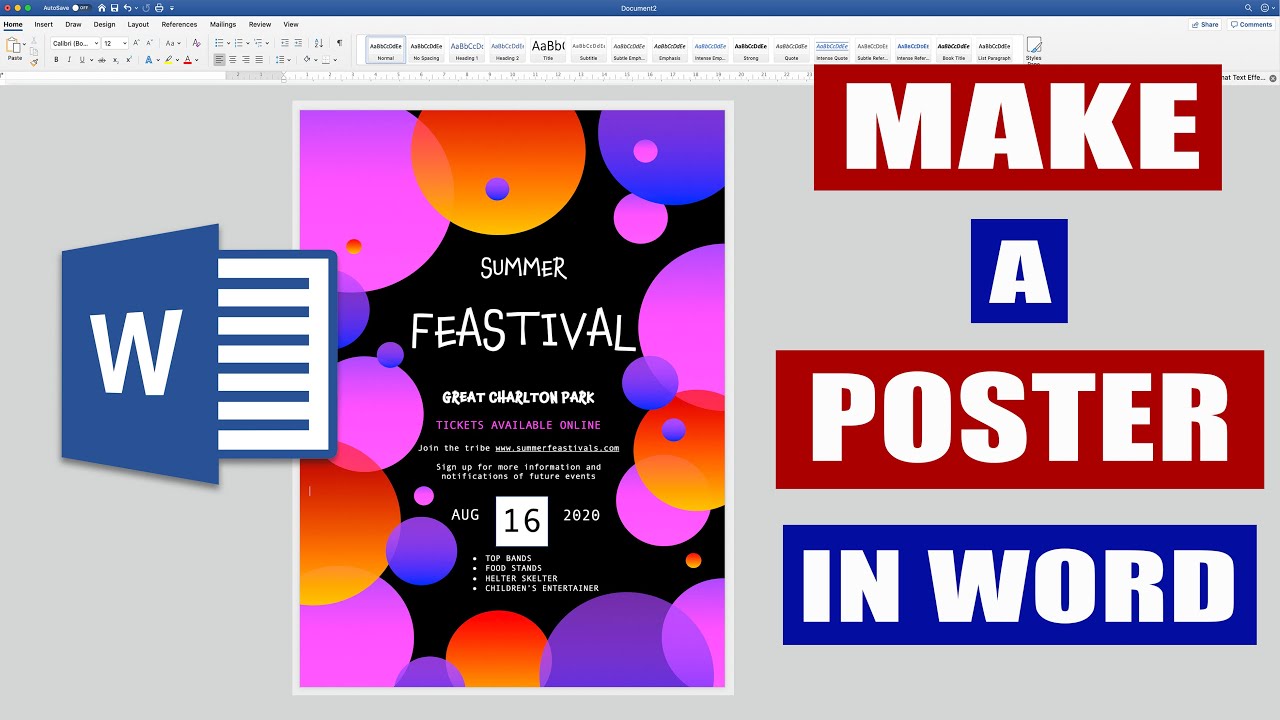
Making a Poster in Word: The Video Version
Opening Word and Setting Up Page Dimensions
Launch Microsoft Word from your Windows operating system or macOS device.
Click “Blank Document” to start fresh, or browse the template selection if you want pre-designed layouts.
The default Letter size (8.5×11 inches) won’t work for most poster design projects.
Navigate to the Page Layout tab and select “Size” from the ribbon menu.
Choose “More Paper Sizes” at the bottom of the dropdown to access custom dimensions.
Professional poster dimensions typically range from 11×17 inches (tabloid) up to 24×36 inches depending on your printing settings and display requirements.
Choosing Between Blank Document and Built-in Templates
Word offers dozens of poster templates through its Insert tab under “Online Templates.”
Search for “poster” or “flyer” to see pre-formatted options with coordinated color schemes and placeholder content.
Templates save time but limit creative control over the poster layout.
Starting with a blank document gives you complete freedom to implement your own visual hierarchy and design elements.
Most experienced users prefer blank documents for custom poster creation because templates often require more work to modify than building from scratch.
Configuring Page Orientation for Poster Layout
Page orientation determines whether your poster displays vertically (portrait) or horizontally (landscape).
Access orientation settings through Page Layout → Orientation.
Portrait orientation works best for event posters, concert announcements, and informational displays where text flows top to bottom.
Landscape suits wide format presentations, timeline posters, and designs emphasizing horizontal visual elements.
The orientation choice affects how viewers naturally scan your poster content and impacts your text box placement strategy.
Setting Custom Page Size for Standard Poster Dimensions
Click Page Layout → Size → More Paper Sizes to open the custom dimensions dialog box.
Enter your target width and height in the Page Setup window.
11×17 inches (tabloid)
Small format posters that fit standard office printers and copiers.
Perfect for internal announcements, classroom projects, or small event promotion where printing costs matter.
18×24 inches
Mid-size poster format balancing visibility with portability.
Common for retail displays, campus events, and presentations that need to stand out without requiring professional printing services.
24×36 inches
Large format professional posters requiring specialized printing equipment.
Standard for conference presentations, trade show displays, and high-impact visual communication in galleries or public spaces.
A3 format
International paper size measuring 11.7×16.5 inches, widely used outside North America.
Matches European and Asian printing standards, making it the practical choice for global distribution.
A2 format
Larger international standard at 16.5×23.4 inches for substantial visual presence.
Professional conferences and academic institutions prefer this size for research posters and detailed information displays.
Word accepts any custom dimensions, but your home printer likely caps at tabloid size-anything larger needs professional print services.
Check your printer specifications before finalizing poster dimensions to avoid resize issues during output.
Adjusting Margins and Bleed Area
Reduce default margins to maximize your design space through Page Layout → Margins → Custom Margins.
Set all margins to 0.25 inches or less for edge-to-edge poster designs.
Bleed area extends design elements 0.125 inches beyond the trim line to prevent white edges after professional cutting.
Word doesn’t have native bleed settings, but you can manually extend backgrounds and images past your poster boundaries to simulate this effect.
Adding Background Color to Poster Canvas
Right-click anywhere on the page and select “Page Color” from the context menu.
Choose from standard colors or click “More Colors” for custom hue selection.
Solid backgrounds work for simple designs, while gradient fills add depth and visual interest through the Format Background panel.
Analogous colors create harmonious backgrounds that don’t compete with foreground content.
Inserting Background Images in Word Documents
Navigate to Insert → Pictures → This Device to add images from your computer files.
Select your image, then right-click and choose “Wrap Text” → Behind Text to position it as a background layer.
Resize by dragging corner handles while holding Shift to maintain aspect ratio and prevent distortion.
Low-resolution images appear pixelated when stretched to full poster size-aim for 300 DPI for professional print quality.
Working with Text Boxes for Poster Headings
Click Insert → Text Box → Draw Text Box, then drag across your poster canvas to create the container.
Text boxes offer precise positioning control that regular paragraph text lacks for poster layout design.
Each text box functions as an independent design element you can move, resize, and format separately.
Remove default borders by selecting the text box, then Format → Shape Outline → No Outline.
Formatting Headline Text with Font Styles
Select your text box content and open the Home tab font controls.
Choose typefaces that match your poster’s purpose-serif fonts convey formality while sans-serif fonts feel modern and clean.
The fonts you select for posters directly impact readability from a distance.
Bold weights increase visibility but overuse destroys typographic hierarchy and makes everything equally unimportant.
Selecting Font Size for Poster Visibility
Headline text needs 72pt minimum for posters viewed from 10 feet away.
Body text requires 24-36pt to remain legible at standard viewing distances.
Test visibility by stepping back from your screen-if you can’t read it easily, increase the font size before finalizing.
Word supports sizes up to 1638pt through the format menu, though most posters rarely exceed 200pt for their largest elements.
Applying WordArt for Decorative Poster Titles
Insert → WordArt displays pre-designed text style templates with effects and transformations.
Click any style, type your headline, then customize colors and effects through the Format tab.
WordArt adds visual punch to titles but reads as dated if overused-limit to one statement piece per poster.
The transformation effects (arch, wave, circle) work for playful designs but compromise readability in professional contexts.
Inserting Images from Computer Files
Choose Insert → Pictures → This Device to browse your local storage.
Supported formats include JPEG, PNG, and bitmap files.
Drag images directly from File Explorer into Word for faster insertion, though this sometimes causes unexpected positioning.
Right-click any image and select “Wrap Text” → In Front of Text for manual positioning freedom.
Using Online Pictures Through Bing Image Search
Insert → Online Pictures launches Bing’s integrated search within Microsoft Word.
Search results filter for Creative Commons licenses, but verify usage rights before commercial use.
Downloaded web images often have insufficient resolution for large poster printing-check pixel dimensions before committing to an image.
Stock photos from search engines rarely match custom photography’s authenticity and relevance to specific poster topics.
Adding Shapes for Poster Design Elements
The Insert → Shapes dropdown contains rectangles, circles, arrows, callouts, and geometric options.
Click any shape, then drag on your canvas to draw it at your desired size.
Shapes create borders, framing elements, background blocks, and decorative accents that organize poster sections.
Psychology of shapes matters-circles feel friendly, squares convey stability, triangles suggest movement and energy.
Applying Shape Styles and Fill Colors
Select your shape and open the Format tab for style presets combining fills, borders, and effects.
Click Shape Fill for solid colors, textures, gradients, or picture fills that add visual complexity.
Monochrome colors create sophisticated looks through single-hue variations.
Adjust saturation in the More Colors dialog to find the perfect intensity for your design elements.
Inserting Icons and SVG Graphics
Insert → Icons opens Microsoft’s library of vector graphics that scale without quality loss.
Search by keyword, select multiple icons by holding Ctrl, then click Insert.
Icons arrive as black silhouettes-change colors through Graphics Format → Graphics Fill.
Vector graphics maintain sharp edges at any poster size unlike pixel-based images that blur when enlarged.
Creating Borders Around Poster Elements
Select any text box or image, then Format → Shape Outline to add border lines.
Control thickness through Weight options ranging from hairline to 6pt standard options.
Contrast between border color and background determines visibility-dark borders disappear on dark backgrounds.
Dashed and dotted line styles create casual feels while solid borders maintain professional appearance.
Arranging Design Elements with Layering Controls
Right-click any object and use “Bring to Front” or “Send to Back” to adjust stacking order.
“Bring Forward” and “Send Backward” move objects one layer at a time for precise control.
Layering creates depth by overlapping elements-text boxes over images, shapes behind text.
Objects inserted first automatically sit behind newer additions until you manually reorder them.
Grouping Multiple Objects Together
Select multiple items by holding Ctrl while clicking each element.
Right-click the selection and choose “Group” to lock them into a single movable unit.
Grouped objects move, resize, and rotate together while maintaining their relative positions and scale and proportion.
Ungroup anytime through right-click → Ungroup to edit individual components.
Aligning Objects Using Alignment Tools
Select multiple objects, then Format → Align to access alignment options.
“Align Center” and “Align Middle” position elements perfectly on shared axes.
“Distribute Horizontally” and “Distribute Vertically” create equal spacing between three or more objects automatically.
Manual alignment by eye creates amateur-looking posters-always use Word’s precision alignment tools for professional results.
Distributing Elements Evenly on Canvas
Select three or more objects before accessing distribution commands through Format → Align.
“Distribute Horizontally” spaces objects equally across the width between the leftmost and rightmost items.
“Distribute Vertically” does the same for height between top and bottom objects.
Even spacing creates rhythm and balance that guides viewer attention across your poster systematically.
Adding Text Effects and Shadow Formatting
Select your text box and open Format → Text Effects for shadow, reflection, and glow options.
Drop shadows add depth and improve readability when text sits over complex backgrounds.
Outer glow creates halos around text-useful for light text on dark backgrounds or enhancing focal points.
Heavy effects feel dated quickly; subtle shadows at 50% opacity with minimal offset distance look more contemporary.
Working with SmartArt Graphics for Information Display
Insert → SmartArt opens templates for hierarchies, processes, cycles, relationships, and lists.
Each SmartArt type organizes information differently-choose based on your content structure not visual preference alone.
Type directly into the text pane or individual shapes to populate your diagram.
SmartArt auto-formats as you add points, but manual adjustments through Format options give you better control over final appearance.
Creating Columns for Multi-section Posters
Select a text box and open Layout → Columns to split content into two or three vertical sections.
Columns work for text-heavy informational posters where continuous reading flow matters more than visual impact.
Adjust spacing between columns through More Columns → Spacing to prevent cramped appearance.
Most poster design benefits more from separate text boxes than true columns-independent positioning offers superior layout flexibility.
Inserting Tables for Organized Data Presentation
Choose Insert → Table and drag to select your row and column grid.
Tables structure schedules, pricing comparisons, feature lists, and any content requiring aligned data points.
Remove default borders through Table Design → Borders → No Border for clean integration with poster aesthetics.
Grid systems underlying table structures naturally create organized layouts that viewers parse quickly.
Applying Design Themes to Poster Layout
Page Design → Themes applies coordinated font and color combinations across your entire document.
Themes maintain consistency but limit creative control-custom formatting often produces more distinctive results.
Preview themes by hovering over options before clicking to see real-time changes.
Custom theme colors through Customize Colors let you build branded poster templates matching specific organizational color palettes.
Using Color Schemes for Visual Consistency
Design → Colors shows preset complementary color schemes and triadic color schemes.
Limit your poster to 3-4 colors maximum to avoid chaotic appearance.
Color theory dictates that split-complementary color schemes offer vibrant contrast without overwhelming viewers.
Color psychology influences poster effectiveness-blue conveys trust, red creates urgency, green suggests growth and health.
Adding QR Codes to Posters
Insert → Quick Parts → Field doesn’t support QR codes natively in older Word versions.
Generate QR codes through free online tools, save as PNG images, then insert through Pictures menu.
Size QR codes at least 1×1 inch for reliable smartphone scanning from arm’s length distance.
Test your QR code with multiple devices before printing-damaged or low-contrast codes scan inconsistently.
Inserting Contact Information Text Boxes
Create separate text boxes for phone numbers, email addresses, websites, and physical addresses.
Place contact details in consistent locations-bottom corners or footer areas follow viewer expectations.
Font spacing between contact elements prevents cramped appearance that suggests unprofessionalism.
Include only necessary contact methods-listing six ways to reach you splits attention and reduces response rates.
Creating Event Details Sections
Dedicate clear space for who, what, when, where, why details in event posters.
Use visual hierarchy to emphasize date and location over secondary information.
Proximity groups related information-keep ticket prices near purchase instructions, not scattered across the poster.
Icons next to each detail type (calendar for dates, pin for location) accelerate information processing.
Formatting Date and Time Information
Write dates in consistent format throughout your poster-pick either “March 15, 2024” or “15 March 2024” and stick with it.
Bold the date or increase its font size 2-4 points above surrounding text to draw attention.
Include day of week (Friday, March 15) since viewers mentally check calendar availability when reading event posters.
Time zones matter for online events or posters with wide distribution-add EST, PST, or relevant abbreviations.
Adding Logo Images to Poster Header
Insert your logo through Pictures menu and position in the top corner where viewers naturally look first.
Keep logos under 20% of total poster height to avoid dominating the design.
PNG format with transparent backgrounds integrates logos cleanly over colored or image backgrounds.
Logo design principles require simplicity-complex logos with fine details become illegible at poster viewing distances.
Working with Transparency Settings
Select any image or shape, then Format → Transparency to adjust opacity from 0% (solid) to 100% (invisible).
Layered transparent shapes create color mixing effects without editing original images.
Text over photos needs 40-60% transparency overlays to improve legibility without completely obscuring background images.
Transparency adds sophistication but slows down older printers-test print before committing to large print runs.
Applying Image Filters and Artistic Effects
Select your image and open Picture Format → Artistic Effects for stylized filters.
Corrections tools adjust brightness, contrast, and sharpness to improve photo quality.
Color tools convert images to grayscale, sepia, or custom color temperature for aesthetic effects.
Heavy filtering removes photo realism-useful for background textures but problematic for product photos or recognizable faces.
Cropping Images to Fit Design Areas
Select your image and click Picture Format → Crop to access trimming handles.
Drag black crop handles inward to remove unwanted image portions without deleting the underlying file.
Aspect Ratio options under Crop lock proportions to standard sizes like 1:1 (square) or 16:9 (widescreen).
Crop to Shape converts rectangular images into circles, stars, arrows, and other shapes for creative effects.
Removing Image Backgrounds
Select your photo and choose Picture Format → Remove Background.
Word automatically detects foreground subjects and marks background areas in purple.
Mark Areas to Keep and Mark Areas to Remove let you manually refine the automatic selection.
Background removal works best on high-contrast images with clear subject separation-complex photos require manual editing in dedicated photo software.
Wrapping Text Around Graphics
Right-click any image or shape and choose Wrap Text to control how surrounding text flows.
“Square” wraps text in rectangular boundary around objects; “Tight” follows the actual shape contours.
“Behind Text” lets you position images as background elements while “In Front of Text” overlays them above text layers.
Most poster designs use “In Front of Text” since posters prioritize visual impact over continuous reading flow.
Creating Custom Shapes with Drawing Tools
Insert → Shapes → Freeform or Scribble lets you draw custom paths and enclosed shapes.
Click to set anchor points for straight lines; click and drag for curved segments.
Double-click or press Enter to complete your shape and convert it to a fillable object.
Edit Points mode (right-click shape → Edit Points) allows post-creation adjustments to individual anchor points and curves.
Using Gradient Fill Options
Select any shape and choose Shape Fill → Gradient → More Gradients for detailed control.
Linear gradients transition colors in straight lines; radial gradients expand from center points.
Multi-stop gradients blend three or more colors with adjustable position stops along the gradient path.
Gradient fills add dimension to flat shapes without requiring complex image editing skills.
Applying Texture Fills to Backgrounds
Shape Fill → Texture reveals preset options like fabric, paper, marble, and wood grain.
Textures add visual interest to large background areas that would otherwise feel empty.
Adjust texture transparency to 20-40% for subtle effects that don’t compete with foreground content.
Custom textures load through Picture or texture fill → Insert from file if you need specific surface appearances.
Setting Up Print Layout View
Switch to Print Layout through View → Print Layout to see how your poster appears on paper.
Zoom levels between 50-75% show the full poster on screen for overall composition assessment.
Print Layout displays margins, page breaks, and exact positioning unlike Web Layout view.
Ruler display (View → Ruler) helps measure element positions and sizes in inches across your poster canvas.
Checking Poster Resolution for Print Quality
Right-click images and select “Size and Position” to view pixel dimensions.
Calculate DPI by dividing image pixel width by printed width in inches-aim for 300 DPI minimum for professional printing.
Images under 150 DPI appear noticeably pixelated in printed posters regardless of how good they look on screen.
Enlarge low-resolution images in photo editing software before importing, or source higher quality versions.
Saving Poster as PDF File
Choose File → Save As → PDF from the file type dropdown menu.
PDF format preserves exact layout across different computers and prevents accidental editing.
“Standard” PDF quality works for most printing; “Minimum size” reduces file size but lowers image quality.
RGB colors in Word may shift slightly when professional printers convert to CMYK color mode-request test prints for color-critical projects.
Exporting Poster as Image File (PNG or JPEG)
Save As → PNG or JPEG converts your poster to image format for digital display or social media sharing.
PNG maintains sharp edges and transparency but creates larger file sizes than JPEG compression.
JPEG works for photo-heavy posters but introduces compression artifacts around text and hard edges.
Export resolution defaults to screen quality-increase DPI through Save As → Tools → Compress Pictures → Resolution before final export.
Printing Poster on Home Printer
File → Print opens the print dialog showing preview and settings.
Select your printer model, paper size, and number of copies before clicking Print.
“Scale to Paper Size” automatically shrinks oversized designs, but this reduces your effective poster size and print quality.
Most home printers max out at 11×17 inches-larger posters require tiling across multiple sheets or professional printing services.
Preparing Files for Professional Printing Services
Export as high-resolution PDF with all fonts embedded through File → Options → Save → Embed fonts.
Contact your print shop for their specific file requirements-some prefer native Word files, most request PDFs.
Include 0.125-inch bleed extension beyond trim lines for cut posters to avoid white edges.
Request printed proofs before authorizing full runs-screen colors never perfectly match physical ink on paper.
Troubleshooting Common Poster Design Issues
Images disappear when saving or reopening documents-embed pictures through File → Options → Save → Embed fonts and images.
Text boxes shift positions between computers-avoid floating layouts by using absolute positioning through Layout Options → Position → More Layout Options.
Fonts change when opening on different computers-embed fonts or convert text to outlines before sharing files.
Print colors look different than screen colors-calibrate your monitor and request color-matched proofs from print vendors.
Fixing Pixelated Images in Word
Replace low-resolution images with higher quality versions from original sources.
Never enlarge small images to fill poster areas-this stretches existing pixels without adding detail.
Check image properties to verify pixel dimensions meet 300 DPI requirement at final printed size.
Compress Pictures feature reduces file size but destroys image quality-disable automatic compression in Options → Advanced → Image Size.
Resolving Text Overflow Problems
Resize text boxes by dragging handles to accommodate all content without cutting off text.
Reduce font size by 2-4 points if text must fit fixed areas and box enlargement isn’t possible.
Adjust leading (line spacing) through Format → Paragraph → Line Spacing for tighter text packing.
Tracking adjustments through Font → Advanced → Character Spacing condense or expand letter spacing to fit text in available space.
Correcting Alignment Issues
Use Format → Align tools rather than manual dragging for perfect object positioning.
Enable alignment guides through View → Gridlines to see positioning references as you move elements.
Baseline alignment matters for text elements-select multiple text boxes and use Align Top to line up text starting points.
Symmetry creates balanced designs while intentional asymmetry generates visual tension and interest.
FAQ on How To Make A Poster In Word
Can you make a poster in Microsoft Word?
Yes. Word handles poster creation through custom page sizes, text boxes, shape tools, and image insertion features. Set dimensions through Page Layout, add design elements via Insert tab, then export as PDF or print directly from the application.
What is the best poster size in Word?
11×17 inches (tabloid) works for home printers. 18×24 inches suits mid-size displays. 24×36 inches requires professional printing services. Choose based on viewing distance, available printing equipment, and whether you need portrait or landscape orientation for your content.
How do I change the page size for a poster in Word?
Navigate to Page Layout → Size → More Paper Sizes. Enter custom width and height dimensions in the Page Setup dialog box. Click OK to apply. Word accepts any dimensions though your printer capabilities limit actual output sizes.
Can I use Word templates for posters?
Word offers built-in poster templates through Insert → Online Templates. Search “poster” or “flyer” for pre-formatted options. Templates save setup time but limit creative control. Blank documents provide complete design freedom for custom poster layouts.
How do I add images to my Word poster?
Click Insert → Pictures → This Device to browse computer files. Drag images directly from File Explorer for faster insertion. Right-click inserted images and select Wrap Text → In Front of Text for manual positioning anywhere on your poster canvas.
What DPI should poster images be?
300 DPI minimum for professional print quality. Calculate DPI by dividing image pixel width by printed width in inches. Images below 150 DPI appear pixelated when printed. Check image properties before inserting to verify sufficient resolution for your poster dimensions.
How do I print a large poster from Word?
File → Print opens settings where you select printer and paper size. Home printers typically max at 11×17 inches. Larger posters require professional printing services. Export as high-resolution PDF with embedded fonts for best print shop results.
Can I save my Word poster as a PDF?
Choose File → Save As → PDF from the file type dropdown. Standard quality preserves layout and image clarity for printing. PDF format prevents accidental editing and displays consistently across different devices without requiring Word installation.
What fonts work best for poster headlines?
Sans-serif fonts like Arial, Helvetica, and Calibri provide clean readability from distance. Use 72pt minimum for headlines visible from 10 feet away. Bold weights increase visibility. Limit to 2-3 font families per poster to maintain visual consistency and professional appearance.
How do I align objects perfectly in Word?
Select multiple objects, then Format → Align for precision tools. “Align Center” and “Align Middle” position elements on shared axes. “Distribute Horizontally” creates equal spacing between objects. Alignment tools produce professional results that manual dragging cannot match.
Conclusion
Learning how to make a poster in Word eliminates the need for expensive design software or specialized training. Microsoft Word’s page setup tools, text boxes, shape gallery, and image insertion features handle everything from basic event announcements to professional presentation posters.
The key lies in understanding custom page dimensions, proper font formatting for distance readability, layering controls for visual depth, and export options that preserve your layout design across different output methods.
Start with blank documents rather than templates for maximum creative control. Use alignment tools instead of manual positioning. Check image resolution before inserting graphics.
Word transforms into a capable poster maker once you master its formatting tools and understand print quality requirements. Whether you’re creating classroom displays, business announcements, or event promotions, these techniques produce professional results without the learning curve of dedicated graphic design applications.
If you liked this article about making a poster in Word, you should check out this article about how to make a poster.
There are also similar articles discussing poster sizes, how to make a beer poster, how to create a poster in PowerPoint, and how to make a wanted poster.
And let’s not forget about articles on how to make a movie poster, how to hang a poster, how to frame a poster, and how to flatten a poster.

Renowned for his expertise in logo design and visual branding, Bogdan has developed a multitude of logos for various clients.
His skills extend to creating posters, vector illustrations, business cards, and brochures. Additionally, Bogdan's UI kits were featured on marketplaces like Visual Hierarchy and UI8.
He also wrote in the past years on sites like Design Your Way, WebDesignerDepot, WPDean, Designmodo, Speckyboy, Slider Revolution, and more.
- Canva vs PowerPoint: Which Is Better for Presentations? - 22 September 2026
- How to Install Fonts on Mac (Step-by-Step Guide) - 20 September 2026
- From Mockup to Code: How AI-Augmented Development Speeds Up the Design Handoff - 19 September 2026

Bogdan Sandu is a seasoned designer who has been designing websites since 2008. Renowned for his expertise in logo design and visual branding, Bogdan has developed a multitude of logos for various clients. His skills extend to creating posters, vector illustrations, business cards, and brochures. Additionally, Bogdan's UI kits were featured on marketplaces like Visual Hierarchy and UI8. He also wrote in the past years on sites like Design Your Way, WebDesignerDepot, WPDean, Designmodo, Speckyboy, Slider Revolution, and more.
You Might Also Like