Creating fresh visuals for every video, article, and social post can take more time than producing the content itself. AI image tools help creators develop original images, explore different concepts, edit existing assets, and adapt one idea for several platforms. However, generating an attractive picture is not the same as creating an image that supports a clear content goal. You still need to plan the composition, protect important details, and select the result that works best for your audience.
In this tutorial, I will explain how I turn a content idea into consistent, platform-ready AI visuals.
Why AI Image Tools Are Becoming Essential for Creators
A single piece of content often needs several supporting images. A YouTube video may require a thumbnail, promotional posts, a newsletter cover, and visual references for editing. A blog article may need a hero image and several section graphics.
AI image tools make it easier to create these assets from one visual direction. Creators can use them for:
- YouTube thumbnails
- Instagram and Pinterest posts
- Blog illustrations
- Newsletter covers
- Podcast thumbnails
- Personal brand images
- Product promotions
- Storyboards
- Video backgrounds
- Image to video starting frames
The main advantage is not simply faster image generation. It is the ability to test several meaningful ideas before spending time refining one. Instead of searching through stock libraries for an image that almost fits, I can describe the subject, composition, colors, and mood that the content actually needs.
What to Prepare Before Generating Images
Define the Content Goal
Start by identifying what the image needs to communicate. A thumbnail should create curiosity about a video, while a product image may need to explain one practical benefit.
Ask three questions:
- What is the main subject?
- What should viewers understand immediately?
- What action should they take next?
These answers help remove decorative elements that do not support the message.
Choose the Target Platform
Determine the image size, orientation, and viewing environment before writing the prompt. Common formats include:
- 16:9 for YouTube thumbnails and video backgrounds
- 9:16 for Stories and short video covers
- 1:1 for square social posts
- 4:5 for vertical feed content
- Wide landscape formats for website banners
- Custom horizontal dimensions for newsletters
Planning the format early prevents important subjects from being cropped or hidden behind interface elements.
Collect Useful References
References help the model understand details that are difficult to explain through words alone. Depending on the project, I may collect the following:
- Product photographs
- Character or portrait references
- Brand colors
- Previous campaign images
- Clothing references
- Location examples
- Composition sketches
- Approved illustrations
Use references to show the facts that must remain stable. A reference should guide the result without replacing the need for a clear prompt.
How to Create Visual Content With AI
Step 1: Turn the Content Idea Into an Asset Plan
Before generating anything, list the visuals required for the complete content package. If I am publishing a YouTube tutorial, my plan might include:
- One primary thumbnail
- Three illustrations for the video
- One vertical teaser image
- Two social promotional posts
- One newsletter header
This prevents me from producing unrelated images that cannot be reused. It also reveals which assets can share the same subject, setting, or visual style.
Step 2: Choose the Right Generation Method
Text to image works well for new concepts, fictional environments, illustrations, and subjects that do not need to match an existing asset.
Reference-based generation is better when the image must preserve a real person, product, character, or design. AI editing is useful when most of an image already works and only one element needs to change.
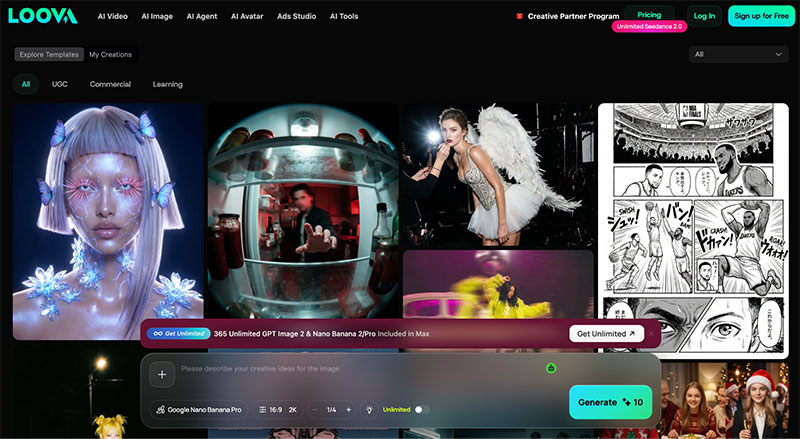
Choosing a right AI picture generator is useful when creators want to generate images, compare different AI models, refine selected results, and turn approved visuals into videos in one creative space. The method should depend on the asset, not on the habit of using the same model for every task.
Step 3: Write a Clear AI Image Prompt
A practical prompt should describe the subject, purpose, setting, composition, lighting, colors, protected details, and format.
Use this template:
Create a [type of image] featuring [subject] for [content purpose]. Show [setting and action] using [composition], [lighting], and [color palette]. Preserve [important details]. Leave [area] clear for [text or graphic element]. Use a [platform format or aspect ratio].
Here is an example for a social content series:
Create a bright editorial image for a series about working as an independent creator. Show a young video creator planning content at a tidy desk with a laptop, compact camera, microphone, and paper calendar. Use soft morning window light, white and warm yellow colors, and a slightly elevated camera angle. Keep the desk organized and make the person the clear focal point. Leave clean space in the upper right for a short headline. Use a 4:5 vertical format.
This prompt gives the model enough information to build a useful layout without making the scene unnecessarily crowded.
Step 4: Generate Creative Visual Content
Early tests should explore real alternatives. Generating 20 nearly identical images makes selection harder without teaching you much.
I usually compare three or four directions by changing one major decision:
- A clean studio scene versus a real environment
- Warm daylight versus bold-colored lighting
- A close portrait versus a wider contextual composition
- A realistic photograph versus a graphic illustration
- A centered subject versus an off-center layout with copy space
Once I identify the strongest concept, I produce controlled variations within that direction.
Step 5: Select Images for Intended Use
Do not select an image only because it looks impressive at full size. Review it in the format and size where the audience will see it.
Check whether:
- The subject is immediately clear
- The image matches the content topic
- The focal point remains strong on mobile
- There is enough space for text
- The colors fit the creator’s identity
- The image can support other formats
- Faces, hands, objects, and products are accurate
- The background contains no distracting errors
For a YouTube thumbnail, I often reduce the preview until it is close to its real display size. If the main subject becomes unclear, the composition needs more work.
Step 6: Refine the Selected Image
Once an image is close to the intended result, make targeted edits instead of regenerating the entire scene. Useful changes include removing a distracting object, correcting a product detail, simplifying the background, adding copy space, or adjusting one color.
Make one significant edit at a time. Requesting a new background, outfit, camera angle, and lighting style in one edit can change the parts that were already successful.
Step 7: Add Text and Brand Elements
Important text should normally remain editable. Add headlines, prices, logos, calls to action, and legal information in a design application after the main image is approved.
This makes it easier to:
- Correct spelling
- Adjust visual hierarchy
- Test different headlines
- Translate the design
- Follow brand type rules
- Improve readability on mobile
When generating the image, request uncluttered space where the final text will appear.
Step 8: Adapt the Image for Different Platforms
One approved image can support several channels, but each version should be deliberately recomposed. A wide thumbnail may place the subject on the right, while a vertical Story version may move the subject lower to make room for a headline above.
Canvas expansion is often better than aggressive cropping. It preserves the main subject while adding enough background for a new format.
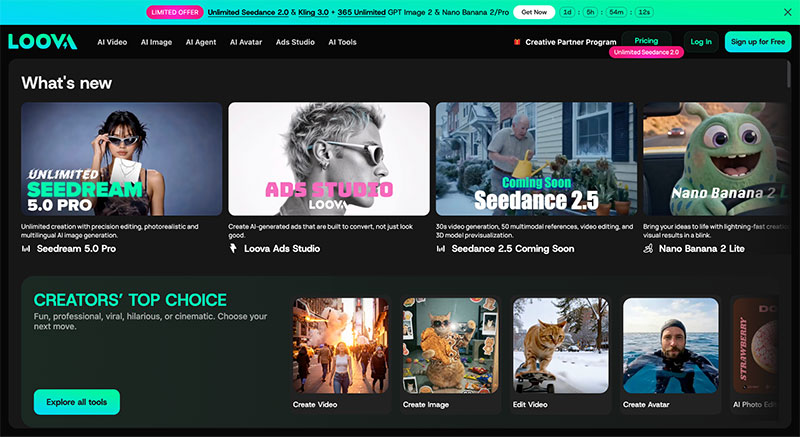
If I need to create images from text for an entire campaign, I often reuse the same subject description, color direction, and lighting instructions across every prompt, using Loova, my favorite AI content creation platform. This helps separate assets feel like parts of one visual system.
How to Keep AI-Generated Images Consistent
Reuse the Same References
Use the same approved product, character, portrait, or style references throughout the project. Switching between references with different clothes, colors, or proportions gives the model conflicting information.
Create a Fixed Subject Description
Write a stable description for recurring subjects. For example:
A woman in her early thirties with shoulder-length wavy black hair, round silver glasses, a dark green overshirt, and a cream T-shirt.
Reuse the wording whenever she appears. Add new actions or settings around it without casually changing the core description.
Repeat the Core Style Direction
Create a short style block that can be added to related prompts:
Clean editorial photography, soft natural daylight, warm neutral background, gentle shadows, and one dark green accent.
This helps connect different images without making every composition identical.
Build From an Approved Master Image
Once the strongest image is approved, use it as the base for new formats, backgrounds, and focused edits. Independent generations are more likely to change the character, product, lighting, and overall visual identity.
Save Reusable Prompt Templates
Save successful prompts by content type, such as thumbnails, blog images, product promotions, and video starting frames. Keep separate blocks for the subject, style, composition, copy space, and protected details.
Practical Examples for Creators
Creating a YouTube Thumbnail
Imagine a video titled “I Built a Podcast Studio for Under $500.” The thumbnail should communicate the transformation quickly. I would show the creator the difference between a plain desk setup and a finished recording setup, using clear contrast between the two sides.
The AI creates the main scene, but I add the price and short headline later. This keeps the typography clear and allows me to test different wording.
Building a Social Content Series
For a five-post series about creator productivity, I could use the same person, desk, color palette, and lighting in every image. Each post would introduce one new action, such as planning, recording, editing, publishing, or reviewing results.
The repeated environment creates recognition, while the changing action prevents the posts from feeling duplicated.
Planning an AI Video
For a short story about a delivery robot exploring a rainy city, I would first create a character reference and one approved city environment. I would then generate several storyboard frames with different camera angles.
Each selected frame could become the starting image for a short image to video shot. Using the same robot description and references would help preserve its shape and colors throughout the sequence.
Final Thoughts
AI image tools can help creators develop original visuals, test concepts, edit assets, and publish across more channels. The strongest results come from starting with a clear goal, planning the required assets, and describing visible creative decisions.
Use references and fixed descriptions to protect recurring subjects. Select images based on their intended use, refine them through focused edits, and adapt each composition for its final platform.
The goal is not to generate as many images as possible. It is to build a recognizable collection of visuals that makes each piece of content clearer and more engaging.
Frequently Asked Questions
What are the best AI image tools for creators?
The best option depends on what you create. Compare tools based on prompt accuracy, reference support, editing controls, character consistency, available aspect ratios, output quality, and commercial-use terms.
How can content creators use AI image generators?
Creators can use them for thumbnails, social posts, blog illustrations, newsletter covers, product promotions, personal branding, storyboards, video backgrounds, and image to video starting frames.
How do I write a good AI image prompt?
Describe the subject, action, setting, composition, lighting, colors, style, protected details, intended platform, and aspect ratio. Use visible instructions instead of broad terms such as “amazing” or “professional.”
How do I keep AI-generated images consistent?
Reuse the same references, subject descriptions, brand colors, lighting style, and successful prompt blocks. Build new versions from an approved master image whenever possible.
Can I use AI images for YouTube thumbnails?
Yes. Use a clear focal point, strong contrast, simple background, and 16:9 composition. Leave room for editable text and preview the thumbnail at a small size before publishing.
Can AI-generated images be edited?
Many tools support object removal, background replacement, canvas expansion, color changes, and other targeted corrections. Focused edits usually preserve consistency better than complete regeneration.
Should I generate text inside an AI image?
Important text is usually better added during final layout. Editable text is easier to correct, resize, translate, and test across different platforms.
How do I turn an AI image into a video?
Use the approved image as the first frame in an image to video model. Write a simple prompt describing the subject’s movement, environmental motion, and camera movement while avoiding too many actions in one short clip.
Can creators use AI-generated images commercially?
Commercial rights depend on the model, platform, subscription plan, uploaded references, and current terms. Check the applicable terms before using generated images in paid content, client projects, or advertising.

Renowned for his expertise in logo design and visual branding, Bogdan has developed a multitude of logos for various clients.
His skills extend to creating posters, vector illustrations, business cards, and brochures. Additionally, Bogdan's UI kits were featured on marketplaces like Visual Hierarchy and UI8.
He also wrote in the past years on sites like Design Your Way, WebDesignerDepot, WPDean, Designmodo, Speckyboy, Slider Revolution, and more.
- How to Install Fonts on Mac (Step-by-Step Guide) - 20 September 2026
- From Mockup to Code: How AI-Augmented Development Speeds Up the Design Handoff - 19 September 2026
- The Beehiiv Logo History, Colors, Font, And Meaning - 18 September 2026

Bogdan Sandu is a seasoned designer who has been designing websites since 2008. Renowned for his expertise in logo design and visual branding, Bogdan has developed a multitude of logos for various clients. His skills extend to creating posters, vector illustrations, business cards, and brochures. Additionally, Bogdan's UI kits were featured on marketplaces like Visual Hierarchy and UI8. He also wrote in the past years on sites like Design Your Way, WebDesignerDepot, WPDean, Designmodo, Speckyboy, Slider Revolution, and more.
You Might Also Like