


How to add fonts to InDesign and use them in your projects
Ever stared at an InDesign project, feeling something was missing? Chances are, the perfect font could transform your design from good to unforgettable.
Adding fonts to InDesign isn’t just about aesthetic choices—it’s a necessity for designers aiming to communicate their creative vision clearly and effectively.
In this guide, I’m diving deep into the font-adding process. From importing those sleek TrueType and OpenType fonts to leveraging Adobe’s vast Typekit library, you’ll master it all.
Whether it’s avoiding the dreaded font errors or organizing your font library like a pro, I’ve got you covered.
You’ll leave equipped to refresh your InDesign projects with precise typographic flair. Ready to revolutionize your designs with just a few clicks? Let’s explore how to inject new life into your layouts with the right fonts.
In total, there are 3 ways to add fonts to InDesign. The first is if you simply install it on your operating system, allowing you to use it in any compatible program. This process can be done manually by finding the corresponding installation paths, or by using an application that guides you, such as Font Book.
The second alternative allows you to install fonts to InDesign exclusively. When installing the software, it will create a series of folders in the installation path, among them is “Fonts”. Here are all the options you have available to write only within the software.
Finally, the third option will serve to install fonts that you will use in specific InDesign files. This option is perfect when you want to share the document with other users who don’t have the font package installed.
Adding fonts to InDesign – Supported files
Although you should not worry about this aspect, since the software is compatible with most of the fonts used today, this is the list so that you are sure when downloading them:
- TrueType
- OpenType (also in the SVG version)
- Type 1
- Variable Fonts
- Multiple Master
- Composite
As you might expect, it is also compatible with all Adobe fonts. You can even download them directly from InDesign if you use a version after 2019, which speeds up the search process.
If you are not sure what Adobe InDesign fonts are currently installed, you can check them from the “Font Family” panel that can be found from the Control Panel or from the Properties menu (you can quickly access them using the Ctrl + T shortcut).
How to add fonts to InDesign – Windows
The installation steps are simple, so your biggest concern will be finding a font you like to download. The first thing we recommend is to close all the programs you have open so that there are no problems during the process.
On the internet, there are many pages specialized in storing all kinds of fonts, as if they were a library. You can find them in free and premium versions, the latter generally being of much higher quality or more complete in terms of the number of characters. Just select the one you want to use and download it.
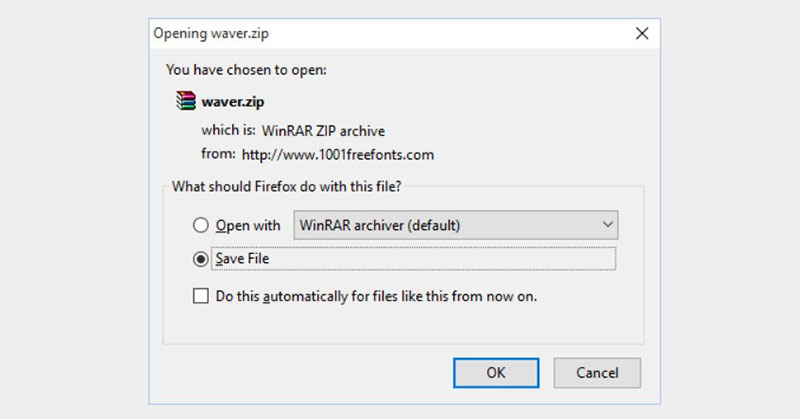
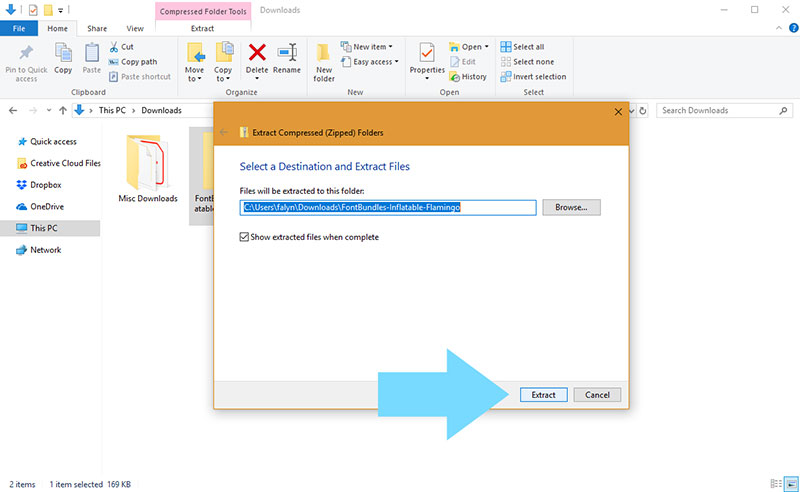
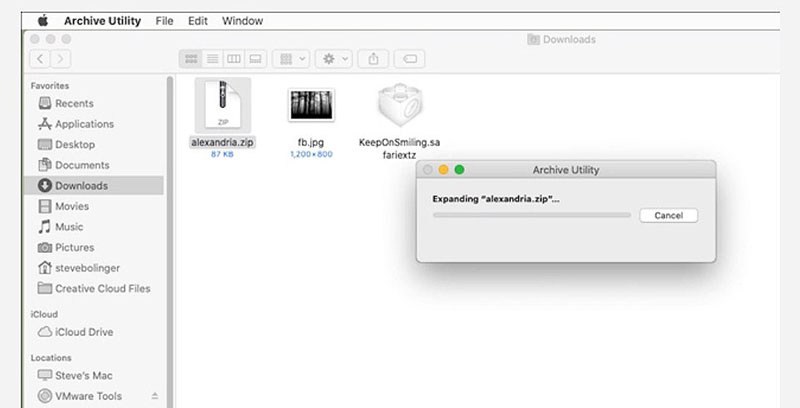
Although the font files are light, they come compressed when downloaded to include other files. In any case, you will need to unzip the download with a program like WinRAR. If you have the program on your computer, simply right-click on the RAR or ZIP file and press the “Extract files …” option so that you can choose where to unzip them.
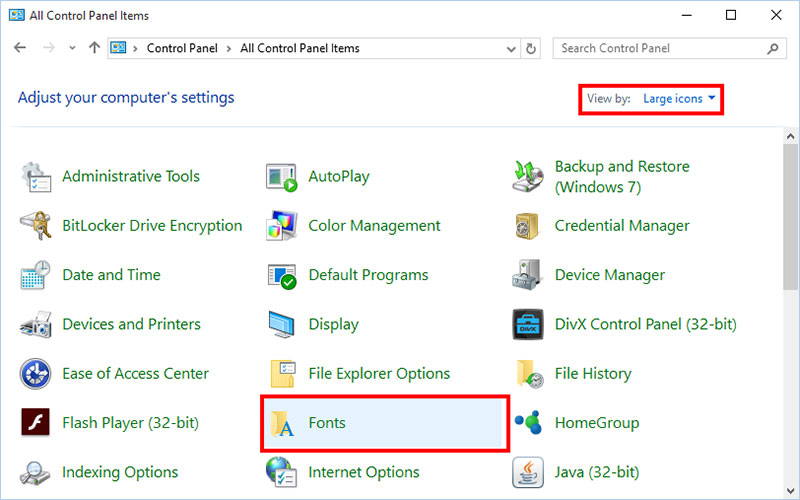
With the fonts for InDesign unzipped, go to your computer’s “Control Panel”. This is found in the “Start” menu in the lower-left corner. Once there, look for the “Appearance and Personalization” option, and there you will see a submenu called “Fonts”.
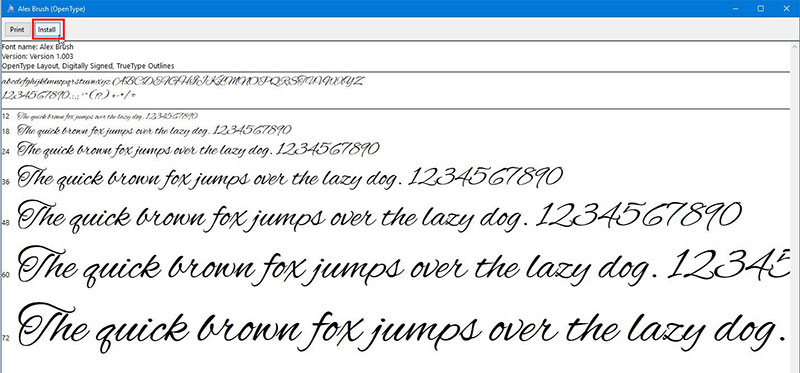
Within “Fonts”, you should get the “File” button, and there you will have the option to add fonts. You just have to find the file that you unzipped and hit the “Install” button. You can now check if you have your new characters in InDesign.
How to add fonts to InDesign – Mac
The installation process on Mac is equally easy, and it is also recommended that all programs be closed before doing so.
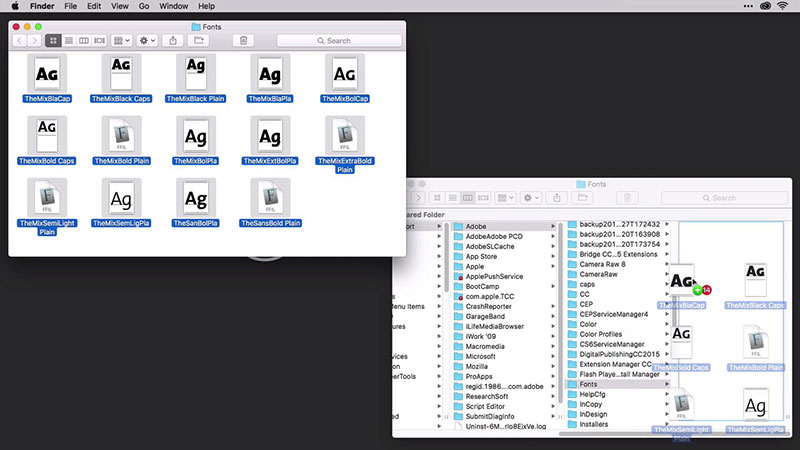
Start by downloading the file you want. You can use Adobe’s official website to make sure of the fonts quality (in addition to offering free fonts for InDesign), or any other trustworthy page you find on the internet. By downloading it, you will get a compressed file, but don’t worry, Mac computers include a tool to unzip it. Just double click it and the files will be placed in a folder where it is located.
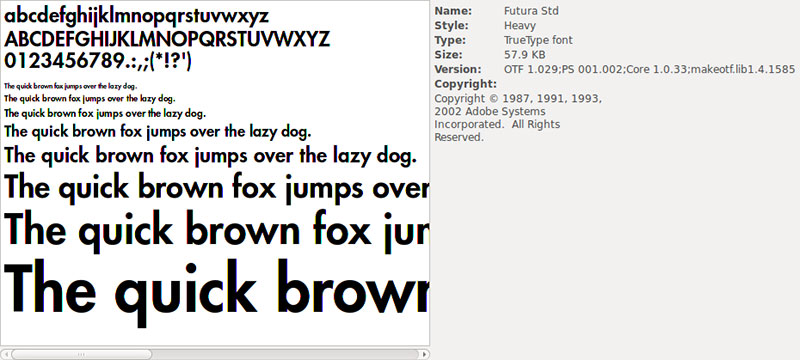
The InDesign fonts have a .TFF extension. Double-clicking on this file will open the Font Book program, which will guide you through the rest of the installation process, in addition to showing you a preview of the font to be installed.
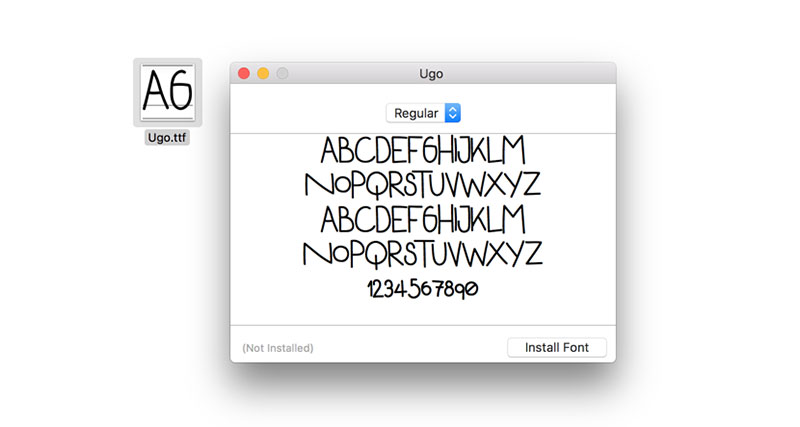
When Font Book completes the installation, you can reopen InDesign (or any program that allows the insertion of texts) to check if the font was correctly installed.
How to add fonts to InDesign – Using Adobe Fonts
As previously mentioned, InDesign versions after 2019 can use Adobe Fonts to make installing fonts a simpler process. Adobe Fonts also has the particularity that it will install the fonts in all the company’s programs, so you only have to do this process once if you have several programs such as Photoshop or Illustrator.
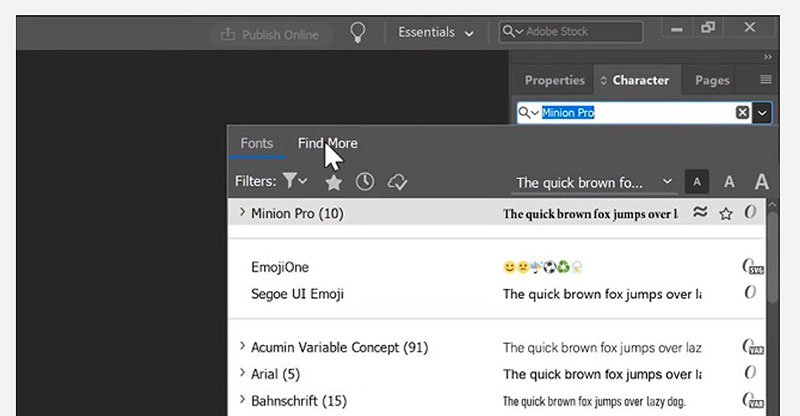
To get started, you must find the “Character” option within the software. You can quickly find the option using the shortcut for your operating system. In Windows, this is Ctrl + T; while in Mac, the combination ⌘ Cmd + T is used. In this menu, what interests you is the “Find More” option, which is at the end of the list.
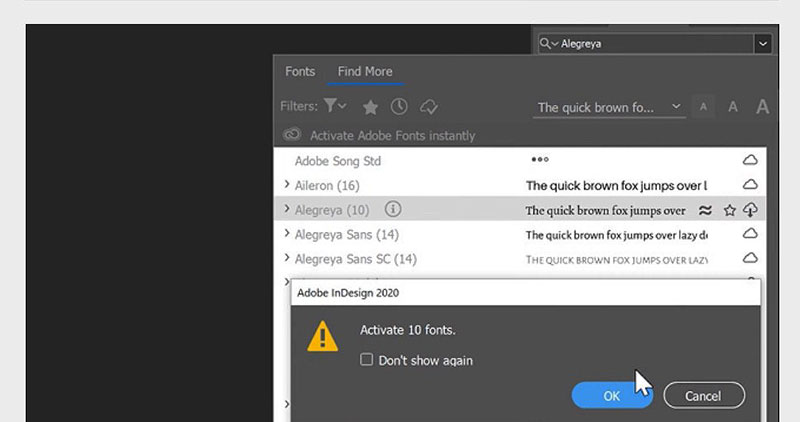
Because it is an Adobe service, you can download fonts for InDesign at no additional cost, but we recommend that you only install those that you are going to use or you will end up with a very extensive gallery in which it will be difficult to find what you need.
To download the fonts, press the cloud button next to each name. The fonts you have installed will be identified with a checkmark.
Embed the font so it doesn’t get distorted
Now that you know how to add fonts to InDesign, it’s time for you to learn how to embed them in your documents. If you have ever used programs like Word, you may have experienced that annoying event of letters moving around when you open the document on another computer. You can avoid this by converting the file into a PDF. The embedding process is basically the final step before converting the file to PDF from InDesign.
This Adobe tool also allows the creation of EPS files, although these are for a more specific use, but also require the prior embedding of the characters.
Steps to Embed in InDesign – For PDF
Open the document you want to convert. Go to the “File” tab and then select “Adobe PDF Presets”. This is a kind of export option that will give you different parameters to create the PDF file.
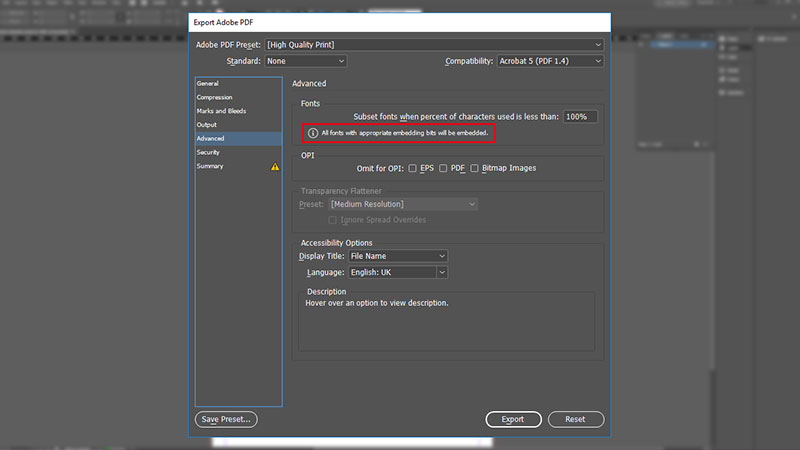
Select the destination of the new file and press the “Save” button. This is the important part of the process. By pressing on “Save”, a tab should open to export the PDF file. In it, you should look for the option “Advanced” from where you can select which are the fonts you want to embed.
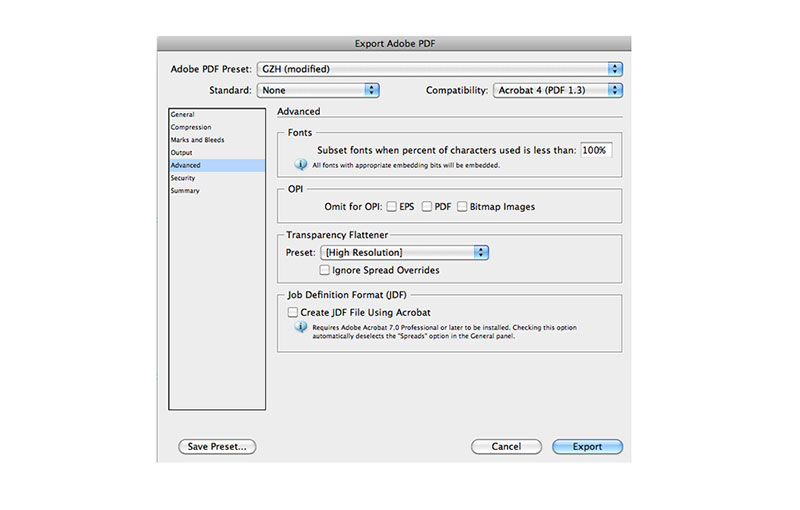
If you want to embed all the fonts in the document, you must put a value of 0% in the “Subset Fonts When Percent of Characters Used is Less Than” option. To exclude fonts, just place a larger value. Now you can press the “Export” button.
Steps to Embed in InDesign – For EPS
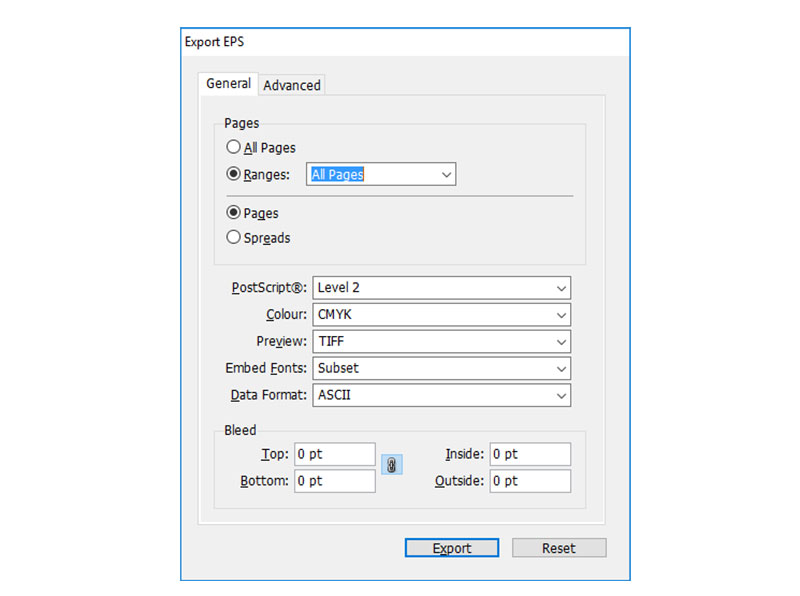
With the document you want to export open, search for the “File” tab and then click “Export”. Here you will have the option to select the type of file you want to create. Select EPS and then “Save”.
In the drop-down window that opened, you will need to select which fonts you want to embed. For a specific selection, use the “Subset” option. If you want all fonts to be preserved, check the “Full” option. Finally, press the “Export” button to finish.
FAQ On How To Add Fonts To InDesign
How do I install new fonts into Adobe InDesign?
Fonts not showing in InDesign? Start by downloading and installing your desired TrueType or OpenType fonts onto your operating system. Once installed, they should be readily accessible in InDesign’s font menu without needing extra steps.
Can I use Typekit fonts with InDesign?
Absolutely. Ensure you’re signed into your Adobe Creative Cloud account. Browse Typekit’s library through InDesign by clicking ‘Add Fonts from Typekit’ in the font menu.
Once you sync them, they’ll appear alongside other installed fonts, enhancing your design software’s typography capabilities.
What is the best way to manage fonts in InDesign?
For efficient font management, consider using Font Book (Mac) or a similar tool for Windows.
These allow you to activate and deactivate fonts as needed, keeping your InDesign workspace streamlined and ensuring faster loading times and better organization.
How do I ensure font compatibility in InDesign documents?
To uphold font compatibility, embed the fonts into your InDesign file. Go to ‘File’, select ‘Adobe PDF Presets’, and choose ‘Include Fonts’.
This step guarantees that your document appears as intended, regardless of the fonts installed on other systems.
What should I do if a font isn’t displaying correctly in InDesign?
Firstly, confirm the font installation on your operating system. If issues persist, clear InDesign’s font cache, a common solution for fixing font errors in Adobe InDesign. Rebooting the software post-clearance often resolves display issues.
How to add missing fonts in Adobe InDesign?
When opening a document that flags missing fonts, click ‘Find Font’ in InDesign. This feature offers options to replace or find missing fonts online.
For future projects, sourcing fonts from reputable libraries like Adobe Fonts ensures reliability and broad compatibility.
Are there any plugins to help manage fonts in InDesign?
Yes, plugins like FontAgent and Suitcase Fusion can greatly enhance font management. These tools offer advanced features like auto-activation, extensive library management, and font corruption repair, integrating smoothly with InDesign.
How do I update fonts in InDesign?
For fonts sourced from Adobe Fonts, simply refresh your sync settings via the Creative Cloud desktop app.
This ensures that all fonts, including those used in InDesign, are up-to-date. For manually installed fonts, re-download and install the updated versions directly.
Can I use custom fonts in InDesign projects?
Definitely. You can import any TrueType or OpenType font into your InDesign projects. Just ensure they are properly installed on your machine. Custom fonts allow for unique typography that can make your designs stand out.
How to handle font licensing in InDesign?
Always verify the licensing details for any fonts you use in projects, especially for commercial use.
Font licensing can vary, so reviewing the terms set by the font creator or distributor is crucial to avoiding legal issues and ensuring ethical font usage in design projects.
Conclusion
Navigating through the process of how to add fonts to InDesign can seem daunting at first, but with the right steps, it’s quite intuitive. By now, understanding the necessity of integrating stylish and functional fonts—from TrueType to OpenType and everything from Adobe’s Typekit—should feel like second nature. These tools not only boost the visual appeal but also the communicative power of your designs.
- Remember
- Always ensure font compatibility and manage your font library efficiently to keep your workflow smooth.
- Stay on top of font licensing to avoid any legal pitfalls.
- Utilize font management tools and plugins to simplify your processes.
The mastery of adding and managing fonts effectively will significantly enhance your design projects, allowing your creative expressions to resonate more profoundly with your audience. Now, put these tips into practice and watch your InDesign projects transform with just a few clicks.
If you enjoyed reading this article on how to add fonts to InDesign, you should read these as well:
- How to add fonts to Paint.NET quickly and with no effort
- he Amazon font. What font does Amazon use? (Answered)
- How to Add Fonts to Photoshop In A Few Easy Steps
Bogdan Sandu, a seasoned designer with 15 years of diverse experience, has been designing websites since 2008.
Renowned for his expertise in logo design and visual branding, Bogdan has developed a multitude of logos for various clients.
His skills extend to creating posters, vector illustrations, business cards, and brochures. Additionally, Bogdan's UI kits were featured on marketplaces like Visual Hierarchy and UI8.
Latest posts by Bogdan Sandu (see all)
- The Modelo Logo History, Colors, Font, And Meaning - 12 May 2024
- Bold Red Color Palettes for Passionate Designs - 12 May 2024
- Sporty Typography: What Font Does Adidas Use? - 12 May 2024