


Imagine transforming a blank canvas into a visual spectacle that grabs eyeballs and an audience. That’s the power harnessed when you uncover the secret to crafting a striking poster in Microsoft PowerPoint.
In a world where information zips by at lightning speed, your message needs to stand out. Posters are your visual shout-out, essential at conferences, in educational settings, or as a sleek marketing collateral.
But how to make a poster in PowerPoint? Buckle up; you’re about to dive into an ocean of creativity facilitated by one of the most widely used presentation software.
Through this jaunt, you’ll snag design skills that rival the pros—mastering everything from text formatting and image insertion to color schemes and customizable slide layouts. I’ll guide you through the whirlwind process where slide design principles meet your innovation.
By the time you reach the finish line, you’ll be primed to not just make, but engineer a poster in PowerPoint that echoes your intention with panache. From stirring visual communication to technical print settings, consider this your treasure map to poster perfection.
Preparing to Create Your Poster
Alright, let’s dive into the nitty-gritty of how to create a poster in PowerPoint.
It’s not just about opening the app and throwing things together. A bit of prep can make a world of difference!
Collecting Materials
Gathering text, charts, data, and graphics
First things first, you need your raw materials. Think of this as gathering your ingredients before baking a cake.
Got some text? Charts? Maybe some snazzy graphics or crucial data? Pull them all together.
This isn’t just about being organized; it’s about seeing what you’ve got to work with. Remember, a well-prepared plan is half the battle!
Organizing materials in a folder
Now, don’t just dump everything on your desktop. Create a folder, label it something you’ll remember, and put all your bits and pieces in there.
This step is like having a clean workspace – it keeps you sane and your process smooth.
Setting Up PowerPoint
Time to get our hands dirty with PowerPoint, the unsung hero in our how-to create a poster in PowerPoint saga.
Starting PowerPoint
Fire up PowerPoint and let’s get rolling. It’s like stepping into your own digital art studio.
Here, the slides are your canvas, and your creativity is the limit. Whether you’re a PowerPoint newbie or a seasoned pro, there’s always something new to discover.
Choosing Poster Dimensions


Understanding PowerPoint’s size limitations is crucial. Imagine this: You’re building a puzzle but without knowing the size of the table.
Tricky, right? PowerPoint has its limits, so choosing standard poster sizes, like A0 or 24×36 inches, is a safe bet.
These dimensions are your playground – ample space to let your creative spirit run wild.
Understanding PowerPoint’s size limitations
PowerPoint isn’t limitless, but it’s pretty accommodating. You want to make sure your masterpiece fits the frame. Think of it like packing a suitcase – everything needs to fit just right.
Selecting standard poster sizes (e.g., A0, 24×36 inches)
Standard sizes are your friends. They’re like those comfy shoes that never let you down – reliable and just the right fit.
Choosing a common size like A0 or 24×36 inches means you’ll have no surprises when it’s time to print or share your poster.
Setting Slide Orientation and Size
Getting the slide size right is like setting the stage for your poster. It’s about laying the groundwork for your masterpiece.
Customizing slide size for poster dimensions
Here’s where you tell PowerPoint, “Hey, this is my vision.” Customizing the slide size to fit your poster dimensions is like tailoring a suit.
It needs to fit your project perfectly. You’re setting the boundaries within which your creativity will flourish.
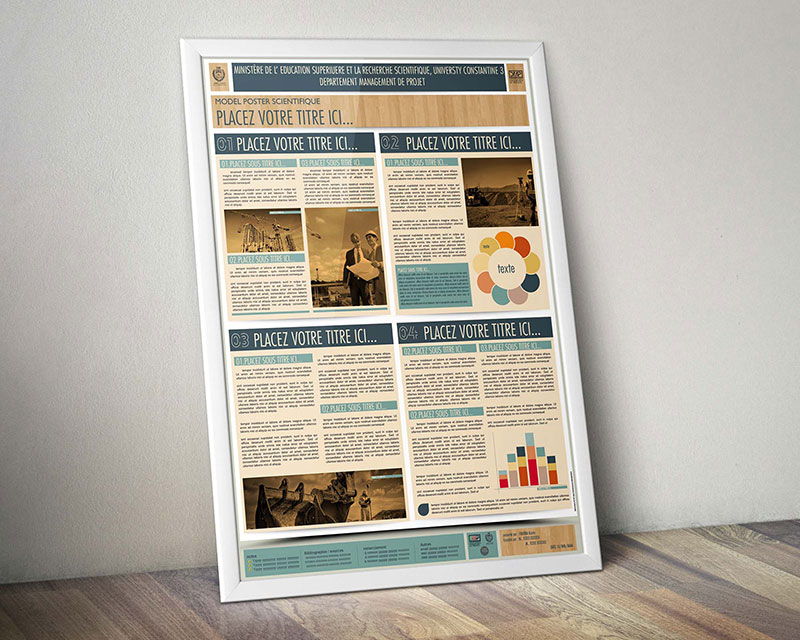
Designing the Poster Layout

Okay, we’re diving into the fun part now – designing the layout. This is where how to create a poster in PowerPoint really starts to take shape.
Think of it like painting; you’ve got your canvas set up, now it’s time to bring your vision to life.
Using a Grid for Alignment
Let’s talk about gridlines. They’re like your secret guide, helping you line up everything just right. It’s like having a hidden blueprint that only you can see.
When you enable gridlines, you’re making sure every element on your poster is where it needs to be – no more guessing if that text box is really centered.
Applying a Background
Choosing a background is setting the stage. It’s like picking out the perfect outfit for a party – it sets the mood.
You can go simple with a solid color, add some depth with a gradient, or even use an image. Each choice changes the feel of your poster. It’s your first big design decision, so think about the vibe you want to give off.
Choosing between solid, gradient, or picture backgrounds
Imagine you’re painting a wall in your room. Each color or pattern will create a different atmosphere. It’s the same with your poster.
A solid background is classic and clean, a gradient adds dimension, and a picture can tell a story all on its own. The background is the foundation of your poster’s personality.
Adding and Formatting Text
Now, let’s get those words in. Adding text is more than just typing; it’s about making your message clear and engaging.
Play around with different fonts, sizes, and colors. It’s like finding the perfect voice for your poster’s story.
Inserting text boxes
Think of text boxes as speech bubbles for your poster. You can move them, resize them, shape them – whatever it takes to make your words stand out. Just click, drag, and start typing your story.
Adjusting font, color, and size
This is where your text comes to life. It’s like choosing the right tone of voice for a conversation.
Each font has its own personality, and the color and size of your text can really change how it’s received. Keep it readable, but don’t be afraid to get creative.
Incorporating Visual Elements
Pictures, charts, maybe even a splash of WordArt – this is where your poster starts to look really cool.
Adding images is about more than just decoration; it’s about enhancing your message. And remember, quality matters. You want your images crisp and clear, like they’re meant to be there.
Adding images and ensuring resolution quality
Think of your images like the stars of a movie. They need to be high-quality, sharp, and fit the scene perfectly.
No blurry, pixelated pictures allowed – this is your show, and every visual element needs to shine.
Using WordArt for stylistic text effects
WordArt is like the special effects department for your text. It can make a simple headline bold and dramatic or add a subtle flair to your message.
It’s all about getting your audience to look where you want, and feel what you want.
Utilizing Charts and Data
If your poster is more on the data-heavy side, this is crucial. Importing charts from Excel can bring in loads of info without the clutter.
You’re not just showing data; you’re telling its story. Make sure your charts are up-to-date and clear. This is where your message gets real, backed by solid facts.
Enhancing Poster Aesthetics
Now, let’s jazz up that poster! How to create a poster in PowerPoint isn’t just about putting things together; it’s about making it look awesome.
We’re talking aesthetics – that secret sauce that makes your poster pop and keeps eyes glued to it.
Basic Design Principles
Keeping text concise and readable
First rule of thumb: Keep it short and sweet. Your text should be like a catchy tune – easy to remember and hard to forget.
Too much text is like overstuffing a suitcase; it just won’t close properly. Make every word count and keep it legible. Think billboard, not novel.
Ensuring contrast between text and background
Contrast is your best friend. It’s like wearing a neon t-shirt in a black and white photo – you stand out.
Make sure your text doesn’t blend into the background. You want it to leap off the poster and catch the viewer’s eye.
Visual Hierarchy and Layout
Arranging elements for easy reading

Think of your poster like a treasure map. You want to guide the viewer through it, from point A to B, without getting them lost.
Arrange your elements – text, images, charts – so that the eye flows smoothly across the poster. It’s all about guiding the viewer’s journey.
Using columns and line breaks effectively
Columns and line breaks are like traffic signs; they organize the flow.
They break up text, making it more digestible, and help organize information. It’s not just what you say; it’s how you present it.
Finalizing and Exporting the Poster
Alright, we’re on the home stretch of how to create a poster in PowerPoint. You’ve designed, tweaked, and beautified. Now, it’s time to wrap it up and show it off to the world.
Review and Adjustments
Finalizing text and image placements

It’s like the final look-over before a big night out. Check every text box, every image.
Make sure they’re all dressed up and in the right spot. This isn’t just about looking good; it’s about making sense too. Everything should be in harmony, telling your story just the way you intended.
Checking for visual balance and readability
Balance is key. Your poster should feel like a well-orchestrated symphony, not a one-man band.
Every element should complement the others, not fight for attention. And readability? Non-negotiable. If they can’t read it, what’s the point?
Saving and Exporting
Saving the poster as a PDF
Now, let’s make it official. Saving your poster as a PDF is like framing your artwork. It preserves the layout, the colors, the whole vibe, exactly as you designed it.
This way, no matter where it goes or who opens it, it looks just as awesome as it does on your screen.
Options for printing and distribution
The world’s your stage now. Printing? Go for high quality. Sharing digitally? Make sure it’s the right format for the platform.
You’ve put in the work, now let it shine. Whether it’s a conference, a class, or just your living room – your poster is ready to tell its story.
FAQ On How To Create A Poster In PowerPoint
What’s the first step in making a poster using PowerPoint?
You kick things off by setting up your slide. Page setup is crucial; it’s where you choose the poster dimensions. Head to ‘Design’, click ‘Slide Size’, and select ‘Custom Slide Size’ to pinpoint your poster specs. Think about where it’ll live – on a wall? A bulletin board? Size it right.
Can I use a template for my poster?
Absolutely, yes! PowerPoint poster templates are lifesavers. They offer a head start with pre-arranged text boxes and graphic elements. Go to ‘File’, hit ‘New’, and type ‘poster’. You’ll find a bunch of templates; pick one that vibes with your topic and audience. It’s customization heaven from there.
How do I add images and graphics appropriate for my poster?
It’s all about visual communication, friend. Click ‘Insert’, then ‘Pictures’ or ‘Shapes’ to bring in multimedia elements that resonate with your content.
Remember, resolution counts. High-quality images make your design pop. And PowerPoint can handle it – just ensure they’re sharp and vibrant to catch those eyes.
What are the best practices for text formatting on a poster?
Text formatting is an art. Choose clear, readable fonts. Conciseness is key; make every word count. ‘Home’ tab’s your playground here.
Mix up sizes for headings and body text, but don’t go wild. Aim for harmony in your layout; it’s a silent communicator. Avoid the dreaded “wall of text.”
Should I consider color psychology when designing my poster?
You’ve hit a goldmine mentioning color schemes. Colors evoke emotions; they’re potent. A dash of red for urgency, a stroke of blue for calm – tap into your audience’s psyche. Keep accessibility in mind, though. Contrast is your ally, making sure legibility never takes a back seat to style.
How can I make sure my poster stands out in a crowd?
Contrast and clarity are your best pals here. Hook viewers with a compelling headline, strategically placed using customizable slide layouts.
Employ sharp graphic elements and bold colors that align with your message. Let your main points breathe. Simplicity is sophistication, and a simple, focused message is a memorable one.
Is it possible to print a large poster from PowerPoint directly?
Yes, it’s doable. PowerPoint’s got your back with its print settings. Just ensure the slide’s dimensions match the desired print size. Then, check the printer’s capacity to handle big jobs. You might split your poster across several sheets using ‘Tiling’ if your printer’s on the smaller side.
How do I maintain high resolution when printing my poster?
Resolution matters, and it’s all in the prep. Start with high-res images – think 300 dpi or better. Next, double-check those print settings, ensuring they’re at the highest quality output. The last thing you want is pixelated graphics on your big day. A pro-tip: save as a PDF for full-resolution prints.
Can PowerPoint posters be interactive for digital presentations?
Sure can. PowerPoint is more than static images. Toss in hyperlinks, videos, or animations from the ‘Insert’ tab.
Make it a high-tech poster that beckons a click or starts a conversation. Great for digital expos or virtual conferences – it’s a poster that refuses to sit quietly in the corner.
Any tips for keeping the audience engaged with my poster content?
Engagement is king. Spark curiosity with questions or surprising facts right off the bat. Use visual communication techniques like infographics or charts.
Keep it interactive – QR codes link to expansive content without cluttering. And whitespace? It’s your unsung hero; it gives elements room to breathe and messages to resonate.
Conclusion
So here we are, at the brink of concluding our whirlwind tour of how to make a poster in PowerPoint. You’re now armed with the insider know-how, from slide design principles to print settings, that’ll have you crafting posters like a seasoned pro.
Let’s just recap the absolute non-negotiables:
- Precision in your page setup.
- A vivid color story, because those hues? They echo your poster’s soul.
- Clarity, in both imagery and text.
- And let’s not forget the silent yet potent visual communication cues that guide the viewer’s eyes.
You’ve gone through the nuts and bolts, hitched them to your own burst of creativity, and you’re on the cusp of making something truly spectacular.
So go on, take that visual shout-out and make it resound across halls and walls. Your message is now a visual powerhouse, thanks to a little help from PowerPoint, a sprinkle of design savvy, and a dash of your unique spark.
If you liked this article about how to create a poster in PowerPoint, you should check out this article about how to make a poster.
There are also similar articles discussing poster sizes, how to make a beer poster, how to make a wanted poster, and making a poster in Word.
And let’s not forget about articles on how to make a movie poster, how to hang a poster, how to frame a poster, and how to flatten a poster.