
Imagine you’ve just crafted a visually stunning digital masterpiece in Paint.net, only to find the existing fonts fall short of conveying your creative vision. Font customization is crucial for that unique touch that speaks volumes in your artwork.
In the vast world of digital design, typography can make or break a visual piece. Here, I’ll guide you through the simple yet transformative process of adding new fonts to Paint.net.
By the end of this guide, not only will you be adept at uploading custom fonts, but you’ll also enhance your projects with text that truly pops.
We’ll explore:
- The essentials of font installation
- Navigating the font directory in Paint.net
- Tips for managing your font library effectively
Dive in, and let’s unlock a new realm of creative possibilities with every letter you type!
How to add fonts to Paint.NET – Step by Step
Download the font you want
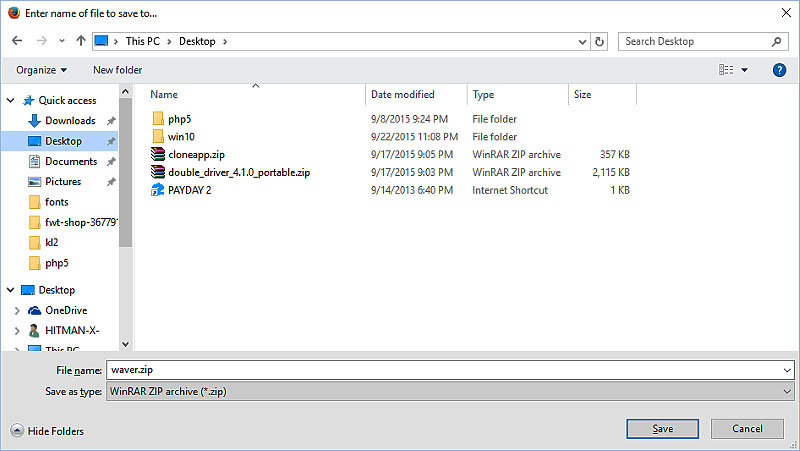

Getting fonts for Paint.net is easy. Many specialized pages have nearly unlimited galleries of free and paid packages. To find them, just search for “Free Fonts” in your favorite search engine and you will find hundreds of pages.
The free options in most cases are of excellent quality and offer almost everything you need to work. However, some fonts offer additional characters in Premium versions, but this will depend on what you are looking for.
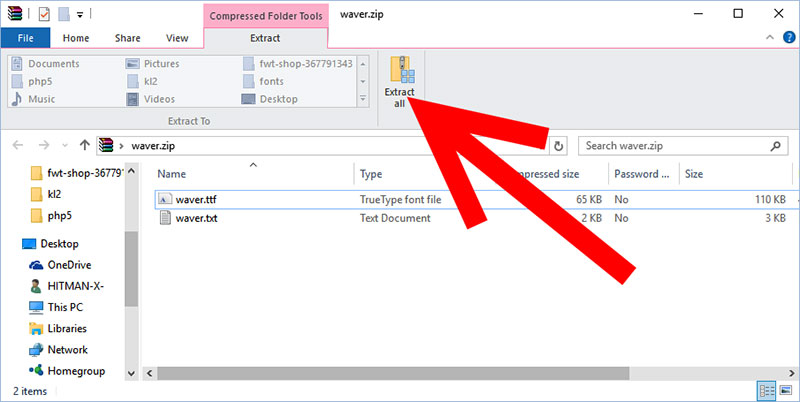

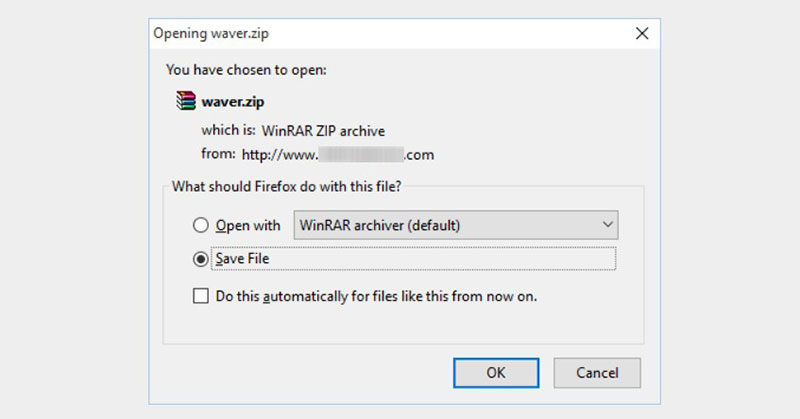
For convenience, when downloading the font, it will most likely be compressed into a ZIP or RAR file, which you will have to unzip using a program like WinRAR or 7- zip.
Open your PC’s Control Panel
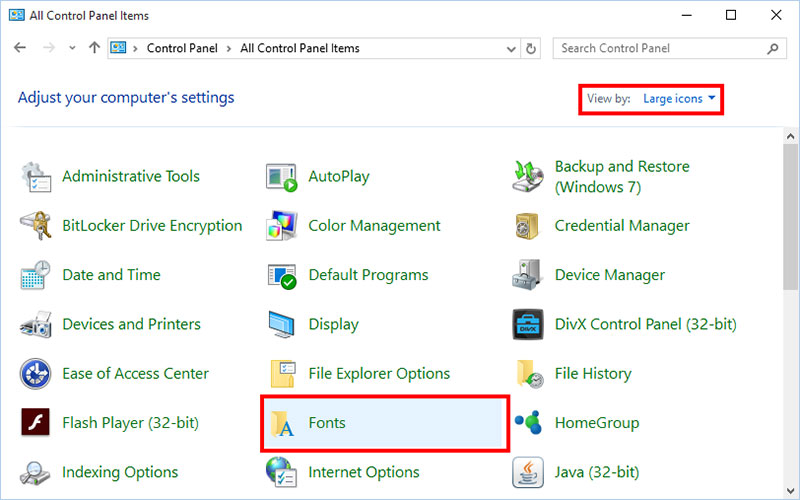

With the file unzipped, now head over to Control Panel to find the Fonts folder. The Control Panel is found in Windows Vista and later located inside the start menu, on one side. In Windows XP this is located inside “My Computer”. In case you can’t find it, you can always search it with Windows Search Tool.
Now, look in the Appearance and Personalization menu, and there you should find the Fonts folder. Opening it will display all the fonts installed on the computer.
As simple as copy and paste
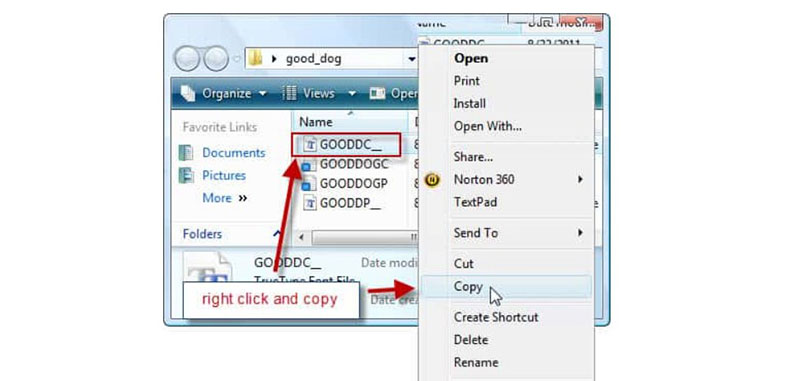

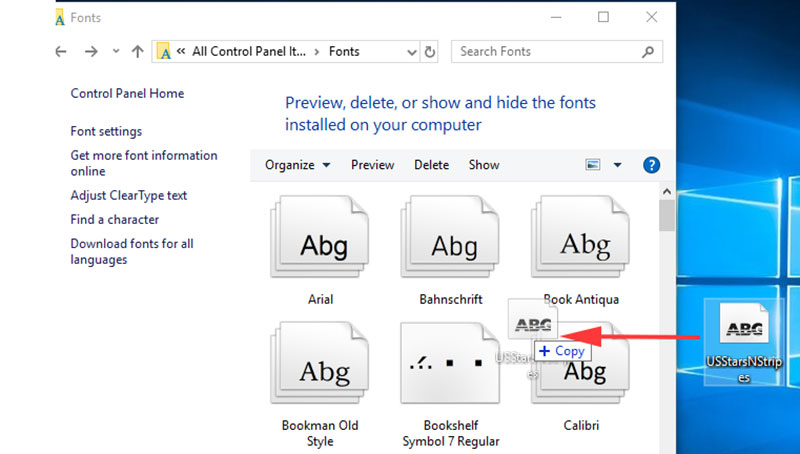
Find your new Font in the folder where you unzipped it, and simply copy and paste it into the Fonts folder in Control Panel. You can also drag and drop the file into the folder. If the system asks you for administrative permissions to perform this operation, grant them or it will not allow you to alter the data in the folder.
How to add fonts to Paint.NET – Alternative way

Alternatively, you can find the Fonts folder from the Windows installation path.
Look on the disk partition where you installed the operating system for a folder called Windows, and in it, you should find the Fonts folder. Similarly, you will have to copy and paste your new glyph collection into this location to install it.
You can now use your new font

You can now close the Fonts folder and restart the programs you closed. There is no need to restart the computer for the changes to take effect.
You should know that this installation process works for all programs that use fonts since you have placed them directly into an operating system folder. Not only will you see the new glyphs in Paint.NET, but also you can use them in other applications.
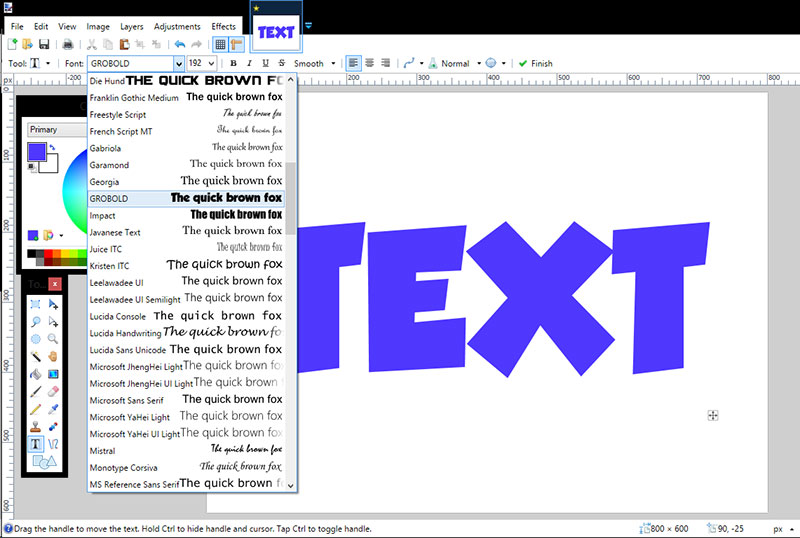
Try opening Paint.NET or any other program to check if your fonts were installed correctly. These should be in the drop-down window with the other fonts, arranged alphabetically.
In design programs, you must first place a text box to be able to write on the drawings.
It’s time to customize your programs

Now that you know how to add fonts to Paint.NET, or to any program in general, you can start downloading all the fonts you want to customize your experience.
A final recommendation is that, although you can install many fonts at the same time, it is best to do it one by one to verify that they work. Some internet files may be corrupt, so they will not be installed correctly even when following all the steps. You may even run into compatibility issues.
How to uninstall font files
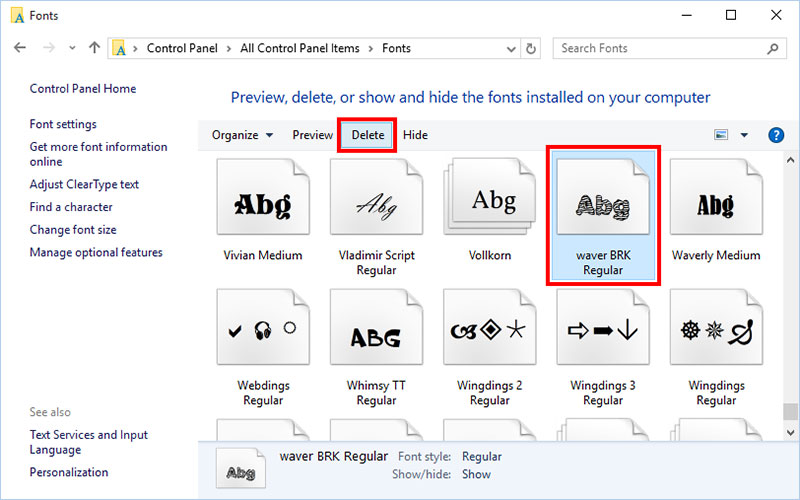
Uninstalling fonts is as easy as installing them. Again, you must find the fonts folder from the Control Panel. Once there, find the file you want to delete, and simply click “Delete” within the Fonts panel.
The system will ask you if you are sure to delete it, confirm your request, and voila, the font will have been deleted. Remember that it is best to perform this process with all programs closed to avoid errors.
FAQ On How To Add Fonts To Paint.net
Where do I start with adding new fonts to Paint.net?
To begin, ensure Paint.net is installed on your computer. Download the font files you want, typically in TTF or OTF format. These files should then be placed in your system’s font directory, which Paint.net accesses to load new fonts.
Can I use any font type in Paint.net?
Yes, Paint.net primarily supports TrueType Fonts (TTF) and OpenType Fonts (OTF). These are widely compatible and should cover most of your design needs. Ensure the fonts are not corrupted to avoid any installation errors.
How do I install fonts into Paint.net?
After downloading your desired fonts, move them to your Windows or Mac font folder. Paint.net uses the system’s font directory, so once installed there, they automatically appear in Paint.net’s text tool.
Is it possible to use downloaded fonts immediately in Paint.net?
Once fonts are installed in the system’s font folder, they should be available in Paint.net. However, if they don’t appear, restarting Paint.net or refreshing the font list in the text tool settings might be necessary.
What should I do if the font doesn’t show up in Paint.net?
First, confirm the font file format is either TTF or OTF. If correct, try closing and reopening Paint.net to refresh the font list. If the issue persists, double-check that the font is properly installed in your system’s fonts directory.
Can I add multiple fonts at once to Paint.net?
Absolutely, you can install multiple fonts simultaneously by adding all the desired TTF or OTF files to your font directory. Paint.net will recognize all newly added fonts after a restart or a refresh of the font list.
Are there specific fonts that work best with Paint.net?
While Paint.net does not restrict the type of fonts used, vector-based fonts like TTF and OTF are optimal as they maintain quality at any size, making them perfect for graphic design tasks.
How do I manage my font library in Paint.net effectively?
For efficient management, regularly update your font library and remove any fonts that are no longer needed. Grouping fonts by style or project can also help streamline your design process in Paint.net.
What are the common issues when adding fonts to Paint.net?
Common issues include fonts not appearing after installation, unsupported file formats, or corrupted font files. Always verify the integrity of the font files and ensure they are compatible with Paint.net.
Where can I find fonts to download for use in Paint.net?
Numerous online platforms offer free and premium fonts suitable for Paint.net. Websites like Google Fonts, DaFont, and Font Squirrel provide a diverse range of typefaces that are compatible with Paint.net and other software.
Choose fonts that align with your creative needs and check the licensing for commercial use.
Conclusion
Diving into how to add fonts to Paint.net might initially seem daunting, but it’s an exhilarating leap into enhancing your creative projects. By embracing new typefaces, you break free from the mold, pushing boundaries beyond the default font settings.
What we covered:
- Navigating font installation with ease.
- Leveraging typography tools to amplify designs.
- Mastering font management to keep your workflow smooth.
Remember, the right font can transform simple text into engaging content that captures and holds attention. Whether embarking on digital art or enhancing user interfaces, adding unique fonts is a simple yet powerful way to infuse personality into your creations.
Armed with these insights and tips, you’re now set to customize Paint.net with fonts that bring your artistic visions to life. Happy designing!
If you enjoyed reading this article on how to add fonts to Paint.NET, you should read these as well: