


Clouds background images to use in your designs

A clouds background is a great way to introduce a beautiful sense of calm to any website or even your own desktop. But most of you will use it as a texture in a project.
The sky is evocative of so many emotions, from tranquility to adventure, and anything that uses the sky as a background will automatically seem connected to nature.
If you choose the right sky background, you can have a truly unique look that takes advantage of the way the human brain works and how we perceive the sky. There’s a timelessness to a clouds background, too, meaning that it will be a good fit for years to come without getting swept away by new trends.
This is why many designers seek to include a clouds background in their projects. There is also a lot of opportunities to add a certain personality and look to a sky background.
With the newer design effects that are found in many graphic design programs, your vector clouds can have a unique and striking look all their own. The result will be highly naturalistic. You can make modifications to everything from colors to dimensions, making a clouds background that is a great fit for your project.
How do you make a clouds background? Do you just make a sky background, then spam clipart clouds all over it? While it’s not quite that simple, it is an easy process that takes little time to master!
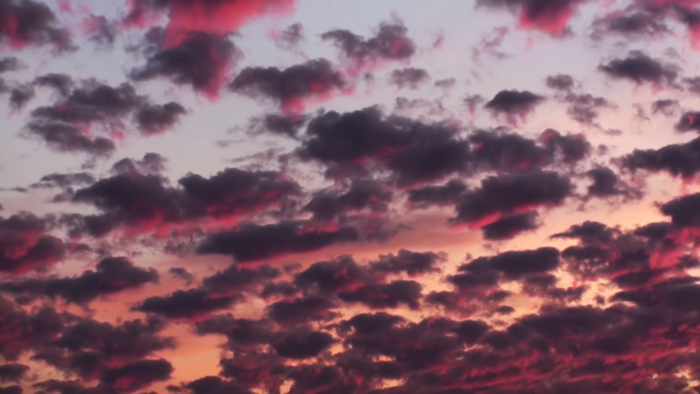
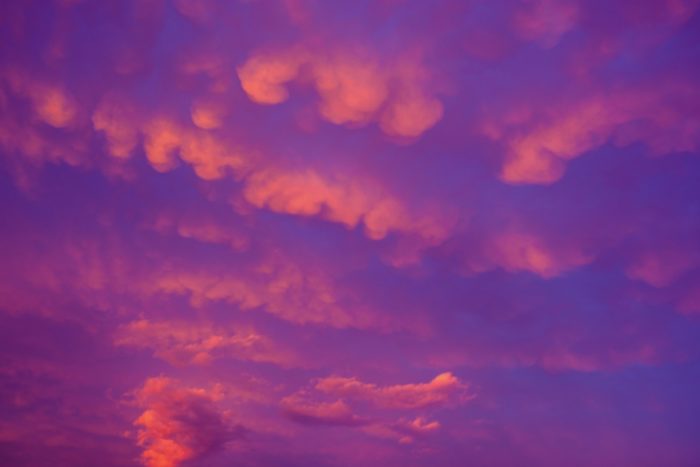
Clouds background images


How to create a quick and easy clouds background in Adobe Illustrator
With the help of the Scatter Brush and the Blending Mode Screen, you can create a tranquil (or not so tranquil) cloudy sky background in Adobe Illustrator. We also included instructions for drawing a bird silhouette in this tutorial to help you add a bit of life to your clouds background if the situation calls for it.
1. Create the Background
Use the Rectangle Tool (M) to draw a rectangle with the same dimensions as the Artboard. Fill it in using the Gradient Tool. You can use standard Swatch Libraries of Adobe Illustrator to accomplish this step if you like. Go to Window > Swatch Libraries > Gradients > Sky. Select any sample you want. Set the angle of 90 degrees in the Gradient panel.
2. Create a Scatter Brush
In order to create a Scatter Brush, you will need to draw a circle. Use the Ellipse Tool (L) to do this. Then drag and drop your circle into the Brushes panel. Create a Scatter Brush. Use random settings.
3. Draw the Shape of the Clouds
- Step 1
Use the Paintbrush Tool (B) and select your newly made Scatter Brush. Draw few different lines in shapes of the clouds. Flow with it. Clouds have organic shapes, and it’s easy to fix mistakes.
- Step 2
Select all of the cloud shapes you have drawn and go to Object > Expand Appearance to transform brushes into objects. Do not forget to Ungroup (Control + Shift + G) these cloud shapes.
4. Add a Fluffy Effect by Using Gradients
- Step 1
Time to change the size of the clouds. You can make them smaller or larger as you desire. When done, select all circles and fill them. Use the black and white Radial Gradient.
- Step 2
Next, you need to go to the Transparency panel and set the Blending Mode to Screen. Group (Control + G) the shapes of each of your clouds. When you use a black fill with Blending Mode Screen, it will become completely transparent. This means that this process will only show the white of the gradients. When used with a group of white gradients, it will make for a fluffy, blurred effect which you usually have to create by using the many raster Blur effects. However, since these are gradients within your vector clouds, the fluffy, blurred effect is entirely vector.
5. Create a Cloudy Sky
- Step 1
Create a few copies of your clouds. To make it faster, use the hotkeys Control + C and Control + V.
- Step 2
Create more copies. Select some of them and go to the Transparency panel. Set their Opacity between 60% and 80%. This will give make some of the clouds seem more distant than others.
6. Draw a Bird (A Bonus!)
- Step 1
Create the framework of the bird:
- The body and the head will be drawn with the Ellipse Tool (L)
- The beak will be drawn with Pen Tool (P)
- The tail and wings will be drawn with the Pencil Tool (N)
- Step 2
Use the Width Tool (Shift + W) to add some more thickness to the left wing. Pull the path in the middle and the Width Tool will thicken the shape.
- Step 3
Next, add some thickness closer to the tip of the wing. Use the Width Tool (Shift + W) again in the same way.
- Step 4
Lastly, add extra thickness to the bottom portion of the wing.
- Step 5
Create the second wing and the tail with the same technique.
- Step 6
Make a number of copies of the tail.
- Step 7
Select all shapes of the bird and go Object > Expand Appearance. Bring all the shapes together with the help of the Pathfinder panel.
7. Add the Birds to the Clouds Background
- Step 1
Create three copies of the bird and fill them in with white.
- Step 2
Select the bird illustrations then go Effect > Stylize > Feather. The Feather Radius should be set to 2px.
8. Create the Sun
Select the Flare Tool. Click and drag it to any place in your cloud illustration. Then left click anywhere else in the cloud design. This should produce a bright flare that looks like the sun in the sky.
9. Finishing Touches
Use the Clipping Mask to hide any protruding parts. Draw the square on the top of all objects that are the same size as the artboard. Select all and go Object > Clipping Mask > Make (Control + 7).
FAQ about clouds background images
What are clouds background images?
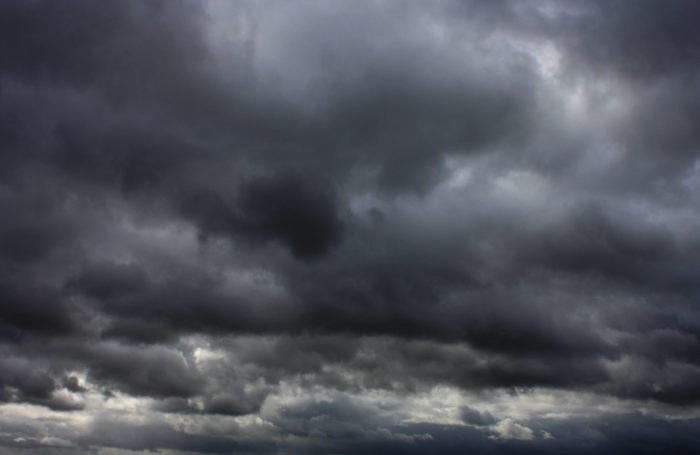
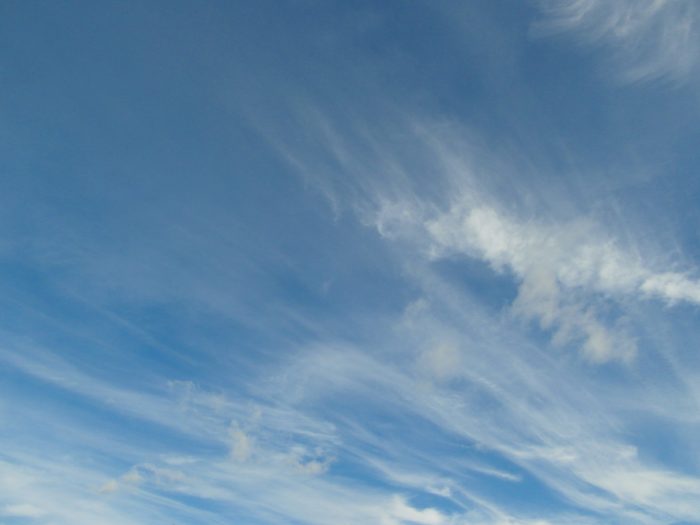
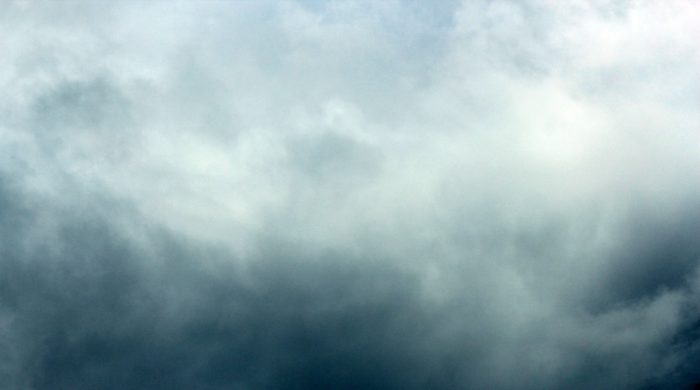
Oh, cloud background images are simply photos or illustrations that feature clouds as the main subject. They can be used for various purposes like website backgrounds, presentations, or design projects. You’ll find these images ranging from fluffy white clouds on a sunny day to dramatic stormy skies. These images can really add a nice touch to your project, making it more visually appealing.
How can I find high-quality cloud images?
To find top-notch cloud images, you’ve got a few options! Websites like Unsplash, Pexels, and Pixabay offer loads of high-quality, royalty-free cloud images for you to use. Just type in your search term, and you’ll find a vast selection of beautiful images. Another option is to use stock photography sites like Shutterstock, iStock, or Adobe Stock. These sites might require a subscription, but they’ll provide a more extensive range of professionally curated images.
Are there any restrictions on using cloud background images?
Well, it depends on where you get the image from. If you’re using a royalty-free image from a site like Unsplash or Pexels, you can use it for personal or commercial purposes without any issues. However, if you’re using a stock photo site like Shutterstock, you might need to check their licensing agreement to understand the specific usage rights and restrictions. Always double-check the terms and conditions before using any image to avoid any legal troubles.
Can I create my own cloud background images?
Absolutely, my friend! If you have a decent camera or even a smartphone with a good camera, you can capture your own cloud images. Just keep an eye out for beautiful cloud formations and capture them when the lighting is just right. You can also use photo editing software like Photoshop or Lightroom to enhance and perfect your images. Experiment with different angles and compositions to create unique and stunning cloud backgrounds!
What are some tips for choosing the right cloud background image?
When selecting the perfect cloud background image, consider the overall mood or theme you’re aiming for. Different cloud formations can evoke different emotions – for instance, bright and fluffy clouds can create a sense of lightness and joy, while dark storm clouds might suggest tension or drama. Also, think about the color scheme of your project and choose a cloud image that complements those colors.
How do I use cloud background images in PowerPoint presentations?
To use a cloud background image in PowerPoint, follow these steps:
- Open your presentation and click on the slide you want to add the background to.
- Go to the “Design” tab and click on “Format Background.”
- Choose the “Picture or texture fill” option and click on “File” to upload your chosen cloud image.
- Adjust the transparency, if needed, and click “Apply to All” if you want the background on all slides.
- Voila! Your cloud background image is now set.
Can I use cloud background images in video projects?
Definitely! You can use cloud background images in video projects as long as you follow the licensing terms for the image. To incorporate a cloud background image in your video, you can use video editing software like Adobe Premiere, Final Cut Pro, or DaVinci Resolve. You can use the image as a still background or even animate it to create a dynamic visual effect.
How can I customize cloud background images?
You can customize cloud background images using photo editing software like Photoshop, GIMP, or Lightroom. Some common customizations include adjusting the brightness and contrast, changing the color tones, or adding filters to create a specific mood. You can also crop the image, remove unwanted elements, or add text and graphics to make it uniquely your own.
Are there any free tools to edit cloud background images?
Yes, there are plenty of free tools out there that you can use to edit your cloud background images. Some popular options include GIMP, which is a powerful, open-source alternative to Photoshop, and Canva, which is an easy-to-use, web-based graphic design tool. Other options include Pixlr, Fotor, and Photopea. These tools offer a variety of features to help you adjust, enhance, and customize your cloud images to fit your needs perfectly. Just explore and find the one that suits your preferences and skill level.
What file formats are best for cloud background images?
The most common file formats for cloud background images are JPEG and PNG. JPEG is a widely used format that offers good image quality and smaller file sizes, making it suitable for most purposes. However, if you need a high-quality image with a transparent background, you might want to opt for PNG. PNG files are larger but maintain better image quality and support transparency, which can be particularly useful if you plan on layering your cloud image with other elements in your design.
If you enjoyed reading this article about clouds background images, you should read these as well:
- Red background images and textures
- Purple background images and textures
- Space background images and textures
- Free wooden background images and textures
- Neat stars background images
- Rustic background images
- Metal background images and textures
- Marble background images and textures
- Free autumn background images
Bogdan Sandu, a seasoned designer with 15 years of diverse experience, has been designing websites since 2008.
Renowned for his expertise in logo design and visual branding, Bogdan has developed a multitude of logos for various clients.
His skills extend to creating posters, vector illustrations, business cards, and brochures. Additionally, Bogdan's UI kits were featured on marketplaces like Visual Hierarchy and UI8.
Latest posts by Bogdan Sandu (see all)
- Vintage Color Palettes That Bring the Past Alive - 16 April 2024
- The Ubisoft Logo History, Colors, Font, And Meaning - 16 April 2024
- Trending Tones: The Most Popular Color Palettes of the Year - 15 April 2024

